


 Marketing & Sales

An outbound calling strategy is just making calls, right? Wrong!
When it comes to generating leads and closing sales, understanding the ins, outs, quirks, and implications of an outbound calling strategy is one of the hardest nuts to crack.
In fact, it feels like everything that follows the outreach stage is far simpler. But for that initial contact to be impactful, all your stars have to align. To help you get started, we’ll cover the key elements of an effective outbound calling strategy and how to implement it for maximum impact.
Why Is Outbound Calling so Hard?
Outbound calling comes with the stigma of interference, nuisance calls, and investing effort in being nice to a random caller who is taking up part of your day.
If you were to go through the to-do list of a prospect you plan to call, you can bet receiving a cold call from a salesperson isn’t particularly high.
Throw in the complex compliance hoops you must jump through, and you can see why the turnover rate in lead generation teams is so high. When salespeople leave due to negative experiences, it makes managing your outbound calling that much harder. Here are some other challenges you’ll face when making outbound calls:
High volume and rejection rates
With a focus on quantity over quality, sales reps are often asked to make dozens to hundreds of calls daily.
The outcome in most cases? No lead.
In fact, on average, it takes no less than eight cold call attempts to get hold of a prospect. The rest of those calls go to voicemail or get picked up but go nowhere, with only 1% of cold calls generating appointments.
With constant rejection and frustration, it’s easy to see how so many sales agents end up burned out. When this happens too often, it’s time for them to seek another job.

High agent turnover and training costs
When salespeople get disheartened and leave your business, it’s back to square one. It can often feel like you’re trapped in a continuous hiring process.
With more new hires come additional training expenses. You’ve got the cost of recruitment, the cost of training, and the cost of not having enough sales resources while you fill the gaps.
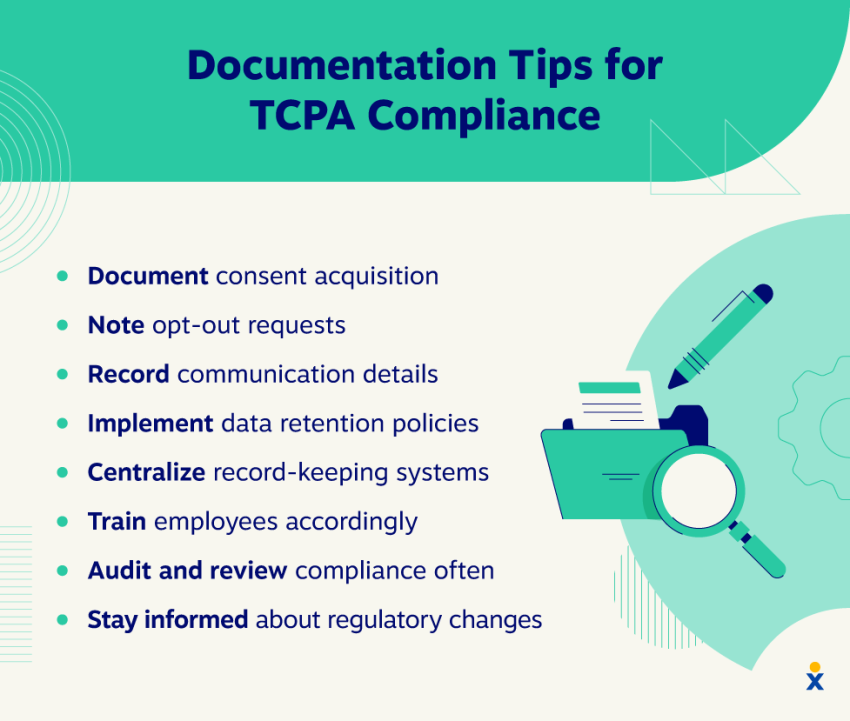
Compliance requirements
On top of your people challenges (both call recipients and salespeople), your outbound calling strategy must comply with various regulations around outbound dialing:
- TCPA regulations (Do Not Call lists and consent requirements).
- Call recording rules (one-party vs. all-party consent states).
- PCI-DSS compliance for handling payments securely.
- HIPAA compliance requirements for healthcare providers.
In addition to ensuring your technology and processes comply with these various regulations, you must also factor in the awareness and training of new and existing staff.

Essential Requirements for Your Outbound Sales Team
Reliable calling infrastructure
The bare minimum requirement for any outbound sales team is a reliable phone system that facilitates automated dialing. One sure way to increase hang-ups and unsuccessful calls is operating a phone system with poor call quality or the tendency to drop calls.
Choose from a predictive dialer or power dialer to reduce manual dialing and minimize misdials and bad data. When you automate these menial tasks, your teams can focus on setting appointments and converting leads.
Features like voicemail drop, local presence area codes, and customizable phone number and caller ID also help improve contact rates. The more personalized a call is, the higher the chance of success.

Legal and regulatory compliance
There is simply no avoiding the potential regulations applicable in your industry when it comes to outbound calling. Failure to adhere to standards can lead to fines, sales restrictions, and even imprisonment.
Take time to understand calling regulations like TCPA and PCI-DSS, and industry-specific guidelines like HIPAA and state-specific calling laws.
Accurate and actionable customer data
The cleaner your data, the more effectively you’ll be able to use it. By using your CRM to segment and prioritize leads (based on interest, behavior, and demographics), you can optimize dial lists and assign specific verticals according to salespeople’s strengths.
Compared to the alternative — assigning random data to random sales representatives — you’re ensuring data quality to prevent wasted dialing efforts and improve sales conversations.
Call analytics and monitoring tools
Once your data is accurate and you’ve trained your salespeople on product, sales pitches, and how to close a deal, what happens next?
You could leave your agents to their own devices and hope for the best. Or you could implement real-time analytics to track agent performance, conversion rates, and call quality.
This doesn’t just give you an insight into success rates and talk times. You can also use advanced tools like AI-driven sentiment analysis and predictive analytics for continuous improvement and customer feedback.
If you know how customers respond to specific language and tactics, you can apply them more or less often and improve sales figures.
How to Sequence Your Outbound Calls
Clearly define your sales objectives
Before you even think about dialing your first contact, there must be a firm agreement of what you hope to achieve by calling these potential customers. Depending on the type of business, this could be:
- Lead generation
- Appointment setting
- Direct sales
When you’ve defined the aim of the call, you must have a measurable key performance indicator (KPI) in place. Consider whether conversion rate, first-call close rate, number of calls, or number of appointments set is the right metric to track.
Craft effective call scripts
You wouldn’t hire an actor for a film and expect them to write their own lines. Likewise, you can’t hire salespeople and ask them to set appointments without some form of script or structure.
For consistency within your brand, and to have a baseline to measure success against, it helps when everyone uses a template that represents your business. Not only will you consistently thrive when the script is excellent, but your teams will be prepared with common objections so they know how to handle them in live calls.
While following the script to the letter isn’t the goal, it typically pays to have a script to use as your home setting. Allow more senior agents to be flexible with their scripts, using their experience and practicing empathy and active listening.
Research prospects to personalize interactions
Once you’ve planned your objectives and refined your script, you must work out who to call. This is where you can leverage your CRM data, social media interactions, and insights from your company website to gather details of your prospects.
For example, if it’s Ryder Cup week and you know that a prospect you’re speaking with loves golf, you might ask if they’re following Tiger Woods’ progress.
That small moment of rapport could change the entire conversation. Customizing calls based on personal-level insights is a surefire way to boost engagement and give you time to convey your reason for calling, work through your value proposition, and start addressing the prospect’s pain point.
Commit to follow-up calls and emails
To experience successful calls and generate qualified leads, it is vital to follow up when you say you will. This might be a simple agreed call-back time or an email with the requested information.
Rather than asking sales agents to action these tasks post-call, ensure your outbound call center software can set automated and structured follow-up sequences. This way, your sales teams can focus on their strongest skill without getting bogged down with admin.
When sales teams follow up with prospects consistently — even when the initial answer may have been “I’m not sure” — the more often you progress through conversations and the higher the likelihood of closing a deal.
In fact, 60% of customers say “no” four times before finally accepting a sales offer — so, it pays to follow up!

Inbound vs. Outbound Sales Calls: Key Differences
Even if you’re well-versed in responding to incoming phone calls, there are some significant differences when it comes to making outbound (often cold) calls.
| Aspect | Inbound Calls | Outbound Calls |
|---|---|---|
| Speed and Urgency | Immediate response required by the rep | Rep initiates and timing is planned |
| Caller Knowledge | Caller often informed/interested | Caller must quickly establish credibility |
| Caller Intel/Quality Needed | Basic info initially provided | Detailed intel required upfront |
| Customer Engagement Level | Higher initial interest | Usually lower initial interest |
| Preparation Time | Higher initial interest | Requires extensive preparation |
Best Practices to Optimize Your Outbound Sales Strategy
Focus on speed-to-lead
Rapidly responding to new leads increases conversion rates significantly. When someone actively expresses interest in your product, the faster you respond, the more likely they will remain curious.
The less dwell time between the prospect’s form submission and your rep making initial contact, the less time the customer has to find an alternative or get busy with their other priorities.
Embrace automation for low-value tasks
The more time your salespeople are on the phone, the higher the chance of lead or revenue generation. So, when a task doesn’t explicitly need human intervention, assign it to your technology stack.
With power dialers, predictive dialers, voicemail drops, and call analytics available with most outbound calling platforms, leveraging technology to keep reps focused on productive conversations become less of a convoluted workflow and more of a simple checklist.
Keep tracking KPIs
Your technology stack should allow you to track a wealth of metrics. Prioritize KPIs like:
- Conversion rate
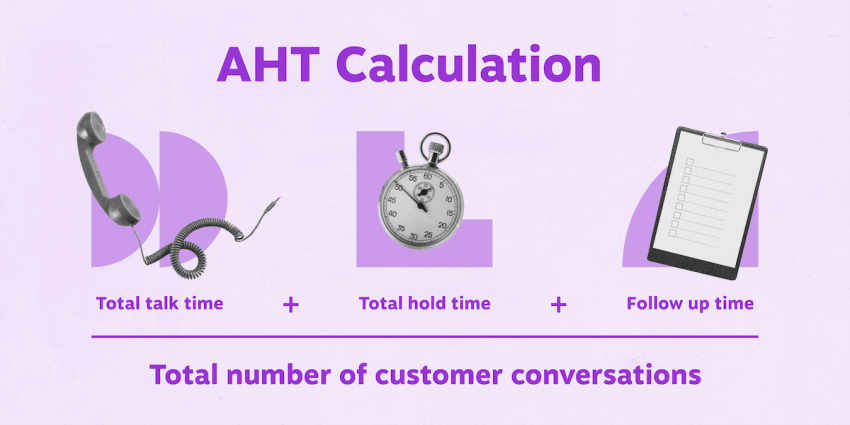
- Average handle time (AHT)
- Call abandonment rates
These help translate your sales tactics into tangible outcomes. They also work together to show a correlation between related metrics. For example, if a shorter AHT equates to a higher conversion rate, you might consider shortening your sales script and getting to your value proposition faster.
Regularly refine your outbound calling strategy based on performance analytics. There will never be a 100% successful script or outbound calling process, but every insight you learn from monitoring performance can help make it that little bit better each time.
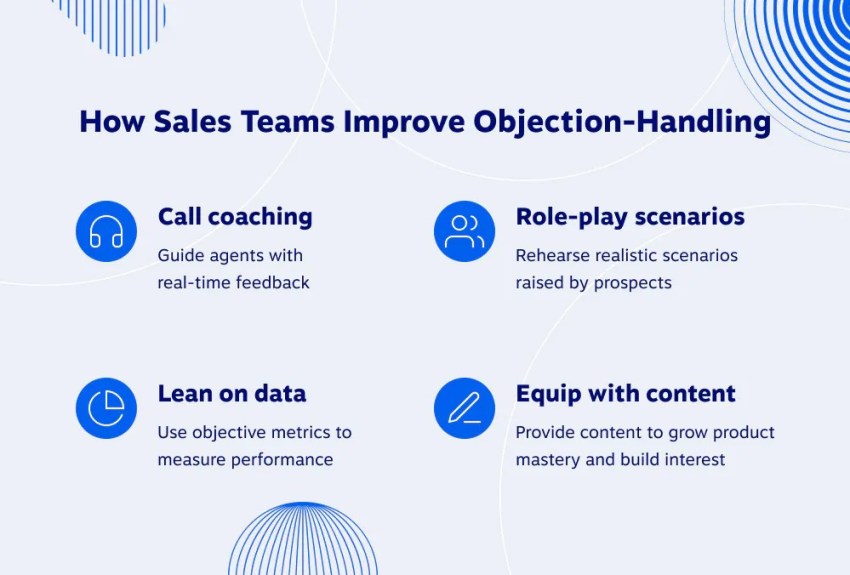
Enhance call quality with real-time coaching
In the past, real-time coaching was an expensive and arduous investment with a senior agent plugged into your new agent’s headset, waiting for them to make a mistake.
This meant several things:
- Your senior agent wasn’t making calls.
- Your junior agent was constantly afraid of making mistakes.
- If that new agent wasn’t successful, it felt like a serious waste of time.
Today, you can use AI-driven real-time coaching prompts to help agents of all skill sets and experience. Anytime an agent gets stuck with a product query or has a new objection, the AI Agent will flash up possible remedies on-screen.
There’s no need for duplicate resources, and your agents spend less time putting customers on hold and hunting for answers. The better the customer experience at this stage, the bigger the chance your prospect will convert.
Manage regulatory compliance proactively
Outside of making sure your calls are as effective as possible, there are also several non-call-related actions you must take.
Make it best practice to conduct regular compliance audits, accounting for regulations like PCI-DSS and TCPA. Here’s where opting for a dialer solution that performs this task pays dividends. If you’re confident that your dialer provider holds the relevant technology standards, there are fewer changes to make and more time to focus on making impactful calls.
How Nextiva Creates Your Effective Outbound Calling Strategy
The more comprehensive your prospect insights and the more channels you can serve them on, the higher the chance of conversion — and repeat sales.
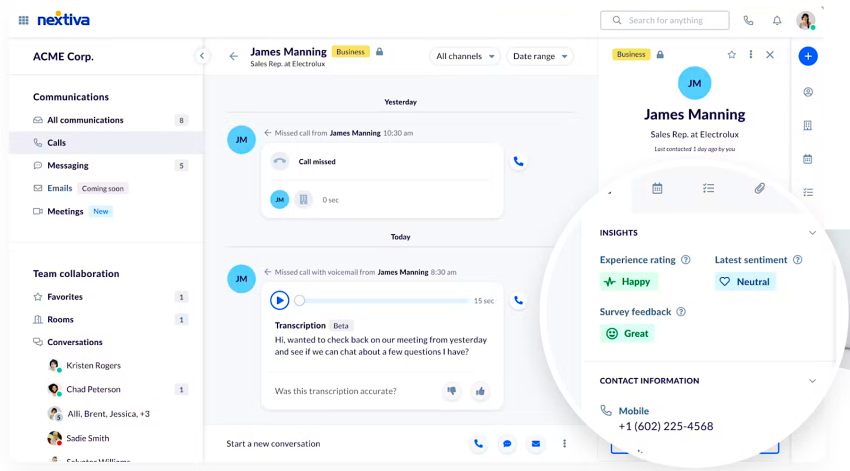
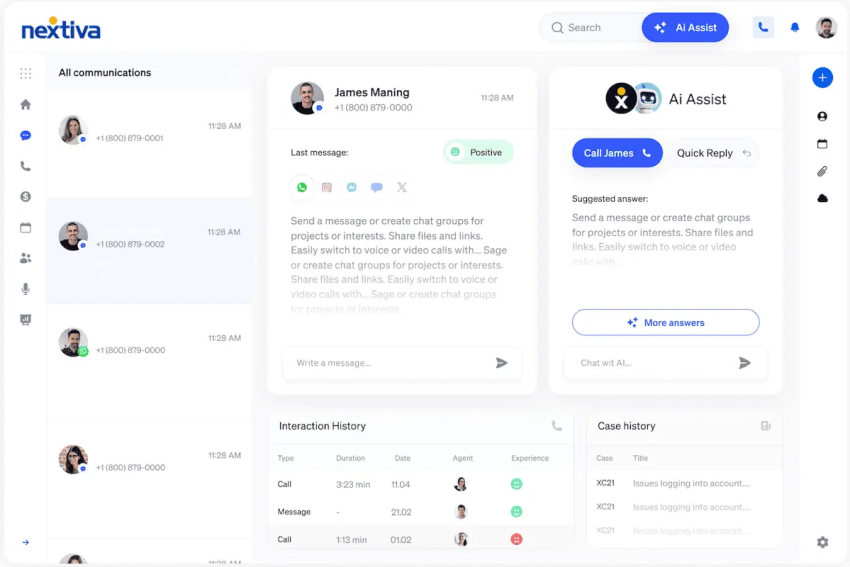
Offering an omnichannel contact center platform, Nextiva combines phone, video, chat, SMS, and email into one platform and seamless integration with leading CRMs.
From a sales management perspective, you get real-time transcription, sentiment analysis, and predictive analytics to continuously improve your scripts, follow-ups, and processes. There’s no longer a need for guesswork and urgent war rooms to fix the sales process when you’ve got customer data doing the work for you.

Enhance Calls with Real-Time Transcription – Nextiva
With built-in compliance functionality (including call recording pause for PCI compliance, TCPA, and HIPAA) as standard and automated insights on competitors, creating a successful outbound calling strategy has never been easier.
Need to ramp up your outbound sales? You need Nextiva.
Optimize your call center operation.
Maximize your team’s productivity effortlessly and see why top brands use Nextiva to handle calls at scale.