Though you may not see traditional fax machines in many offices these days, faxing documents is still a requirement for a lot of businesses and industries. They just use internet faxing technology to send and receive important documentation instead of bulky machines and a dedicated phone line.
Faxing over the internet, often referred to as online, digital, or internet faxing, offers several advantages over analog faxing. Businesses can eliminate the need for bulky hardware, reduce operational costs, and feel confident that their communications are both secure and easily accessible from anywhere.
If you’re unsure what this setup looks like or how faxing over the internet works, you’re in the right place! In this article, we’ll guide you through the process of how to fax over the internet, show you the benefits, and provide a few relevant use-cases of faxing.
How to Fax Over the Internet
An online fax service provider uses similar technology to what traditional fax machines use for transmitting fax data, but instead of relying on a physical fax machine, the service operates through a digital interface that’s accessible via an online dashboard, as you’ll see below.
Online faxing essentially turns your documents into a format that a fax machine can read (and vice versa), so even if your recipient still uses a standard fax machine, you don’t need one. All you need is an internet connection and a solid online faxing setup.
Now, let’s go through the steps to start sending and receiving faxes over the internet.
Step 1: Sign up for an online faxing service
In order to send and receive faxes, you’ll first need to sign up for an online fax service. Our Digital Fax service is one such example (and is included with Nextiva’s business voice plans!).
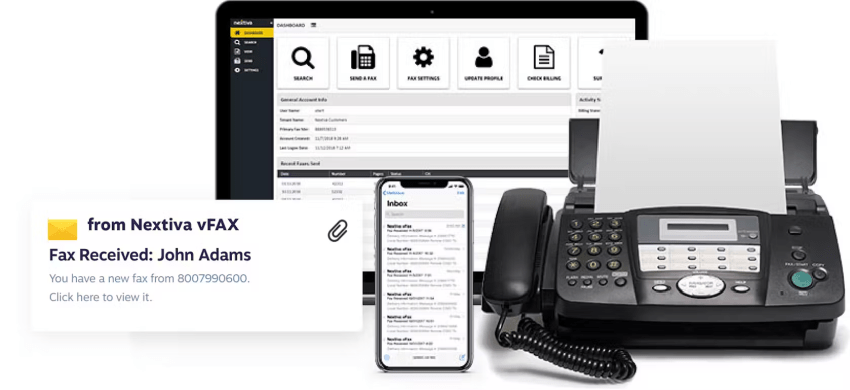
Creating your account shouldn’t take longer than a minute or two. It typically involves entering your name, company name, email, and phone number, as well as your address and payment details.
Many services will give you free pages to send and receive or a time-based free trial before starting your paid plan.
Step 2: Choose your fax number
When creating your account, you’ll also choose your fax number.
If you already have a fax number, your fax service of choice should let you transition it over. Nextiva, for instance, allows you to keep your current fax number so your fax service won’t be disrupted during the process.
If you don’t have a number, you’ll be assigned a toll-free or a regular fax number. You can usually choose your area code and select from multiple available numbers.
Step 3: Attach your document(s) to a new fax message or your email
You can use online fax services in two ways:
- Through its dashboard
- Using your standard email service
In your dashboard, simply follow the prompts to enter your recipient’s fax number and attach your text documents, PDFs, or images to your fax message.

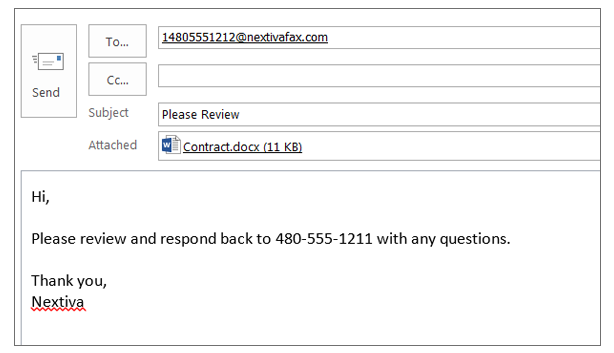
In your email, you can attach your digital document to a new email message. Then enter your recipient’s fax number in the To: field, followed by the name of the service you’re using. For Nextiva, it looks like this: 16021234567@nextivafax.com.
Step 4: Your faxing service translates the attachment and sends it
Your fax message is then converted into a format that a fax machine can read on the receiving end, and the fax service sends it over the phone line.
Keep in mind that although you are using the internet to send your document to the online fax service, the final leg of the journey – sending to the recipient’s fax machine – still uses a phone line.
This process can take up to a few minutes, depending on the size and complexity of the documents you sent.
Step 5: The recipient’s fax machine decodes the data and prints the fax
Of course, if the recipient is also using an online faxing service, they’ll get an email or a smartphone ping notifying them that a new fax is waiting for them.
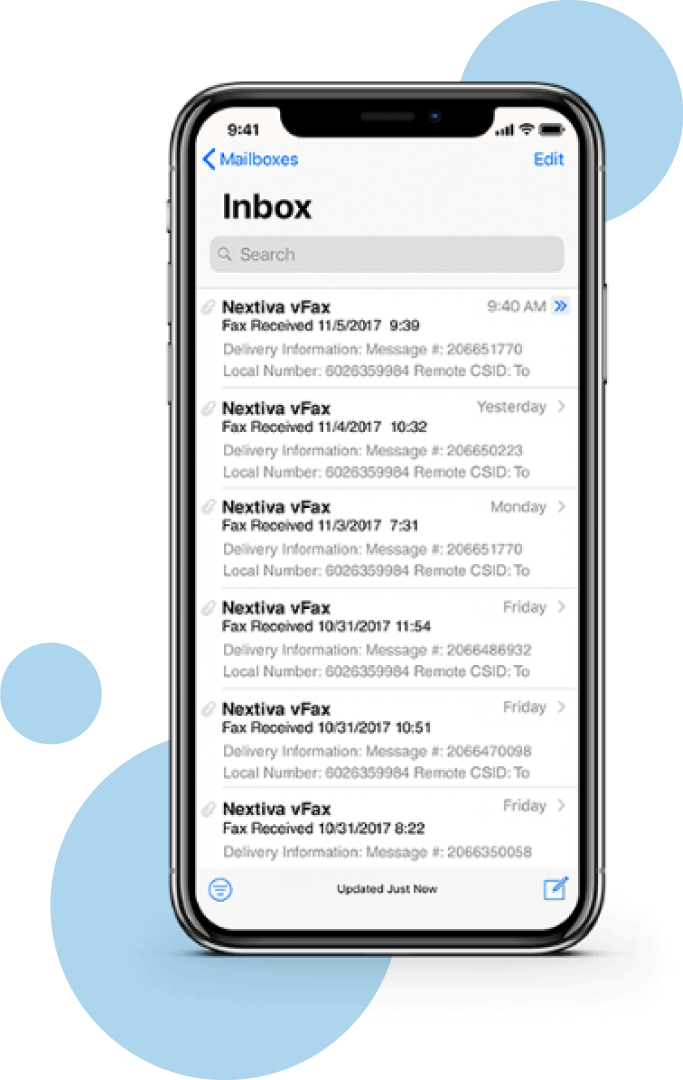
Many online fax service providers, including Nextiva, allow you to use your existing PC, tablet, fax machine or mobile device to send and receive faxes. (We don’t make you buy any new expensive equipment!)
Either way, the document that you sent is now in their hands or on their computer, and they can view it immediately.
How Does Online Faxing Work?
Unlike standard faxing, there’s no printing or waiting by a machine involved with internet faxing. Attaching your PDFs, text documents, or graphics to an email and sending them as an outgoing faxes takes mere seconds.
Unlike emails which are exposed to security issues and cyber threats, traditional faxing is among the most secure ways to send and receive sensitive information and confidential documents. Despite the advancements in digital communication, some companies continue to invest in Plain Old Telephone Service (POTS) lines for their traditional fax machines for that exact reason.
Faxing over the internet makes the most out of both worlds. It sends documents securely as fax pages, but it doesn’t require that you own and maintain a physical fax machine, fax servers, special fax modem, or additional software.
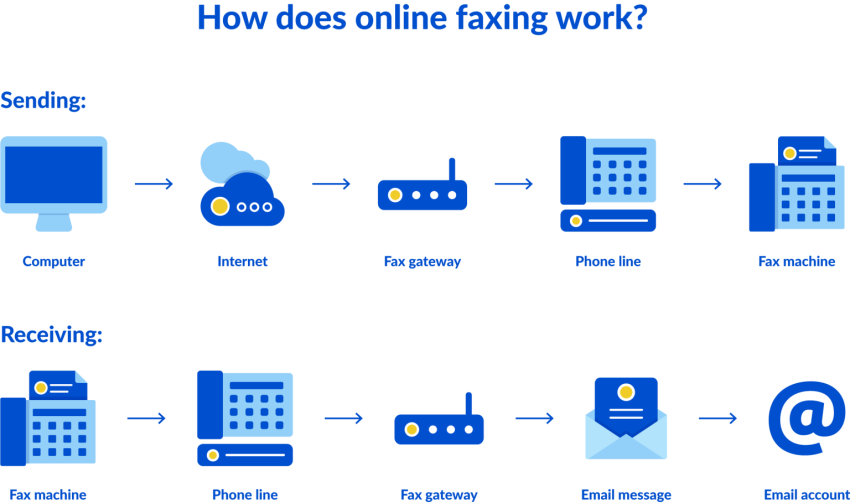
Here’s all you need to fax over the internet:
- An internet connection
- An email account
- A subscription to an internet fax service
With this setup, you can easily send receive faxes. The best part? You can get started in a matter of minutes.
Benefits of Faxing Online
You now know how to fax online. But if you’re still not convinced, check out these valuable digital faxing benefits over the internet compared to traditional or analog faxing.
Convenience
Online faxing allows users to send and receive faxes from anywhere with an internet connection, using just their computer, smartphone, or tablet. You don’t need to bother with a traditional fax machine, which simplifies setup and maintenance. Plus, it’s a great addition for remote teams and multiple offices.
Cost Savings
No need for a dedicated telephone line or the costs associated with maintaining a physical fax machine, including paper, ink, and maintenance. Online faxing also eliminates long-distance costs, thanks to the flat-fee nature of internet faxing.
Enhanced Security
Many online fax services offer encrypted transmission of documents, providing better security compared to traditional faxing or emailing. With Nextiva, every fax you send or receive uses 256-bit SSL encryption to keep your sensitive information secure. Also, since everything is delivered directly to your personal inbox and not a communal fax machine, your confidential documents are for your eyes only.
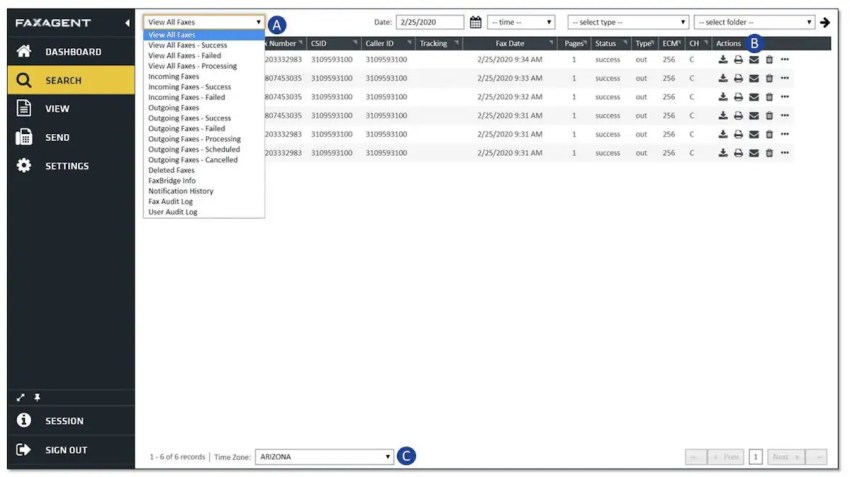
Digital records of sent and received faxes can be easily maintained and searched for to provide a clear audit trail for compliance and tracking purposes.
Integration and Automation
Online fax services can often integrate with email, cloud storage, and other business applications, which streamlines workflows.
And the automation of faxing processes, such as scheduled sending and automatic receipt confirmation, can improve efficiency.
In a nutshell, this is the next generation of faxing, with convenience, security, and automation built in. Plus, an online fax provider can easily scale to accommodate the faxing needs of growing businesses without requiring significant investment in new hardware.
Business Use-Cases of Online Faxing
Let’s go through a few different scenarios where internet faxing is used in various business contexts to provide better efficiency, security, and compliance when it comes to document handling.
Medical Records and Prescriptions
Healthcare providers regularly need to share patient records, lab results, or prescriptions with other healthcare facilities or pharmacies. Sensitive documents are faxed over the internet to ensure confidentiality and compliance.
Certain industries, including healthcare, have stringent compliance regulations – HIPAA in this case – regarding the handling of sensitive data. Internet faxing often meets these requirements better than email.

The outcome is: Secure and rapid transmission of confidential medical information.
Financial Transactions and Authorizations
Banks, financial institutions, and other businesses need to send and receive financial material with personal data such as account numbers. Documents like loan applications, financial statements, and authorizations are faxed over the internet to ensure security and compliance.
Like the healthcare industry, the financial industry also has strict compliance regulations (GLBA, SOX) when it comes to transmitting confidential information, which internet faxing typically meets better than email.
The outcome is: Secure and efficient handling of financial documents, reducing the risk of fraud and ensuring compliance with financial regulations. Internet faxing services also often include detailed audit trails and delivery confirmations, letting both parties know that their fax document has been securely sent and received.
Human Resources
HR departments need to send and receive employment applications, resumes, benefit forms, and other sensitive employee paperwork.
Faxing these documents via the internet provides better privacy and compliance with data protection regulations. Internet fax service providers typically offer end-to-end encryption, which means a higher level of security for sensitive documents compared to standard email services.
The outcome is: Secure and efficient management of HR documents that protects employee privacy and ensures regulatory compliance.
How to Fax Over the Internet With Nextiva
When you’re choosing between online faxing services, you want faxing to become easier – not more complex or time-consuming. This is exactly why Nextiva Digital Fax is super simple to use.
Here’s how you can use online faxing in two ways with Nextiva.
Using Nextiva’s Digital Fax
Once you’ve signed up for Digital Fax, you’ll have your login information, and you’re good to go:
- Log in from Nextiva Digital Fax login page with your credentials
- Click “Send a Fax”
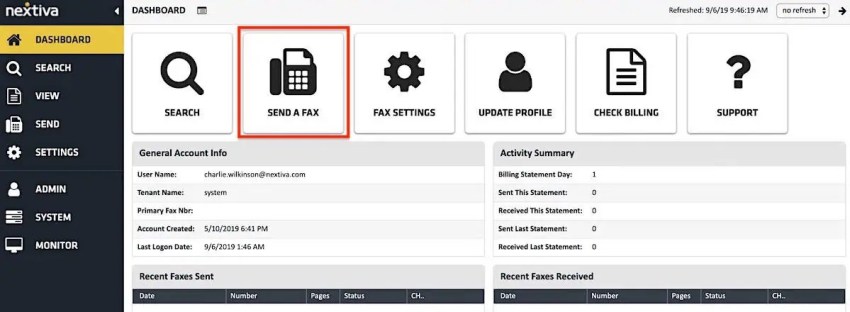
- Enter the recipient information, such as their fax number, name, fax subject, as well as your sender name
- Add attachments to your fax, such as images, PDFs, Microsoft Office files, text files, and cover page (up to ten files per fax). Here’s a list of accepted file types.
- Review your fax and assign its type and folder, so it’s easy to find in the future
- Send!
If you want to receive a fax, all you need to provide to your sender is your fax number, which you can find in your Digital Fax settings.
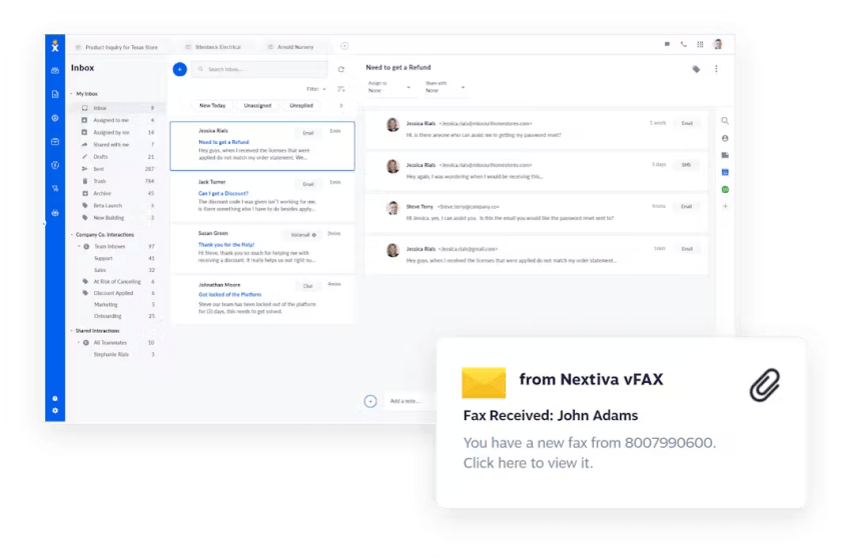
When you receive a fax, you’ll get an email notification.
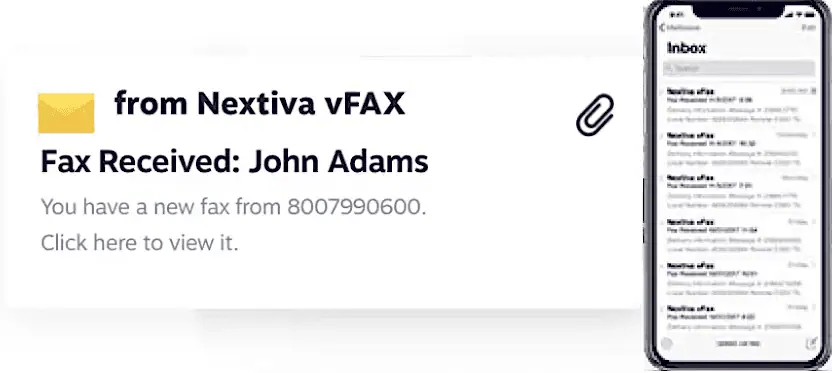
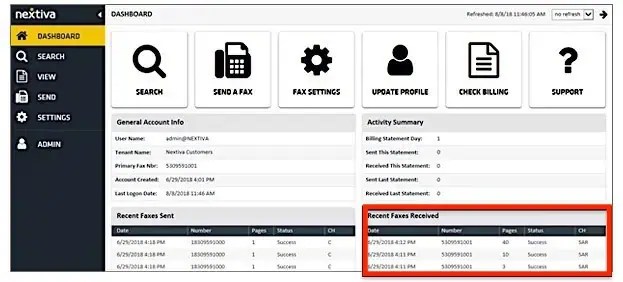
You’ll also be able to view all your incoming faxes from your Digital Fax dashboard.
Faxing via Email
Faxing over email is extra handy if you’re on the go and need to send a fax. Your email service is probably already open, so if you want to skip logging into your online faxing dashboard, you can.
Here’s how to send a fax via email with your Nextiva Digital Fax subscription:
- Retrieve the fax number you’re looking to send a fax to
- Open your usual email service and create a new email
- In the To: field, enter the fax number followed by your fax number – it will end with @nextivafax.com (For example, 16021234567@nextivafax.com)
- Add up to ten files as email attachments
- Add text to the body of the email if you want to add additional notes
- Send!
Start Faxing Online With Nextiva’s Solution—It’s Easy
Online faxing doesn’t have to be expensive, archaic, or complicated.
Nextiva Digital Fax isn’t just easy to use – it’s also affordable and packed with features you’ll love. The best part is, it’s included with Nextiva’s business voice plans, including our VoIP phone systems and our cloud phone systems.
Plans start at $7.95 for 500 pages per month, and if your fax fails to send, don’t worry, it doesn’t count! And any faxes sent or received after you have exceeded your pool of pages is just $0.03 cents per page.
You can try Digital Fax out for free for 30 days. Plus, there’s no contract required, so there’s no risk to you. And if you need HIPAA-compliant fax, we’ve got that, too. Contact us – we’ll be happy to talk you through setup!
With Nextiva Digital Fax, you can:
- Easily send faxes to anyone with a physical fax machine or online faxing service
- Keep your current fax number or pick a new one from the area code of your preference
- Set up online faxing plans for your entire company
- Use your mobile device, PC, or tablet to send and receive faxes
Online faxing, simplified.
Send and receive secure, electronic faxes from anywhere on any device.
Online Faxing FAQs
While many apps provide free options, they often come with limitations, such as a cap on the number of pages that can be sent and received, or a 7-day free trial, after which you’ll need to pay. For example, Dropbox fax allows you to send five pages for free, but after that it’ll cost you. And with iFax’s “free fax online service” you can send only five pages per month for free. For more frequent faxing needs, users may need to consider paid plans.
Yes, you can send a fax through Gmail, but neither Gmail nor Google Workspace have built-in fax capabilities. You’ll have to use an internet fax service, such as Nextiva, that integrates with email to send online faxes. See “Faxing via Email” in the article above for step-by-step instructions.
Sending a fax without a fax machine – or a phone line – is quite simple with the use of an online fax provider or apps that allow you to send and receive faxes via your computer, smartphone, or tablet. Click here to read an article or watch a short video of how to do this with Nextiva Digital Fax.
Free internet faxing is easy using an online fax provider that offers a free trial or limited free faxing capabilities.


 VoIP
VoIP 

