Supervisors can change Agent’s availability to the Call Center either from the Personal Wallboard, Tools Menu, or the Agent Activity tab. Below are all the Agent availability options to select from:
- Join Queue: Assign the selected Agent to the selected queue.
- Leave Queue: Unassign the selected Agent from the selected queue.
- Sign-In: Update the selected Agent’s ACD state to Sign-In.
- Available: Update the selected Agent’s ACD state to Available.
- Unavailable: Update the selected Agent’s ACD state to Unavailable, including the unavailable reason code if applicable (e.g., break, restroom, etc.).
- Wrap-Up: Update the selected Agent’s current ACD state to Wrap-Up.
- Sign-Out: Sign the selected Agent out of all queues.
From the Personal Wallboard:
- Right-click on the Call Center under the Personal Wallboard.
- Select Agents > Agent > Agent availability.
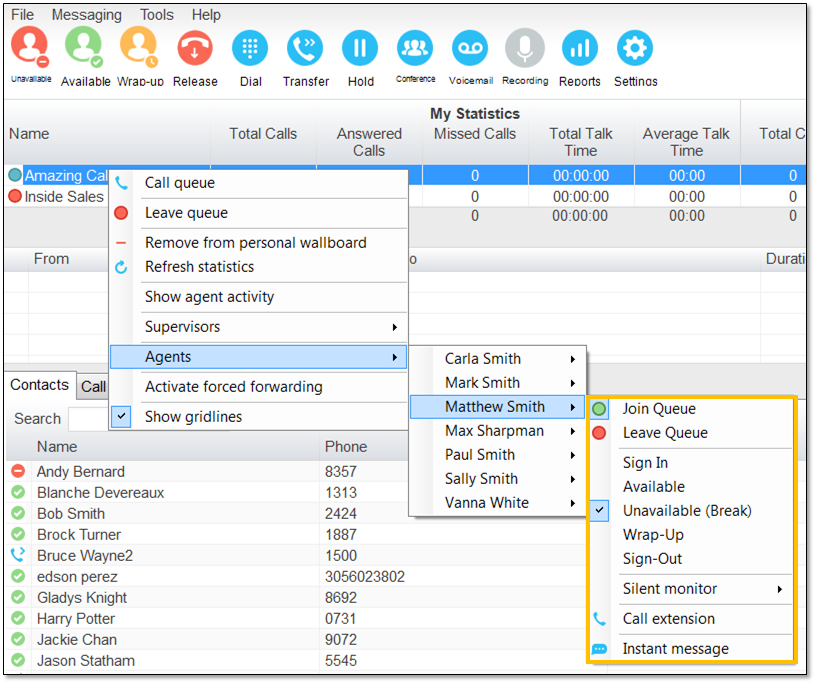
Agent Status – Personal Wallboard
From the Agent Activity Tab:
- Click the Agent Activity tab, then select a Call Center from the Name drop-down menu.
-
Right-click on the Agent and select the Agent availability.
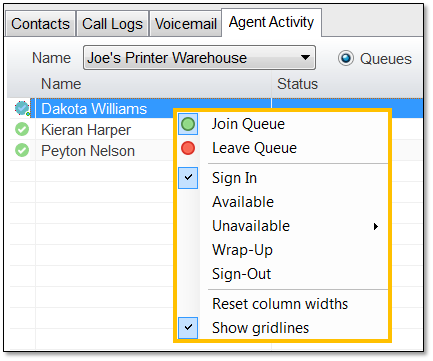
Agent Status – Agent Activity Tab
From Tools Menu:
- Click Tools > Call Centers > Call Center > Agents > Agent > Agent availability.
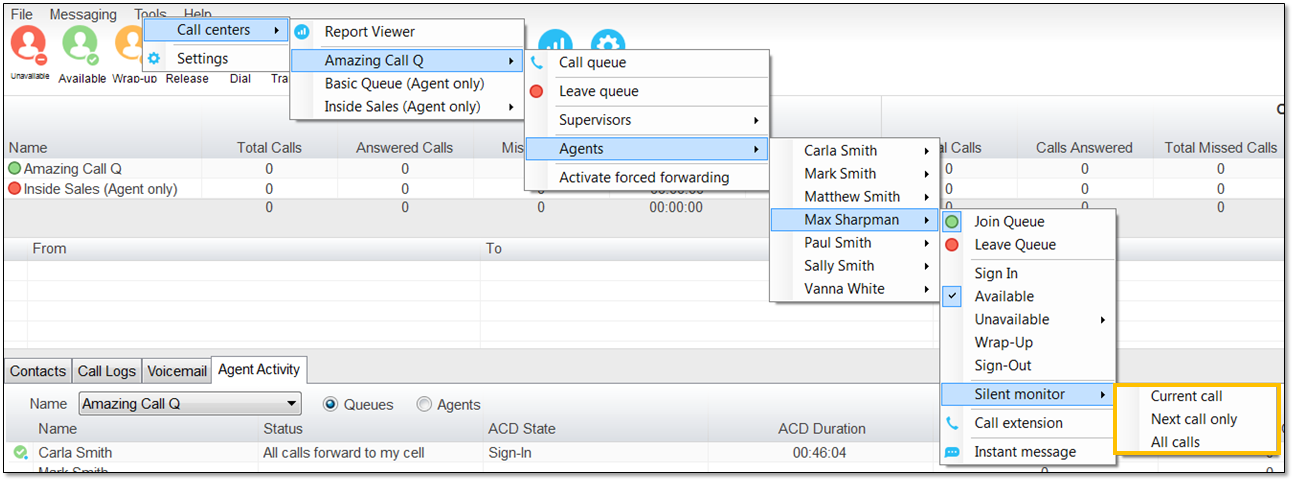
Agent Status – Tools Menu
Related Articles:
- Installing Nextiva Unity
- Manually Upgrading Nextiva Unity Desktop
- Nextiva Unity Agent Interface
- Nextiva Unity Reception Interface
- Nextiva Unity Supervisor Interface
- Managing Calls from Nextiva Unity
- Managing Call Recording from Nextiva Unity
- Transferring a Call from Nextiva Unity
- Escalating a Call to a Supervisor
- Sending Instant Messages from Nextiva Unity
- Silent Monitoring from Nextiva Unity Supervisor
- Customizing Statistics in Nextiva Unity Supervisor
- Configuring Thresholds from Nextiva Unity Supervisor