Control when agents can access Nextiva CRM based on their IP address to increase security and protect your data from unauthorized access. For example, you may only want your agents to access Nextiva CRM when they are in the physical office or only from a trusted device. You can add multiple IP addresses to the whitelist to grant access from trusted sources. Any attempts from other IP addresses will be blocked.
- Visit nextiva.com, and click Login to log in to NextOS.
- From the NextOS Home Page, select CRM.
- Click Administration Tools (wrench) at the top-right corner of the Nextiva CRM window.
- Under Security in the left navigation panel, click Manage IP Whitelist.
- Select the This is a closed network radio button and enter the IP address to allow.
- Click the Plus (+) sign to add. Click Save.
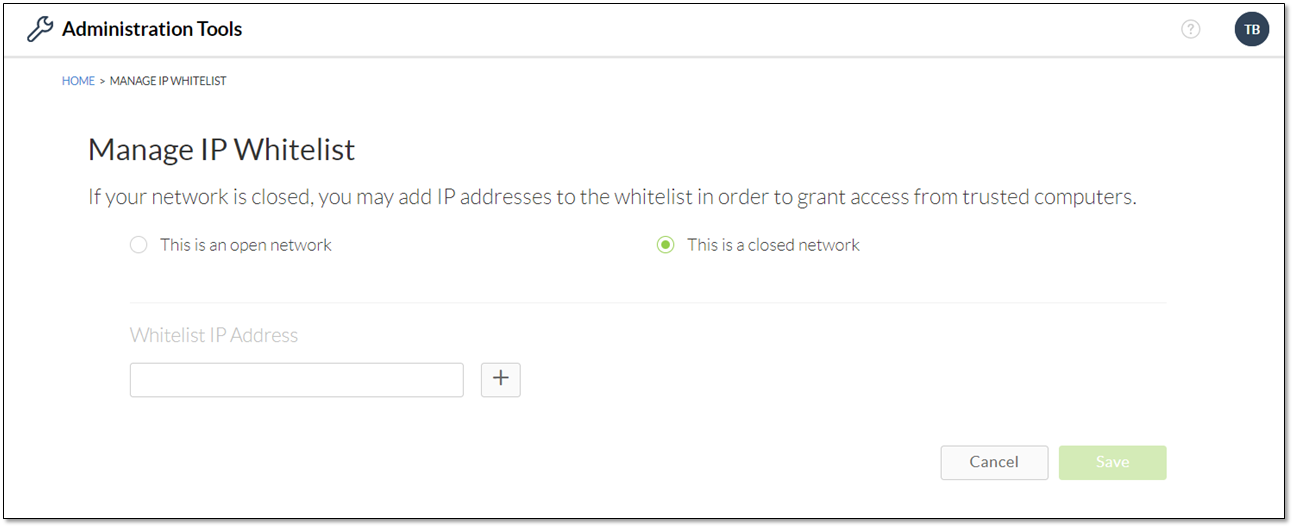
Adding An IP Address
NOTE: Click the Pencil icon to the right of the IP Address to edit. To remove an IP Address, click the Trash icon.
Related Articles: