Creating users and assigning licenses

Create new users and assign licenses, providing users access to specific services, such as Nextiva Voice.

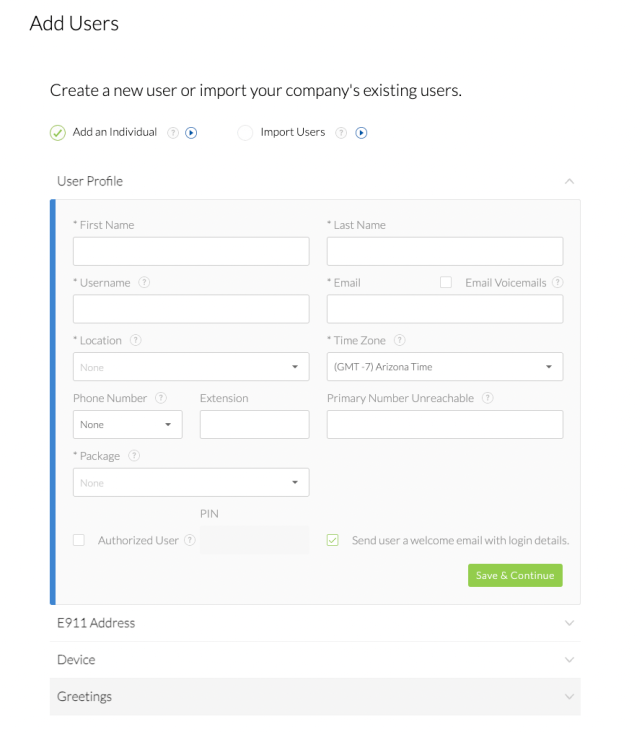
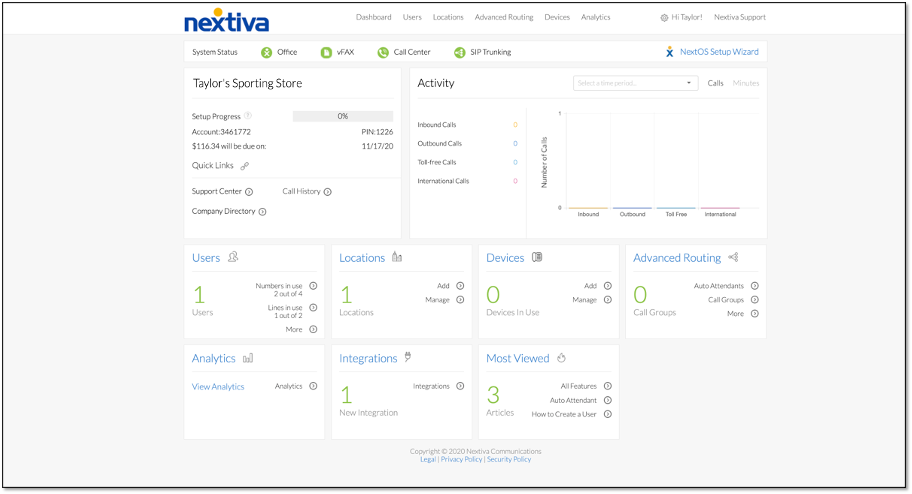
Choose the image that looks most like your screen once logged in.

Screen Voice Admin
Screen Home Page

Creating new users

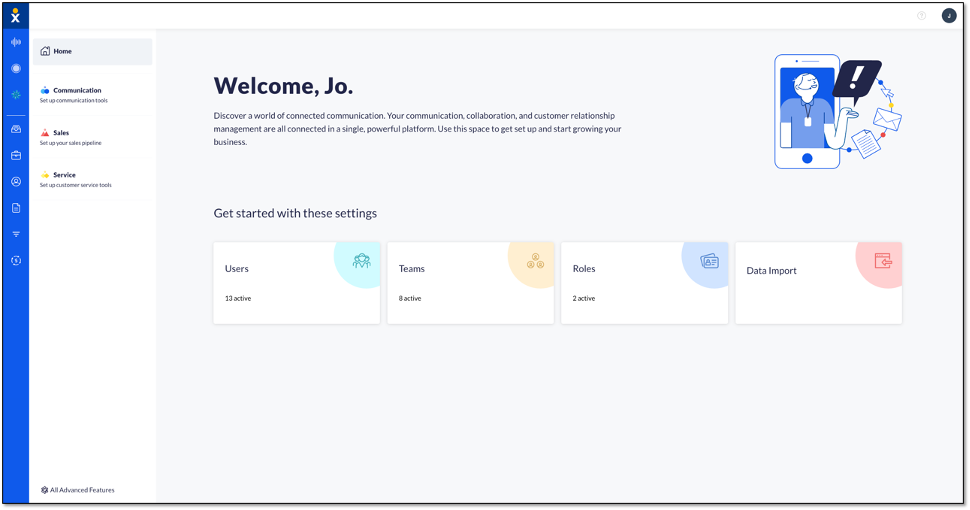
From the NextOS admin home page, click Users to create and manage all NextOS users.

Click Create users > enter the user’s information > Add License > Create. The new user’s login credentials are automatically sent to the email provided.

NOTE: If a user has more than one profile, then only that user can update specific information, such as the first name, last name, email, phone number, and time zone. For more information, click here. 

Roles (optional)

Roles limit user access to specified areas of NextOS. Admins can create and manage users, roles, and settings by default. Users can only edit their own voice settings. Click Roles & Permissions on the left menu to create or manage roles and permissions

Primary team

Assign a primary team to group users together based on job responsibilities. You can later direct calls to these teams. Assign a team when creating a user. You can also manage and create teams in the left menu under Teams. 

Licenses

Add various licenses, providing users access to specific services, such as Nextiva Voice. Make sure to assign a license for each voice user. Admins don’t require a voice license unless they need phone service as well.

Setting up Nextiva voice for users

Manage all essential user voice settings, such as phone numbers, devices, voicemail, emergency locations, and business hours from one place.

To manage user voice settings, select Users > Actions > Voice Setup or Voice Settings if the user is already set up with voice.

Creating new users

From the Nextiva Voice Admin Dashboard, hover over Users > Add Users > complete the User Profile form > Save & Continue

TIP: Import multiple Users (up to 40) at one time by clicking Import UsersDownload XLS/CSV template > Upload Complete Template.

For users with a primary phone number, the E911 Address section will expand with auto-completed fields based on the selected Location. Confirm the physical location of the User > Save.

In the Device section, choose to assign a device to the user now or later. For more information on assigning a device, click here

(Optional) Upload a greeting. If no greeting is uploaded, the default greeting will play. For information on recording greetings, click here.

Assigning a license to a user

From the Nextiva voice admin dashboard, hover over the Gear icon in the upper-right corner > My Account > Licensing > Assign. Select the checkbox(es) next to the user(s) > Save

Need additional help? Click here.

Was this article helpful?