Enabling text messaging (SMS/MMS)

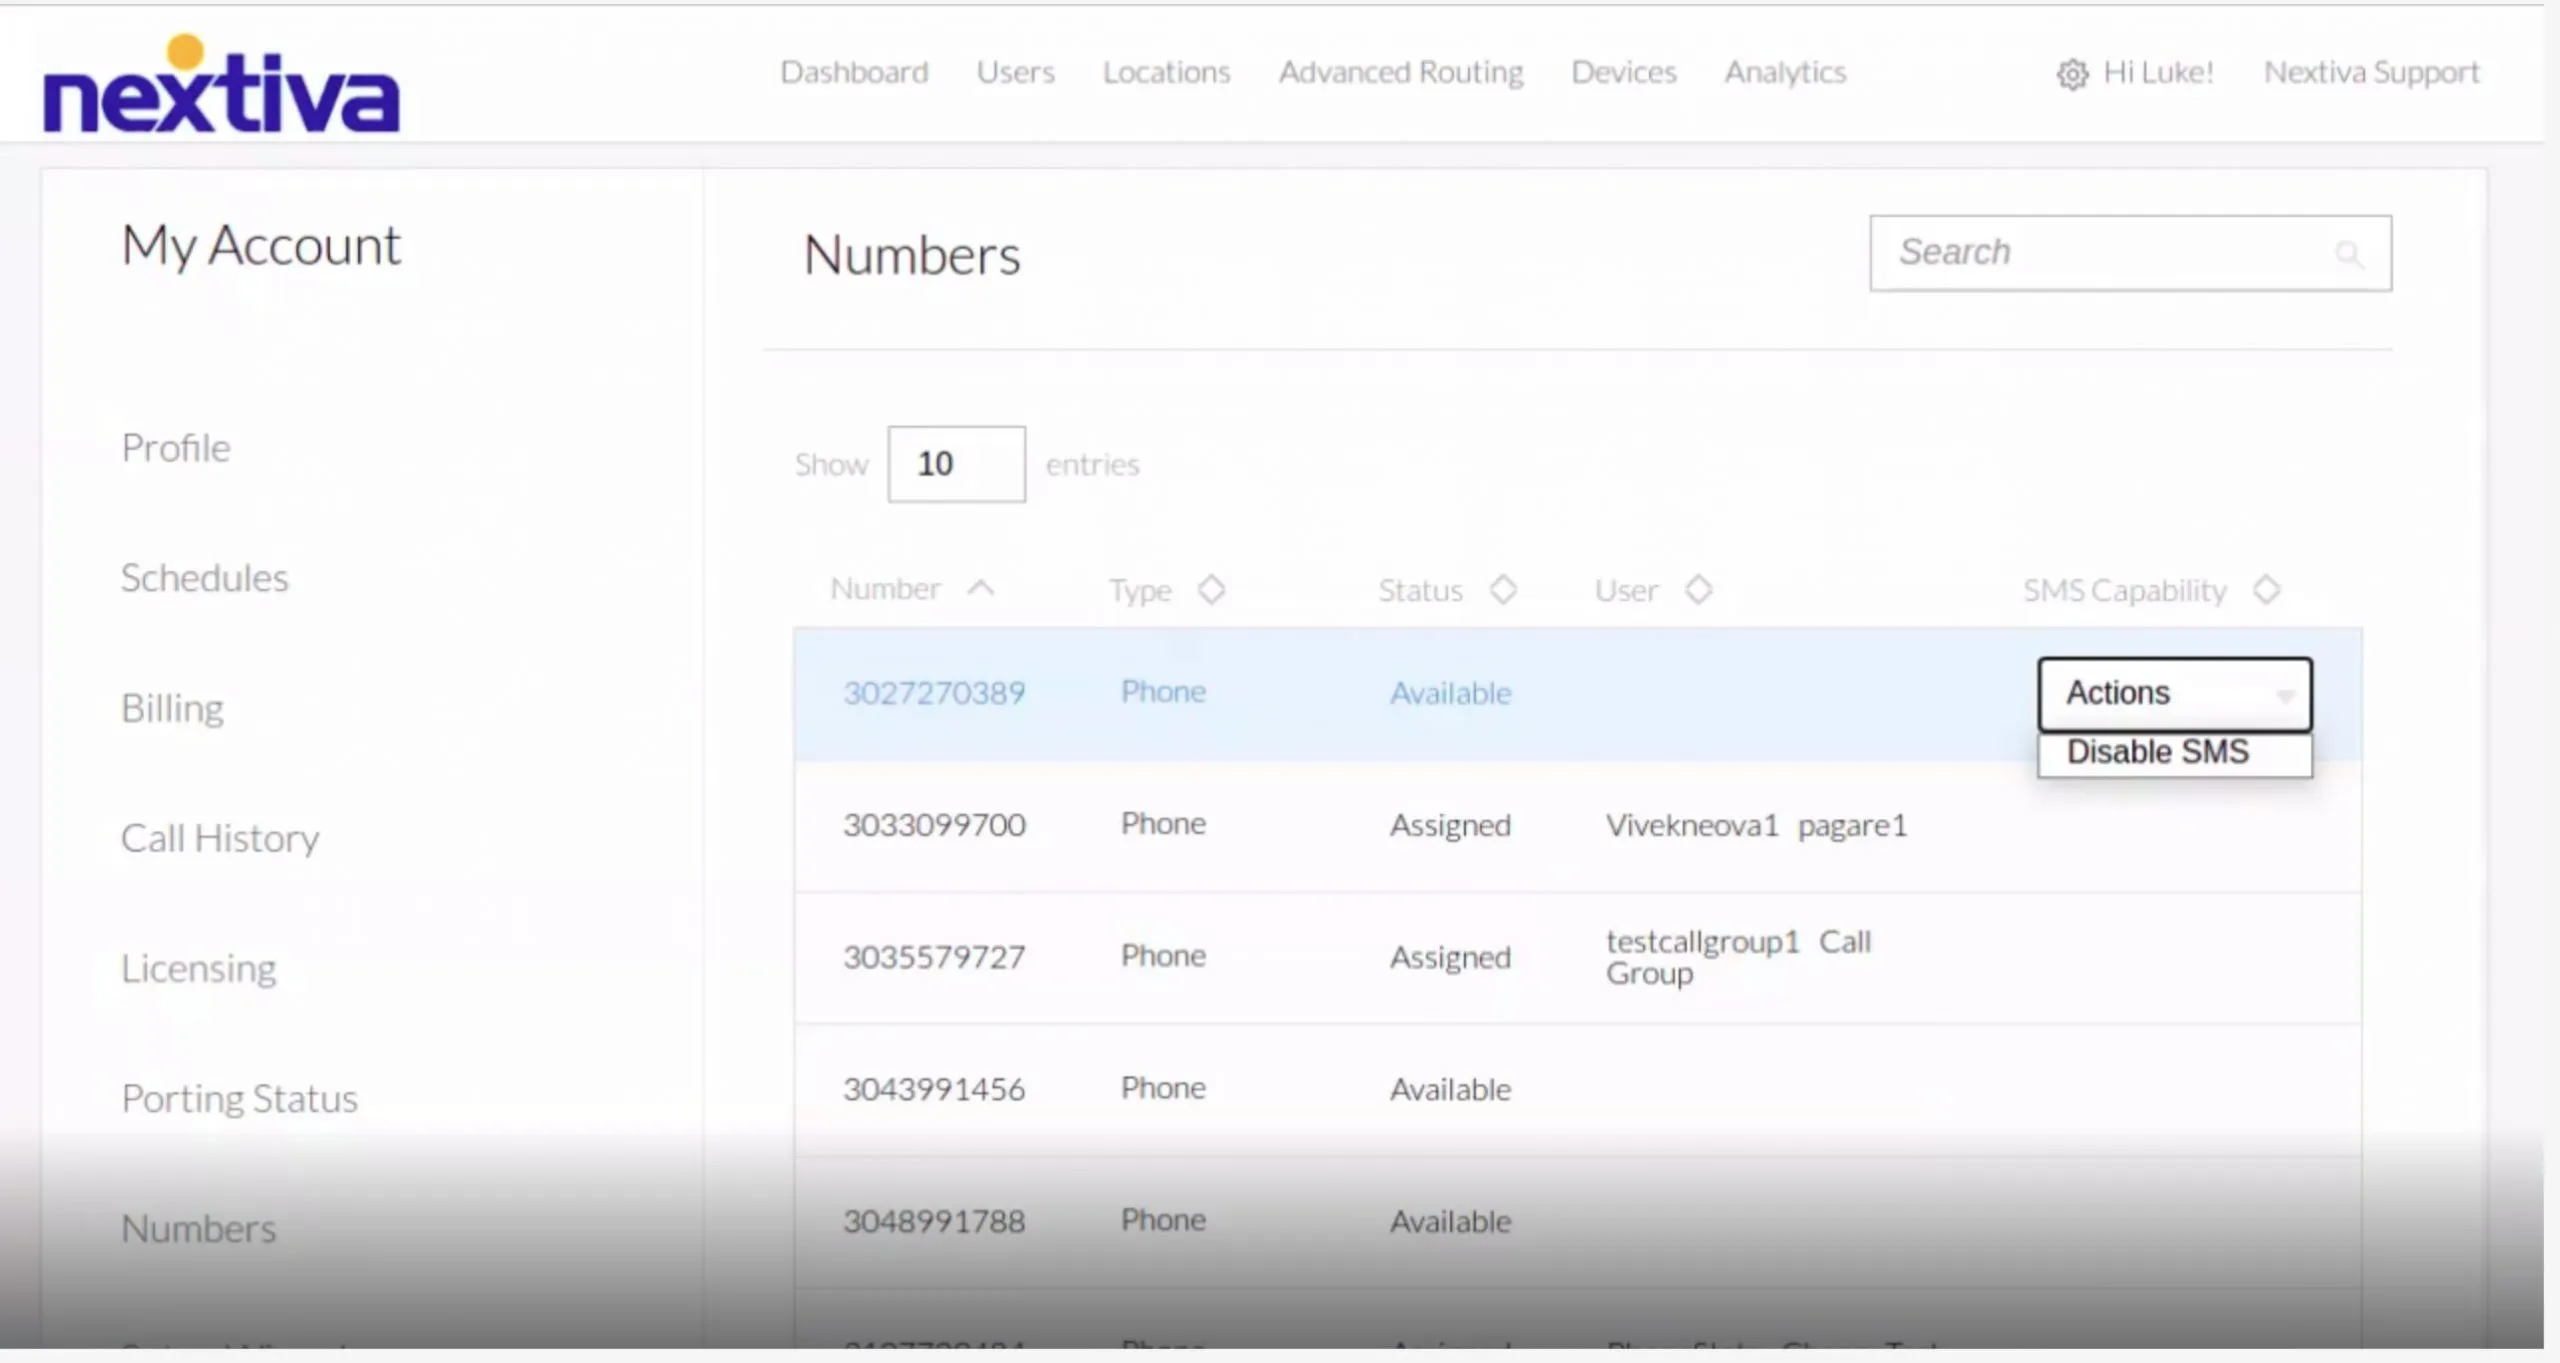
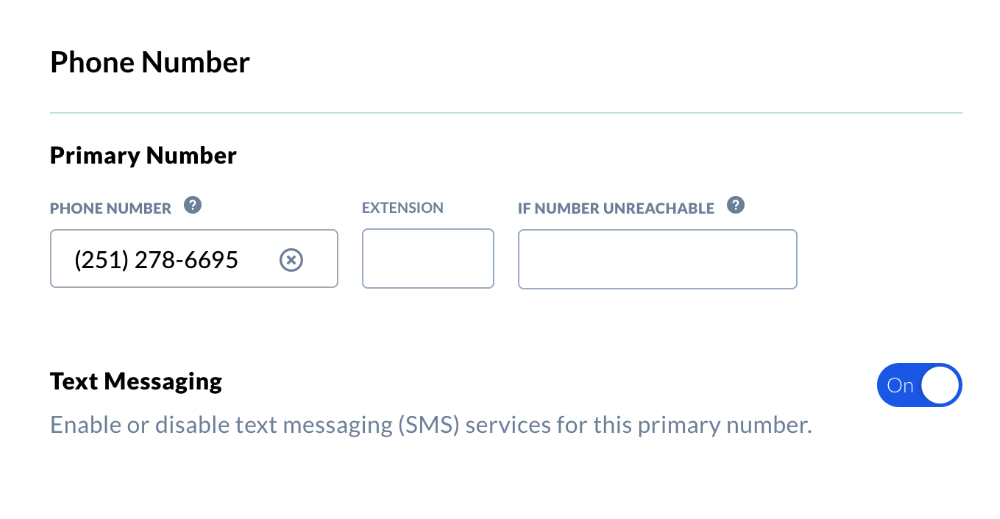
Send and respond to text messages using your Nextiva business phone number. Before enabling SMS, it’s necessary to register your Nextiva phone number. For instructions on how to register your number, click here

Choose the image that looks most like your screen once logged in.

NextOS
Nextiva 3.0

Enabling text messaging (NextOS) 

By default text messaging is automatically enabled when creating new users with a local primary phone number assigned. 

From the NextOS admin dashboard, select Users > Actions > Voice settings > Phone Number

Click the toggle to turn on/off text messaging for the user. 

You can also enable/disable text messaging under the Numbers page (Communication > Phone System > Numbers). Hover over the phone number and select Actions > Enable/Disable SMS > Confirm.

To enable/disable team text messaging, click here.


Enabling text messaging (Nextiva 3.0) 

From the NextOS admin home page, select Voice. Hover over your name on the top right corner and select My Account > Numbers.

Hover over the number and click the Action drop-down under SMS Capability and select Enable SMS > Confirm.

NOTE: To enable texting, the phone number must be assigned to a user as their primary phone number and cannot be assigned to a call-flow or auto-attendant. 

Need additional help? Click here.

Was this article helpful?