Call Groups (sometimes called Hunt Groups) route incoming calls to a specified group of users. For example, you can create a Call Group for multiple teams, such as sales and support teams, choose to ring all users at the same time, or ring users in a specific order. If no one is available to take the call, callers can be routed to a voicemail box or to an alternate destination.
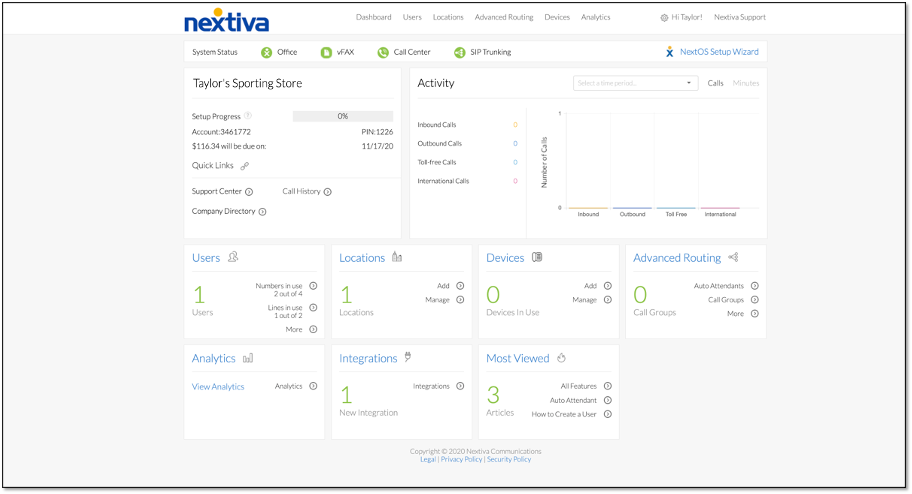
From the Nextiva Voice Admin Dashboard, hover over Advanced Routing > Call Groups > Create Call Groups.
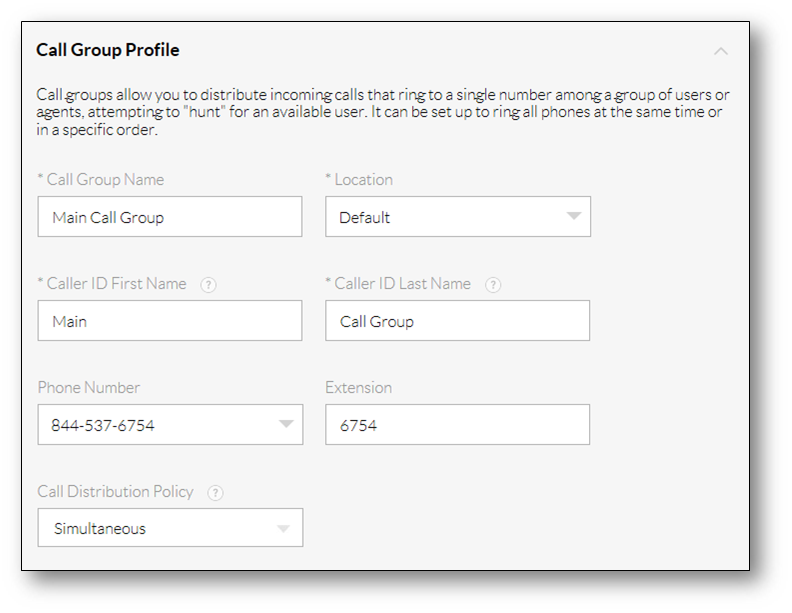
Complete the fields on the Call Group profile screen, as indicated below:
- Call Group Name: Descriptive name for the Call Group.
- Location: Location that the call group belongs to.
- Caller ID First Name and Caller ID Last Name: Caller ID that will show on a user’s phones when a call comes in through the Call Group.
- Phone number: (Optional) Phone number that rings directly to the Call Group.
- Extension: (Required) Extension number of the Call Group.
- Call distribution policy: The ring pattern of the Call Group. Options include:
- Circular: Rings one user at a time in a looping order, i.e. User A at the top of the list moves to the bottom after taking a call (A-B-C-D, then B-C-D-A, and so on).
- Regular: Rings one user at a time in a set order (A-B-C-D, then A-B-C-D again when the next call comes in).
- Simultaneous: Rings every user in the Call Group at the same time.
- Uniform: Rings the user who has been idle the longest.
- Weighted: Rings users based on a predetermined percentage for each user.
- Select users from the Available Users list to assign to the Call Group by clicking Plus (+).
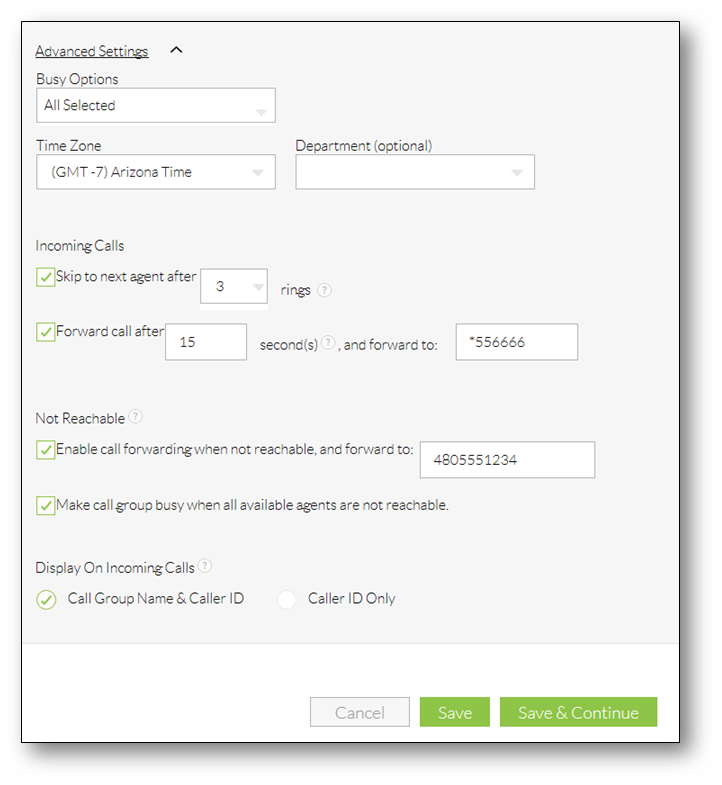
- Click Advanced Settings to complete the following settings > Save.
- Busy Options:
- Allow call waiting: Allows users to take more than one call at a time through the Call Group.
- Allow members to control group busy: Allows users to enable/disable call forwarding via feature access codes (#51 and #52).
- Enable group busy: Enables call forwarding for the Call Group.
- Apply group busy when call ends: Enables Call Group Busy when a call ends.
- Time Zone: Time zone of the Call Group.
- Department: The Department associated with the Call Group.
- Incoming Calls:
- Skip to next agent after __ rings: Total rings a user has to answer the call before the call routes to the next user. This setting does not apply if Simultaneous Ring is in use, or if only one user is assigned to the Call Group.
- Forward call after __ seconds, and forward to: Total time the call rings the Call Group. This is typically used to send calls to voicemail after a certain number of seconds (one ring is approximately 3 seconds), but can also be used to forward calls to an Auto Attendant or an external number. To send calls to voicemail, enter *55, followed by the voicemail extension.
- Not Reachable:
- Enable call forwarding when not reachable, and forward to: Forwards calls to voicemail, an Auto Attendant, or an external number if all phones in the Call Group are offline (not registered). For voicemail, enter *55, followed by the voicemail extension.
- Make call group busy when all available agents are not reachable: Forwards the call to the Call Group voicemail if all phones in the Call Group are offline (not registered).
- Display On Incoming Calls: This is what will be displayed on the caller ID when the User receives an incoming call from the Call Group.
- Group Caller ID: Displays the Call Group caller ID, the first/last name of the caller, and their phone number.
- Caller ID: Displays the caller’s name and number only.