Call Groups (also known as Hunt Groups) allow you to have incoming calls ring to multiple employees on your account. This feature attempts to “hunt” for an available employee and can be set up to ring all users at the same time or in a specific order. This feature is perfect for a company that needs multiple people to answer phone calls. Make sure you set up this feature properly before troubleshooting: Click Here
To Adjust your Call Group Rings from Nextiva Voice Admin Portal:
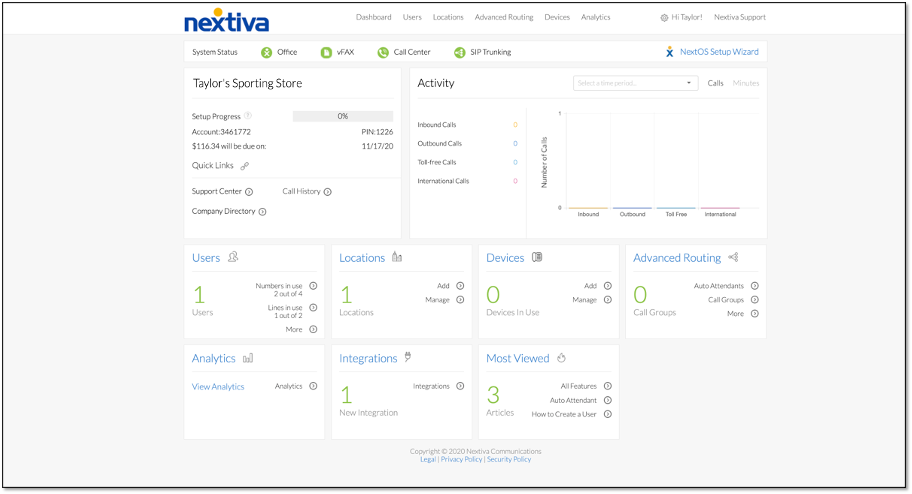
- From the Nextiva Voice Admin Dashboard, hover your cursor over Advanced Routing and select Call Groups.
- Select the location the Call Group is in by clicking the drop-down arrow and clicking the location.
- Hover your cursor over the name of the Call Group you would like to adjust the number of rings for, and select the pencil icon.
- Scroll down and select Advanced Settings to expand the section.
- Verify the number of rings in the Skip to next agent after __ rings are set to the appropriate number of rings.
- Verify that the Forward call after __ seconds, and forward to __ field is set to the appropriate number of seconds, and the forwarding number/extension is set correctly.
- Click Save to apply changes.
If One Phone is Not Ringing and All Other Phones Are:
- Reboot the phone not receiving calls to ensure it is online and connected before troubleshooting further. Disconnect the power cord for 10 seconds, then plug the phone back in.
- Place and receive a test call to ensure calls are able to be made and received.
- If the problem continues, please reach out to a Nextiva support agent.
If your Call Group Phones Are Not Ringing in the Correct Order:
-
- From the Nextiva Voice Admin Dashboard, hover your cursor over Advanced Routing and select Call Groups.
- Select the location the Call Group is in by clicking the drop-down arrow and clicking the location.
- Hover your cursor over the name of the Call Group you would like to adjust the number of rings for, and select the pencil icon.
- Check the Call Distribution Policy and verify that it is set correctly.
- If all users should ring at the same time, make sure the Simultaneous radio button is selected.
- If the phones are to ring one at a time starting with the same person every time, the Regular radio button should be selected.
- Circular, Uniform, and Weighted Call Distribution will cause incoming calls to ring phones in a different pattern based on your company needs.
- In the Available Users section, verify that the order of users is correct. To move a user, click and hold on the user, and move the user to the correct order location.
- Click Save to apply changes.

