
 Customer Experience
  Blog
Blog  Business Communication
  Leadership
  Marketing & Sales
  Productivity
  VoIP
VoIP 

Customer satisfaction is more important today than ever before. Given the large number of choices consumers have in almost every market, companies that listen to their customers have a distinct advantage.
A customer satisfaction survey is an invaluable tool for both small business owners and large corporations. Surveys can help determine how customers are feeling about an organization’s customer service, web experience, products, or services. They can also help an organization get to know their customers in order to better communicate with them.
The best survey questions typically include an overall company rating, a rating of their offerings or customer service experience, and some open-answer questions so that customers can give constructive feedback.
Popular types of customer service satisfaction survey questions are as follows or, for a quicker version, jump down to our visual.
What Are Customer Satisfaction Survey Questions?
Customer satisfaction survey questions are specific queries designed to assess how pleased customers are with a company’s products, services, or experiences. These questions help businesses gather valuable feedback to identify strengths and weaknesses in their offerings and customer service practices. By understanding how happy their customers are, businesses can make informed decisions to improve quality, enhance customer service, and increase customer loyalty.
The questions in customer satisfaction surveys are used to gauge customer needs, understand problems or weak points in a company’s offerings, or determine clearer routes of communication. These questions often come in the form of a follow-up email or popup window and typically include a rating scale, though they can sometimes be left open-ended.
Deciding exactly which rating scale to use and what questions to ask can be confusing. We’ve gathered some of the most helpful survey questions below so that business owners can browse the issues that are important to them and craft the perfect customer satisfaction survey.
Customer Service Specific Questions

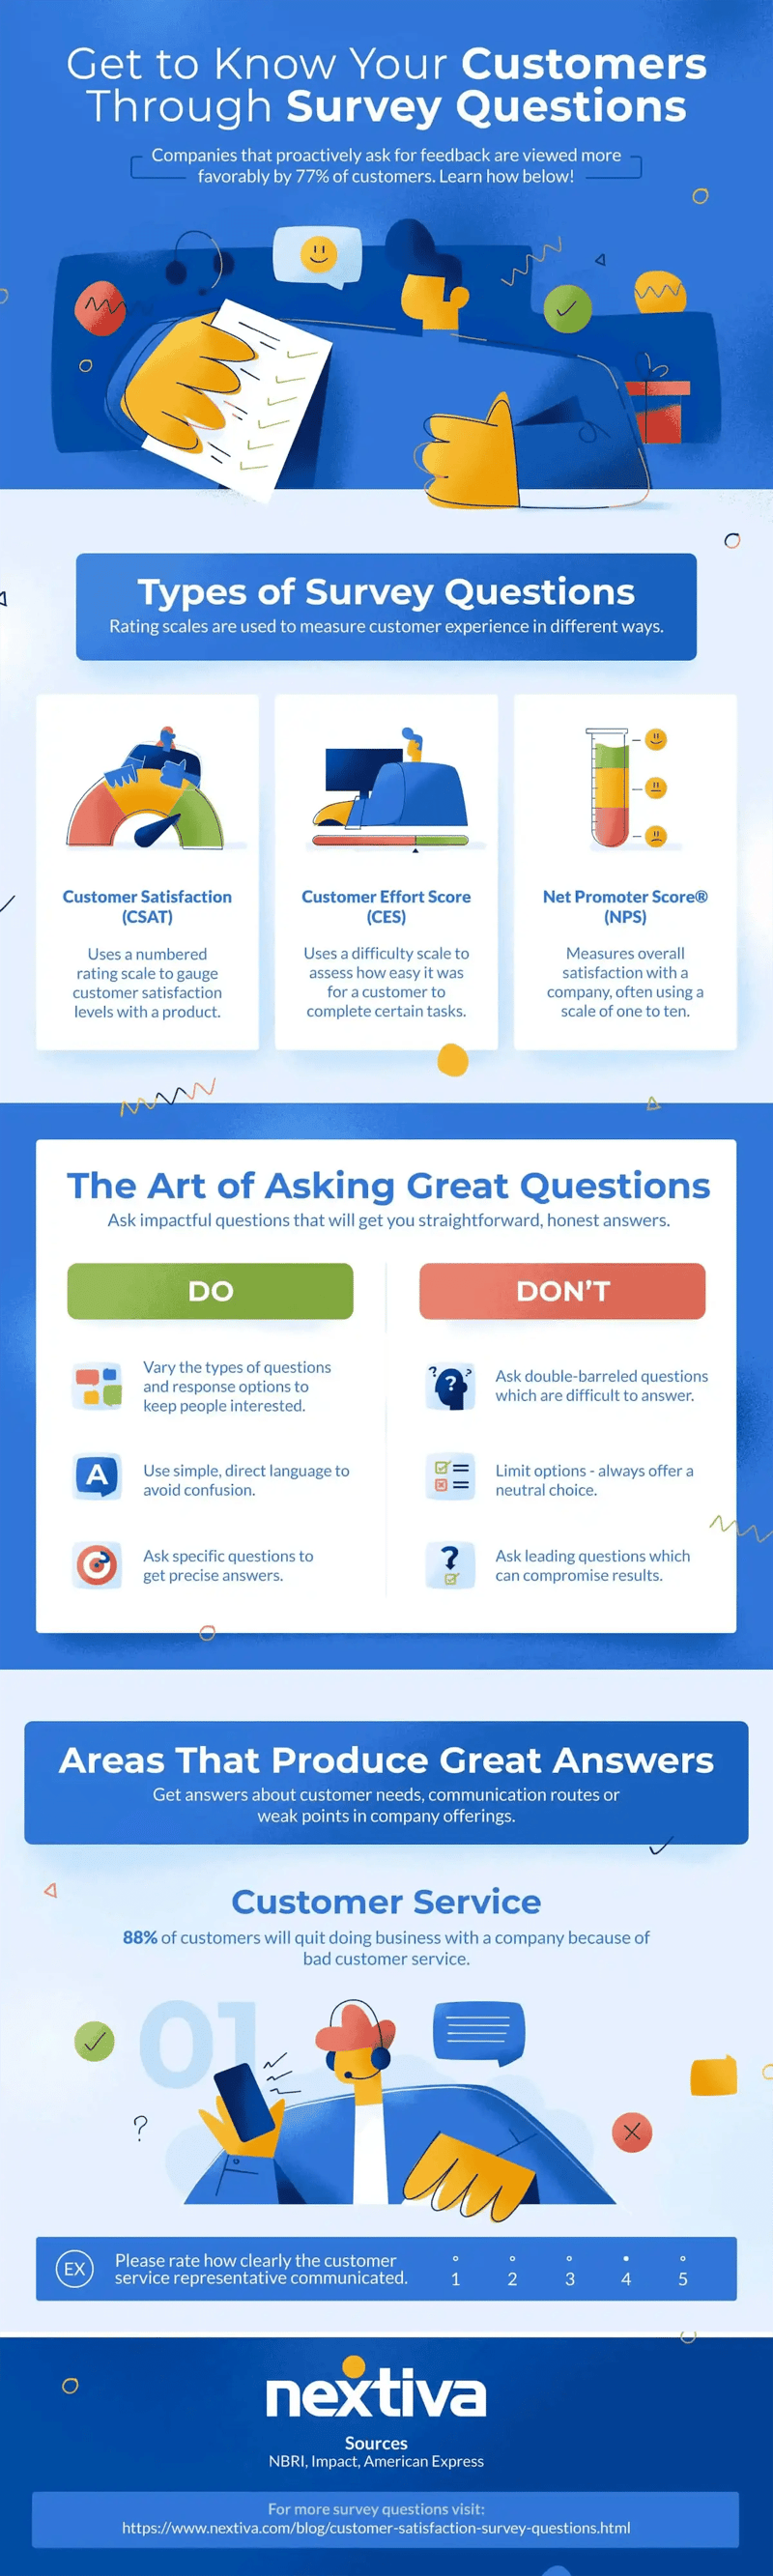
Customer service questions are used to measure how effective a company’s customer service department is. They can include questions about the overall customer service experience and the ease with which the customer’s questions were answered, or they can be about the representative who assisted them specifically.
- Please rate the service provided by the [company] representative.
- Please rate how clearly the representative communicated.
- Please rate the friendliness of the representative.
- Did your representative resolve your issue completely?
- Was your inquiry resolved in a timely manner?
- How many representatives assisted you today?
- Was your representative knowledgeable about the company/policies/product?
- Did your representative make you feel valued as a customer?
- On a scale of 1-10, how much effort did you have to put forth to solve your problem?
- On a scale of 1-10, how easy did [company] make it to handle your issue?
Website and User Experience Questions

These types of questions can help a business gauge how user-friendly its website, app, or processes are. They can also determine which features are used, which are not, and whether new features are needed.
- How would you rate your experience using [company]’s web portal?
- On a scale of 1-10, how easy was it to find what you were looking for on [company]’s website?
- Did the website load efficiently?
- On a scale of 1-10, how easy was [feature] easy to use?
- What was the reason for your visit to [company]’s website?
- Which of [company]’s features is/are most valuable to you?
- On a scale of 1-10, how would you rate our installation/onboarding experience?
- Was [company]’s website aesthetically pleasing?
- Rate the quality of [company]’s vendor options.
- Rate your level of satisfaction with the variety of options offered.
Product, Shipping, and Warranty Questions

Questions about the actual product (and how it’s delivered or warranted) can provide a company with knowledge about which features are most valuable to their customers, which could use improvement, and if their product is meeting expectations.
- On a scale of 1-10, how well does our product meet your needs?
- What product features are the most valuable to you?
- Are there any features that we’re missing?
- If you could solve one problem with our product, what would it be?
- On a scale of 1-10, how would you rate the value of our product for the money spent?
- Which of the following words would you use to describe our product?
- How would you rate the following services?
- How would you rate the quality of this service?
- Did our product/services meet your expectations today?
- On a scale of 1-10, how satisfied are you with our shipping options?
- Did [product] arrive on time?
- Did the description of [product] on our website accurately represent what you received?
- On a scale of 1-10, how would you rate our warranty/repair experience?
Related: See how we turned our customer reviews into a blog
Customer Loyalty Questions

These questions are used to determine which customers are advocates for the company and which are at risk of taking their business elsewhere. By asking the customer’s level of satisfaction with the company or willingness to recommend the company, organizations can gain insight into how loyal their customer base is.
- How likely are you to recommend [company] to a friend or colleague?
- How likely are you to use [company]’s services again?
- Was this your first time working with [company]?
- Will you purchase more products from [company] in the future?
- Would you identify yourself as a loyal customer of [company]?
- Compared to our competitors, how would you rate our product?
- How frequently will you use [company]’s product?
- On a scale of 1-10, how strongly do you feel that [company] acts in your best interest?
- On a scale of 1-10, how competitive do you feel our prices are?
- How would you feel if you could no longer use [company]’s product?
Related: How to Write 10x Better Customer Service Emails (+Templates)
General Marketing Questions

The marketing department can gain valuable insight into how customers are finding out about the company, what platforms they are using.
- Where did you learn about [company]?
- Which of our products/services are you interested in?
- How would you explain our product/service/offering to a friend, family member, or colleague?
- Would you like to receive more information about new products or special offers?
- Are you following [company] on social media? If so, which platforms?
- Do you subscribe to [company]’s email newsletter?
- Do you read [company]’s blog?
- Which competitors did you consider before choosing [company]?
- Are there any communication channels you would prefer we use?
- What can we do to improve your experience with [company]?
- What would you use as an alternative if [company]’s services were no longer available?
The marketing survey questions help assess how well a company’s marketing strategies are working and, at the same time, whether you’re able to read customer’s minds and offer the services they’re actually looking for.

Customer Satisfaction and Demographics Questions

Questions about the overall opinion of a company should almost always be included in a customer satisfaction survey. This gives the company an idea of how the customer views them as a whole. Demographic questions help gather insight into exactly who their customers are.
- Overall, how satisfied are you with [company]?
- What is the primary benefit you have received from [company/product]?
- Select your age group from the ranges below:
- Select your level of education:
- Select your employment status:
- Select your range of household income:
- Select your marital status:
- What is your ethnic origin?
- Do you have children/dependents?
- Enter your zip code below:

Why Are Customer Surveys Important?
Surveys are useful in gauging how an organization’s customer base views them, their products or services, and their interactions. Without surveys, it would be difficult to get an idea of how customers are truly feeling.
Companies who listen to their customers’ praises, complaints, and opinions ensure their future growth and success by making needed improvements or altering their communication strategies.
Surveys can be deployed strategically to identify specific types of improvements that need to be made. For example, they can be sent out after a product return to find out exactly why the item didn’t meet the customer’s needs. They can also be deployed after a drop in sales volume to find out exactly what went wrong.
Here are a few more reasons why creating customer satisfaction surveys is essential for any business looking to improve and grow:
- A satisfaction survey provides direct insights into what your customers expect from your products and services, which makes it much easier to tailor your offerings to meet their needs more effectively.
- Regular feedback can help you identify specific areas where your business can improve, whether it’s the quality of customer service, the user experience on your website, or the functionality of your products.
- Surveys can help you measure customer sentiment and, thus, how well your business is doing over time (and against competitors). They allow you to track customer satisfaction scores and see the direct impact of any changes you make.
- The data collected from customer satisfaction surveys can guide strategic decisions and prioritize resource allocation to areas that will most improve the customer experience.
- By demonstrating that you value their opinions and are committed to making improvements based on their feedback, you can build stronger relationships with your customers. This often leads to higher retention rates because they feel more valued.
If an overwhelming response is received on any one topic, that can be used to identify where changes need to be made before a customer is lost.
Remember, while finding out what’s wrong can be helpful, it’s also important for companies to send out surveys when business is good. Sending out surveys when business is doing well is essential for maintaining success because it helps companies understand what is driving their success. Regular feedback can also reveal unseen issues that you can tackle before they become a bigger issue.
Use a customizable survey tool plugged into your communication software to save time and effort in creating and sending surveys and collecting and analyzing data.
Types of Customer Satisfaction Survey Questions
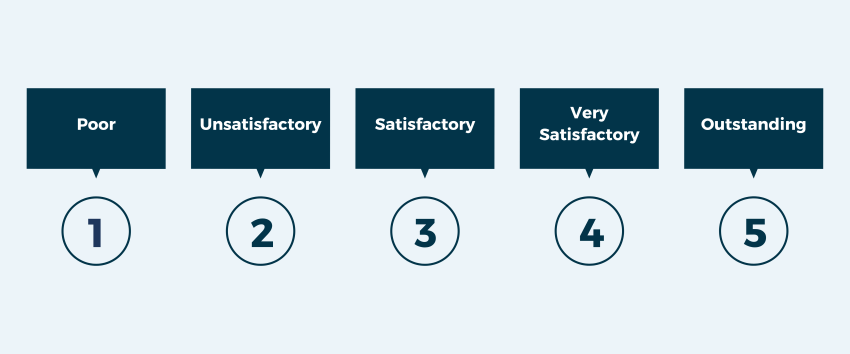
Rating scales are used to measure customer experience in different ways. The most popular scales are:
- Customer Satisfaction (CSAT): Commonly used to gauge customer satisfaction levels with a purchased product, the CSAT scale typically uses a rating between one and five. One represents the lowest level of satisfaction, while five represents the highest.
- Customer Effort Score (CES): This scale is used to measure how easy it was for a customer to complete certain tasks, like speaking with customer service or using an online help portal. The scale usually ranges from very easy to very difficult.
- Net Promoter Score® (NPS): Probably the most straightforward of the three, the NPS measures overall satisfaction with a company, often using a scale of one to ten.
Retaining a customer is much less expensive than gaining a new one, and surveys can ensure that an organization’s customers are loyal. Sending out a survey also shows the customer that a company cares and is always striving to improve its offerings. There are countless benefits to customer satisfaction surveys, and businesses large and small should be executing them early and often.
Nextiva Helps You Make Better Business Decisions
Nextiva’s survey software makes it easy for you to understand your audience, make better business decisions, and solve customer issues.
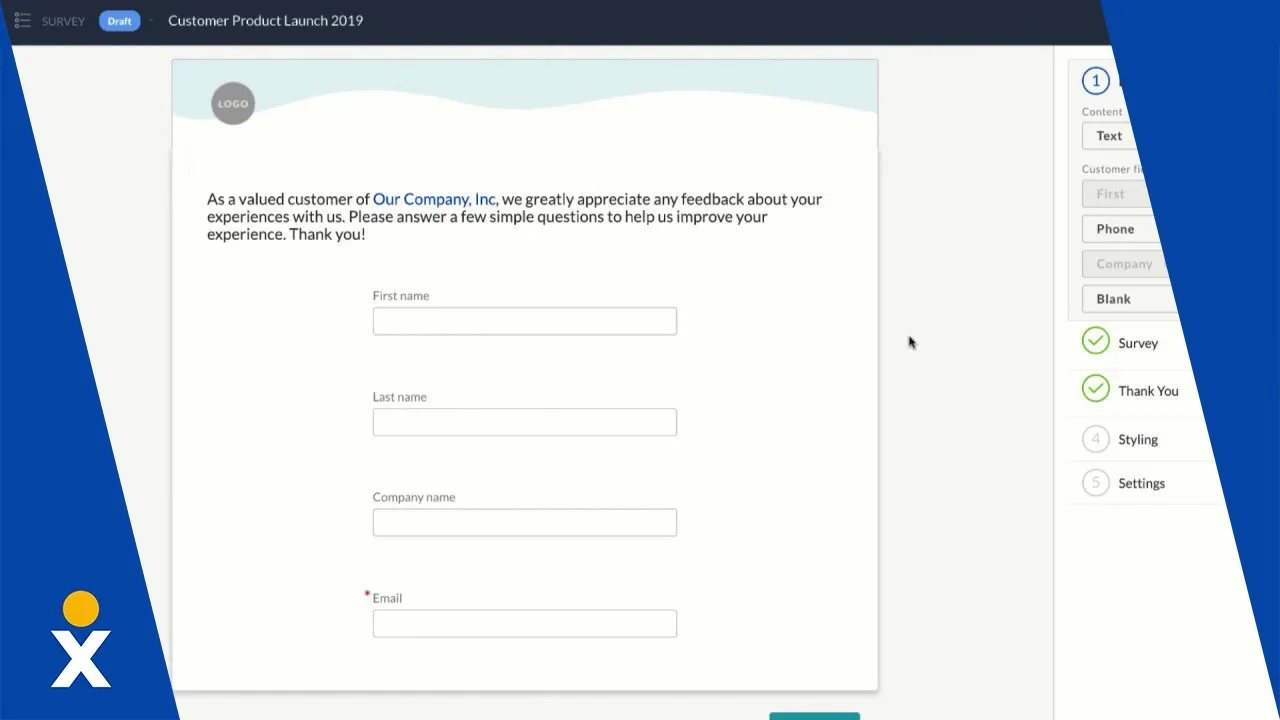
Design short or long surveys, using a variety of question types. Custom options allow you to build a survey that asks questions in just the right way. Plus, you can easily customize your surveys to make it look and feel like your brand. Make the entire experience with your business consistent and clean.
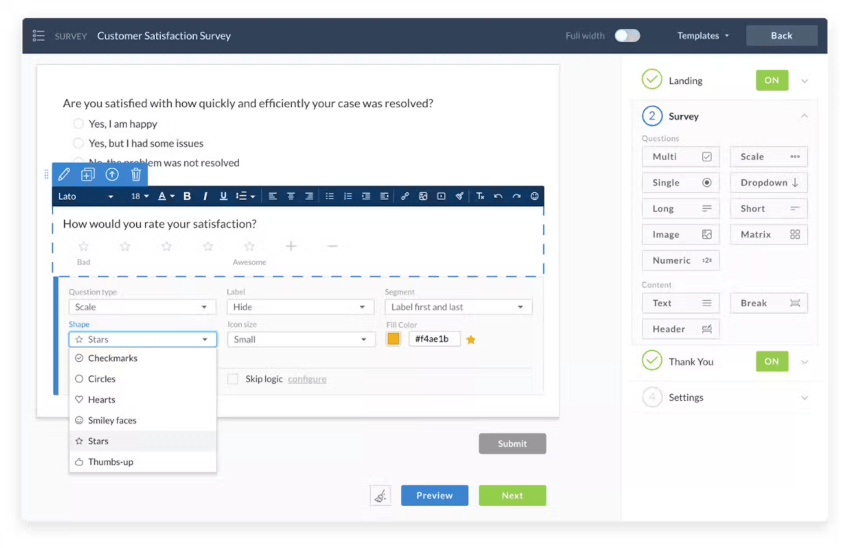
Our online survey software has these features:
- Create Surveys in Minutes
- Drag-and-Drop Functionality
- Website Embeds
- 9 Built-In Question Types
- Design Surveys like a Pro
- Customizable Branding
- Responsive Design
- Question Skip Logic
- Save Time and Work Efficiently
- Duplicate Existing Surveys
- Create Templates
- No Coding Necessary
- Analyze Responses Instantly
- View Results in Real Time
- Emailed Responses
- Capture Incomplete Responses
| Wow your customers every day. Get the answers your business needs with survey software and level up the customer experience in every interaction. Elevate your CX. |
Get to Know Your Customers Through Survey Questions:
Customer Satisfaction Survey Questions FAQs
The best customer satisfaction survey questions are tailored to gather specific feedback across various touchpoints on the customer journey that can directly inform improvements in products or services. Common effective questions include:
“How satisfied are you with our products/services?”
“How easy was it to find what you needed on our website?”
“How well did our customer service representative resolve your issues?”
Three key questions that can effectively gauge customer service satisfaction and help assess the efficiency, empathy, and effectiveness of the customer service team are:
“How would you rate the quality of our customer service?”
“How well did our customer service team understand your needs?”
“Was your issue resolved to your satisfaction?”
A general survey aiming to capture comprehensive feedback might include these five questions:
“How satisfied are you with our product/service?”
“What features do you value the most/least in our product/service?”
“How does our product/service compare to our competitors?”
“What would you change about our product/service?”
“How responsive have we been to your questions or concerns?”
These questions cover satisfaction, preferences, competitive positioning, desired improvements, and customer support responsiveness.
The four main types of customer satisfaction surveys are:
Net Promoter Score (NPS) – This measures customer loyalty by asking how likely they are to recommend your product/service to others on a 0-10 scale. Scores of 0-6 are detractors, 7-8 are passives, and 9-10 are promoters.
Customer Satisfaction Score (CSAT) – This directly asks customers to rate their overall satisfaction with your product/service, typically on a 1-5 or 1-7 scale from very unsatisfied to very satisfied.
Customer Effort Score (CES) – This measures the ease of experience by asking how much effort was required to get an issue resolved, use a product, etc. on a scale.
Product-Market Fit Survey – This aims to determine if your product meets customer needs before launch by asking questions about potential usage and demand.
Other common types include post-purchase surveys about checkout/delivery experience, usability surveys about website/app navigation, and open-ended surveys to collect qualitative feedback.