Reports provide business-critical data to help companies identify what strategies are working and which ones need more attention. For example, a vending company operates in three states, and the owner wants to run and send monthly reports on each location to the respective managers, but would rather not have to create the same report every month for each location and remember to send them. The owner’s time is better spent on more important tasks.
With Nextiva Voice Analytics businesses can set custom reports to automatically run and be distributed on a specified schedule.
NOTE: Please be aware that Call Log and Period over Period reports cannot be run as scheduled reports
From the Nextiva Voice Admin Dashboard, click Analytics in the top menu bar. On the Nextiva Voice Analytics Home Page, click the Save tile or select Saved in the top menu.
Completing the Schedule Form
Click Scheduled Reports > Scheduled report + > complete the required field below and click Submit.
- Enter a name for the schedule.
- Select a custom report. For information on creating custom reports, click here.
- Determine the time frame for running the report.
- Fixed: Define the specific start and end date and time during which data will be collected.
- Relative: Control when to collect data, in relation to when the report will be distributed. For example, selecting Units: Months and Qty: 1 will generate the report to include data one month prior to the distribution date. The time range defines the start time on the first day and the end time on the last day of the report.
- Select the time zone.
- Choose the frequency for delivering the report (Minutes, Hourly, Daily, Monthly, or One Time) and define the intervals.
- Choose when to end the recurrence, Forever, or Custom Date. For Custom Date, select the end date.
- Enter the email address for the recipient(s) of the report. Use a comma to separate multiple addresses (up to 25).
An email with a link to the report, sent from analytics@nextiva.com, will arrive in the inbox of the provided email address(es) per the schedule.
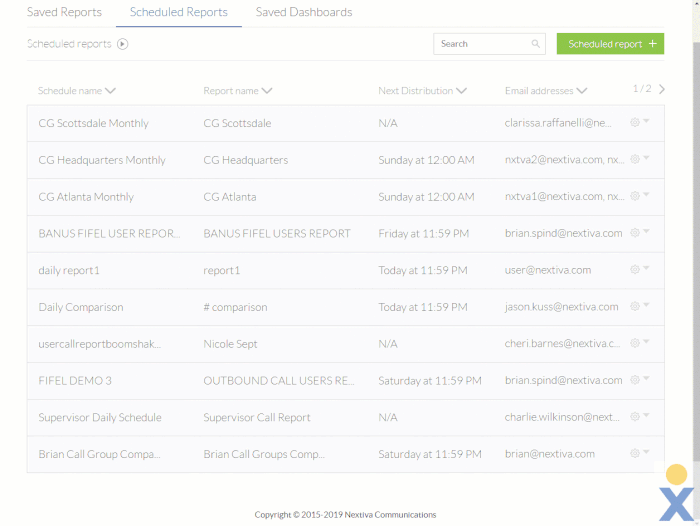
View schedules by navigating to Saved > Scheduled Reports. Edit or delete a schedule by clicking the Gear icon corresponding to the desired schedule.
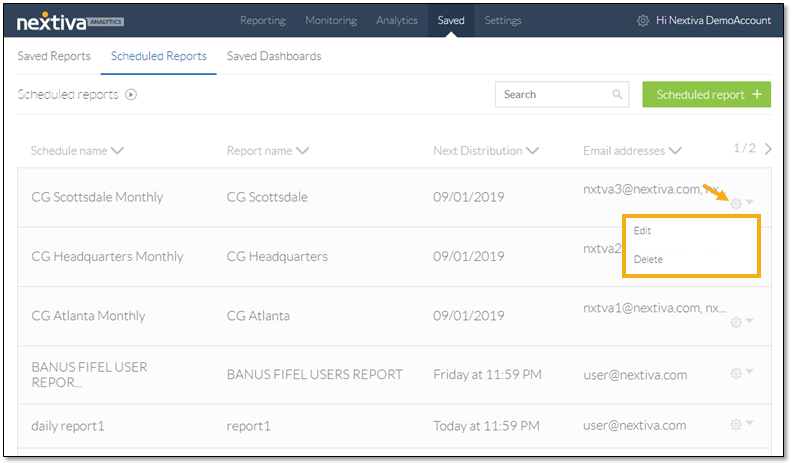
Edit or Delete Schedule