The ideal network involves your Internet Service Provider (ISP) connecting onsite to a stand-alone modem that connects to a router, preferably a router recommended to you from Nextiva. If you have more devices on your network than ports on your router, you can connect a switch to your router to expand the number of ports.
There are three main areas that you should be concerned with regarding your Cisco Meraki Network Appliance. They are:
Firewall Access Rules: The most straightforward way to ensure that traffic is not being blocked is to allow all traffic to and from 208.73.144.0/21 and 208.89.108.0/22. This range covers the IP addresses from 208.73.144.0 – 208.73.151.255, and 208.89.108.0 – 208.89.111.255.
DNS Server Configuration: If the DNS server being used is not up to date and consistent, devices (Polycom phones in particular) can become deregistered. Nextiva always recommends using the Google DNS servers of 8.8.8.8 and 8.8.4.4.
Traffic Shaping (Quality of Service – QoS): Quality of Service (QoS) Traffic Shaping reserves a specific amount of bandwidth on your network solely for VoIP traffic to improve audio quality.
Cisco Meraki Routers (MX Series and Z1 Cloud Management) are common network appliances that allow entering Firewall Access Rules and Bandwidth Management rules to allow for unimpeded flow of VoIP traffic.
Though there are a number of different models and firmware versions, and though the instructions and graphics may be different, the information below should assist a Network Administrator with entering Nextiva’s Firewall Access Rules, selecting a public DNS, and entering Quality of Service (QoS) configuration rules.
A common recommendation for Cisco Meraki network appliances is to use Google Public DNS servers to prevent DNS resolution failures, leading to deregistrations. Please see the information below to configure your Cisco Meraki network appliance.
Click the Links Below to Jump to the Corresponding Section:
To Enter Firewall Access Rules:
- Log in to your Meraki Dashboard using the Meraki Dashboard located here. Alternatively, go to wired.meraki.com or navigate to the IP address of the Meraki.
- Locate the Firewall option, usually located under Security Appliance.
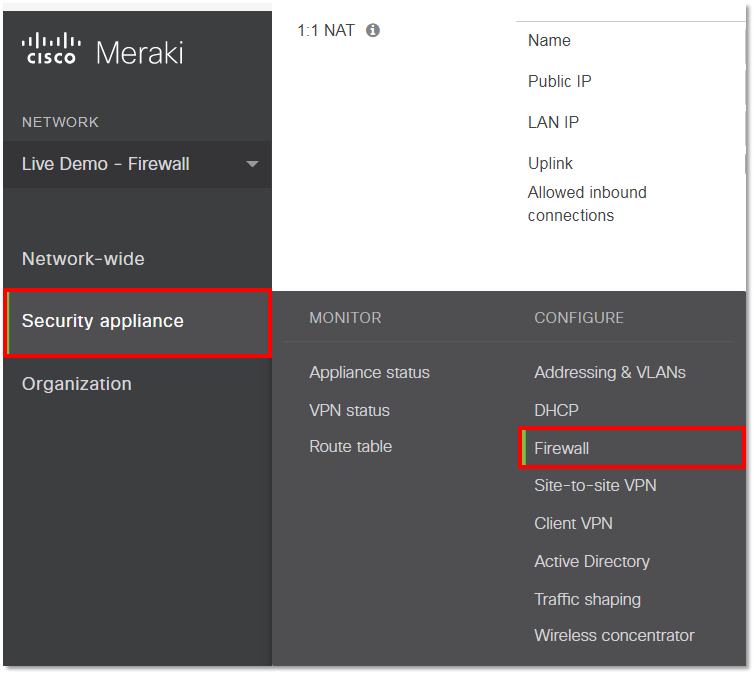
Firewall Selection
- Select Add a rule under Outbound Rules.
- Enter the following information in the fields:
- Policy: Allow
- Protocol: Any
- Source: Any
- Src Port: Any
- Destination: 208.73.144.0,208.73.151.255 (two IP values separated by a comma)
- Dst Port: Any
- Comment: Allow Nextiva Traffic Range 1
- Select Add a rule under Outbound Rules.
- Enter the following information in the fields:
- Policy: Allow
- Protocol: Any
- Source: Any
- Src Port: Any
- Destination: 208.89.108.0,208.89.111.255 (two IP values separated by a comma)
- Dst Port: Any
- Comment: Allow Nextiva Traffic Range 2
- Scroll down and click Save Changes to save both of the rules. If there are any additional firewall rules, move the Nextiva rules to the top of the list.
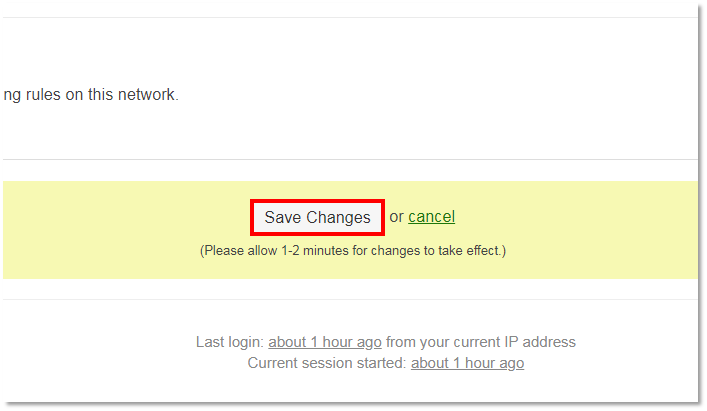
Save Changes
To Configure DNS Servers:
- Log in to your Meraki Dashboard using the Meraki Dashboard located here. Alternatively, go to wired.meraki.com or navigate to the IP address of the Meraki.
- Locate the DHCP option, usually located under Security Appliance.
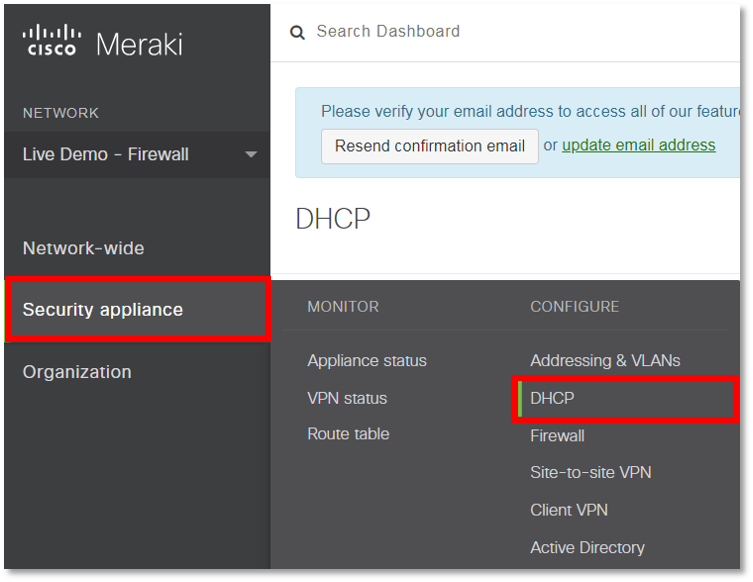
DHCP Selection
- Click the drop-down menu and select Use Google Public DNS next to DNS nameservers.
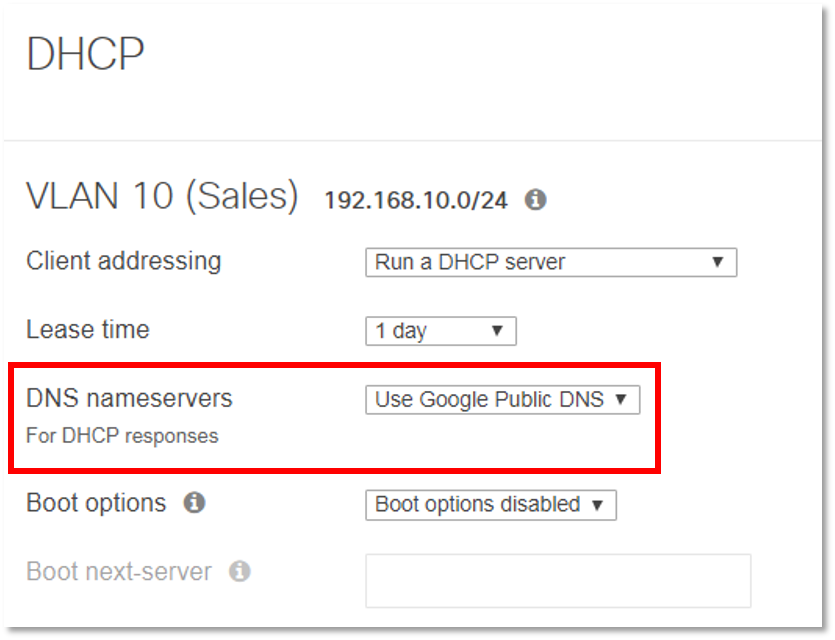
Google Public DNS Selection
To Enter Traffic Shaping (QoS) Rules:
- Log in to your Meraki Dashboard using the Meraki Dashboard located here. Alternatively, go to wired.meraki.com or navigate to the IP address of the Meraki.
- Locate Traffic Shaping, usually located under Security Appliance.
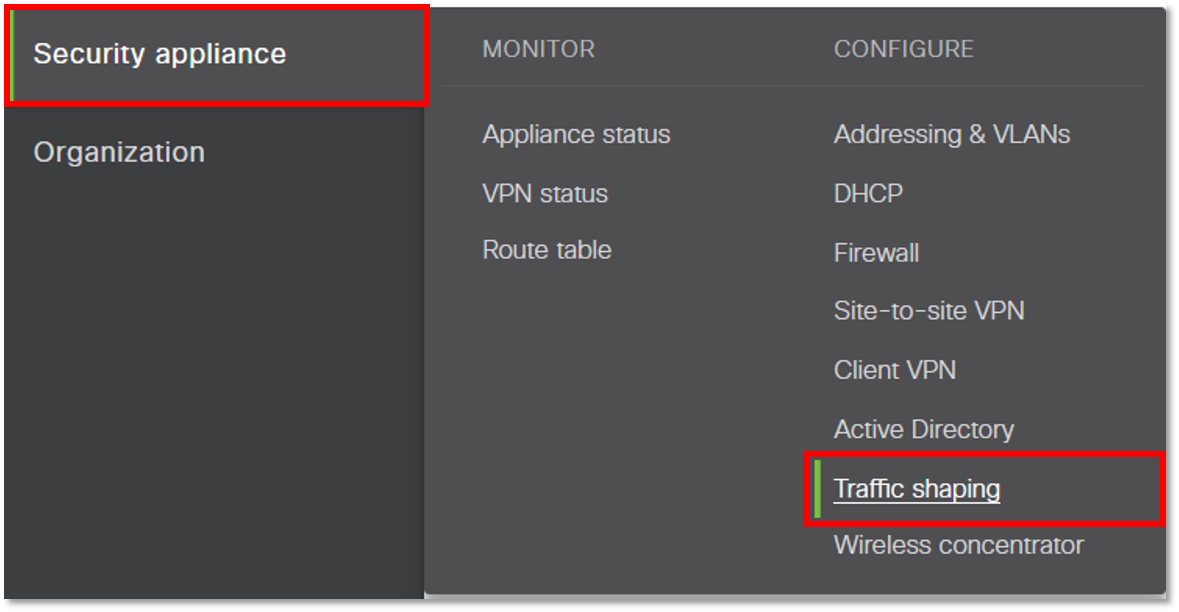
Traffic Shaping Selection
- Under Traffic Shaping Rules select Create a new rule.
- Select Add+
- Select Custom Expressions and enter the following required information:
- Custom Expressions: 208.73.144.0/21
- Select Add expression.
- Enter the following information:
- Custom Expressions: 208.89.108.0/22
- Select Add expression.
- Click out of the window and select the following information:
- Enable SpeedBurst: Disabled/Unchecked
- Bandwidth Limit: Ignore network per-client limit (unlimited)
- Priority: High
- DSCP tagging: 46 (EF – Expedited Forwarding, Voice)
- Verify the rules are entered correctly and select Save Changes.
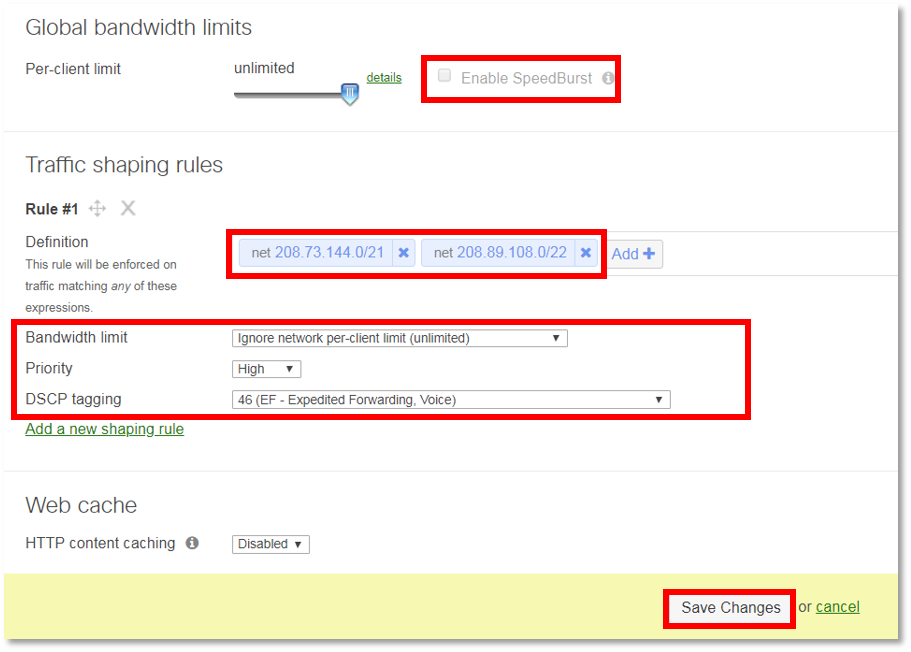
Completed Traffic Shaping Example