Overflow adjusts call routing for callers in the queue by signaling a specified action after a certain time. If a queue receives a large number of calls and the callers are waiting for more than the predefined waiting time, the overflow feature will trigger.
Overflow can be beneficial if there is a long wait time and can be configured to move Overflow calls from a busy Call Center to one that has more availability, to improve the Call Center experience. If your Call Center Queue Length has been reached and another call comes in, Overflow will be triggered and follow the routing policy configured in the steps below.
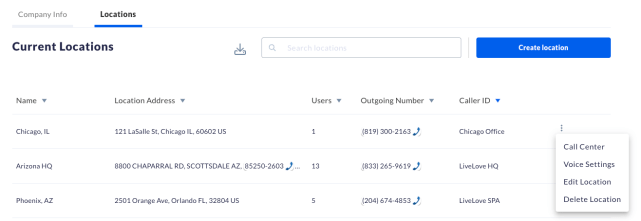
Navigating to Call Center from NextOS (If purchased after Dec. 2020)
Navigating to Call Center from Nextiva Voice (If purchased before Dec. 2020)
The Configuration Portal launches in a new tab for convenience. Select Call Center on the left Navigation Pane, then select Call Centers.

If you have more than one Call Center, you will see a list of Call Centers on the next page. Find the Call Center that you wish to configure and select Edit at the end of the row, or on the Call Center name directly.

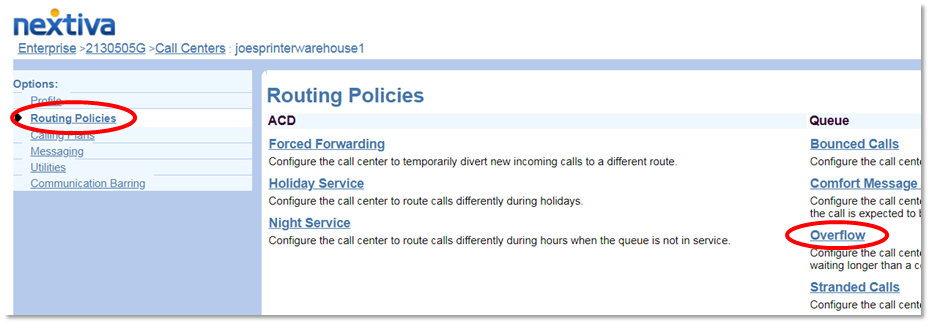
On the Call Center Profile screen, on the left under Options, click Routing Policies, then click Overflow.

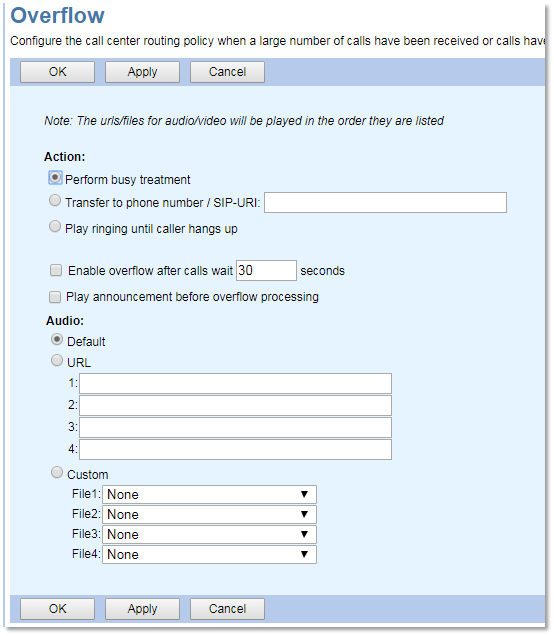
The five configurable Overflow settings include:

- Perform busy treatment: Performs standard busy treatment for Overflowed calls after Overflow is triggered.
- Transfer to phone number / SIP-URI: Transfers the Overflowed calls after Overflow is triggered.
- Play ringing until caller hangs up: Continually plays a ring when Overflow is triggered.
- Enable overflow after calls wait X seconds: Specifies the amount of time before Overflow treatment is triggered.
- Audio: Plays the Default Nextiva announcement, plays an audio file located online, or you can select a custom greeting. Announcements are chained and played back to the caller one after another. For information on uploading announcements, click here.
Click OK or Apply to save any changes.


