A series of widgets can be displayed on the screen for users to see gamifications and totals of the workitems that they have handled. There will be a Home Tab with the widgets stacked on top of one another. The widgets are created and configured by an administrator. Then, tabs are created, widgets are assigned to tabs, and the tabs are assigned to users or user profiles. The user configuration will take precedence over the profile one. Users will need to navigate to the Home Tab to see them, in order to see the Homepage when logging in it must be configured to the right position.

NOTE: The Home icon should be in the furthest left position.
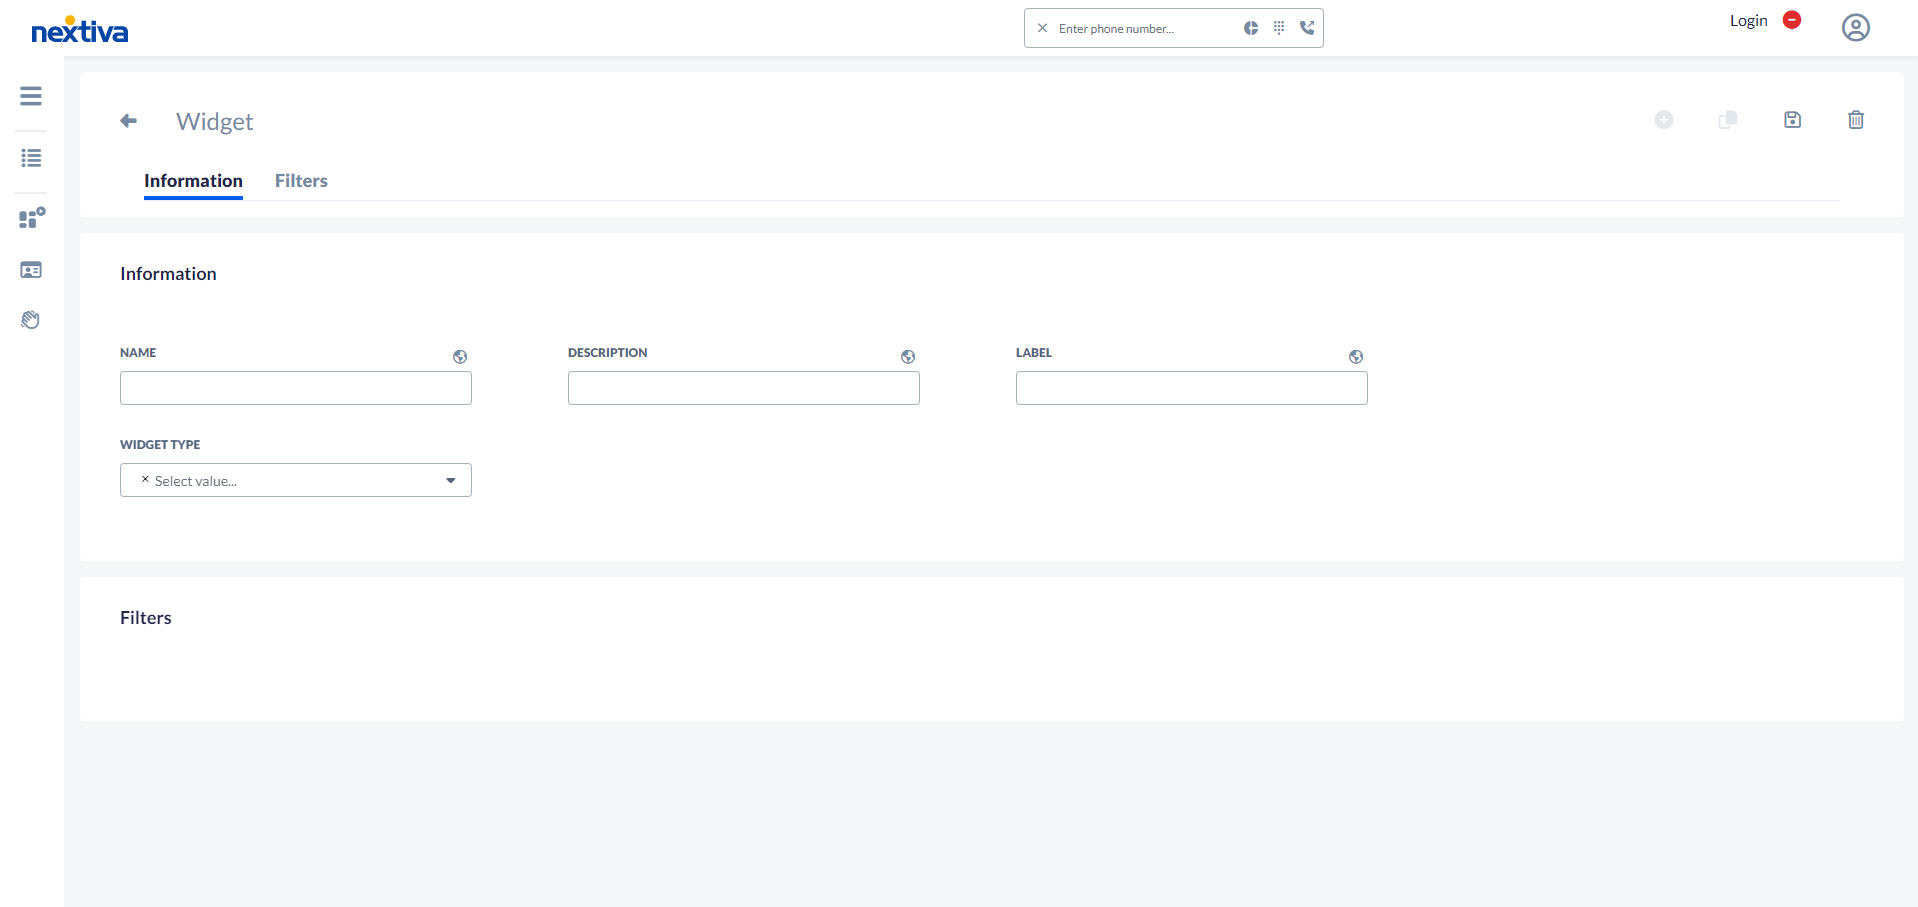
Configure a Widget
To create and configure a widget:
- In the Options Menu, search for the Widget Icon.
![]()
- Click the + icon next to the search bar in the center of the screen.
- You will be directed to a new screen with two tabs: Information and Filters.

- In the Information Tab, you determine the:
- Name. NOTE: It’s very important to name widgets as specifically as possible so it’s clear when agents see them.
- Description
- Widget Type – The Widget Type tells the graphical representation of the widget and some information.
- Time Interval – Weekly or Daily. A week of workitems or day of workitems. NOTE: The Time Interval for the Voicemail,and Personal Callbacks will be the default date range, users can change it in these widget’s settings.
- Refresh Rate – The data can only be refreshed manually, in the future there will be an option to be refreshed in specific time intervals. Note: Widgets are automatically refreshed when you navigate to the home page.
- In the Filters Tab you set the Media Type for the widget. The Media Types available are:
- Chat
- Inbound Call
- Inbound Extension Call
- Inbound Fax
- Inbound SMS
- Outbound Call
- Outbound Email
- Outbound Extension Call
- Outbound SMS
- Predictive SMS
- Progressive Workitem
- Quarterback/Predictive
NOTE: Filters, such as Media Type, are used to specify the type of workitem to be shown in the widget. If there are none in the list, then all possible filters are selected. E.g. all of the media types or all of the dispositions.
NOTE: For certain widgets, you can also filter by Queues, Dispositions and Campaigns.
NOTE: Workitems must be dispositioned for the widget to be updated.
Widget Types
The widget types are:
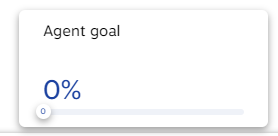
- Agent Goal is a percentage of an agent’s performance compared to a goal configured by an administrator. The goal can be set in the Goal field when configuring the widget.

- Agent KPI shows statistics for filtered workitems for an agent. If you select Agent KPI as the Widget Type, the KPI field will appear. There are six KPI types:
- Average Handle Time – The average time that an agent spends on their workitems.
- Average Talk Time – The average time that an agent spends talking to customers.
- Average Wrapup Time – The average time it takes an agent to disposition a workitem after terminating.
- Total Handle Time – The total time that an agent has spent handling workitems
- Total Talk Time – The total time that an agent has spent talking to customers.
- Total Wrapup Time – The total time that an agent has spent in wrap up.
Workitems are made up of two parts: Talk Time and Wrapup Time. Talk Time starts from when the workitem is answered to when the workitem is terminated. Wrapup Time includes dispositioning the workitem and other activities such as updating contact information. Handle Time is the sum of Talk Time and Wrapup Time.
NOTE: There can only be one KPI per widget at a time.
NOTE: You can create multiple widgets to capture as many KPIs as desired.
NOTE: To move Agent KPI widgets on the homepage, drag by the widget’s name.
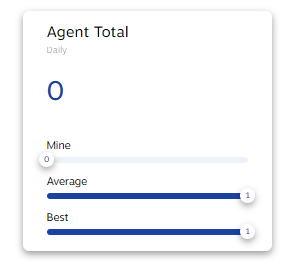
- Gamification: Agent Total shows an agent’s performance for filtered workitems compared to the average performance and the best performance. It will present three lines:
- Mine. The total number of filtered workitems handled by the agent.
- Avg. Calculated by the total number of filtered workitems divided by the number of agents assigned to the widget. NOTE: This field will show the same number for every user that has the widget assigned to them.
- Best. This shows the best performance of any user that has the widget assigned to them.
NOTE: This field will show the same number for every user that has the widget assigned to them.

- Gamification: Disposition Total shows how workitems are being dispositioned over time. The disposition(s) to filter by can be configured in the Disposition list under the Filters tab when creating the widget. It will present three lines:
- Mine. The total number of filtered workitems dispositioned by the agent.
- Avg. Calculated by the total number of filtered workitems divided by the number of agents assigned to the widget. NOTE: This field will show the same number for every user that has the widget assigned to them.
- Best. This shows the best performance of any user that has the widget assigned to them. Note: This field will show the same number for every user that has the widget assigned to them.
- Occupancy is a graphical representation of how long an agent has spent on certain statuses when logged into the ACD.
- This widget can be compared to other widgets. Hovering your mouse over parts of the chart will show additional information. Clicking on the legend will toggle statuses back and forth.
NOTE: Occupancy wiil follow rules configured for the user. If that user is allowed to monitor other users it will show the totals for all users.
- This widget can be compared to other widgets. Hovering your mouse over parts of the chart will show additional information. Clicking on the legend will toggle statuses back and forth.
- Personal Callbacks are created by dispositions of other workitems in the Nextiva system. They are workitems that come back at a date and time specified by the agent.
- For the Personal Callbacks Widgets, users can select the specific date range they want by clicking the Settings icon.
- Specific workitems can be deleted or rescheduled. If rescheduled, a calendar will pop-up to choose a new date. It will then be positioned in the list based on the callback date.
- Multiple Callbacks can be opened by holding down the Command key or the Windows meta tag open.
- This widget can be resized compared to other widgets.
NOTE: There is a visual loading bar that will appear on the top border of the widgets when changes are made or when an action is taken.
NOTE: For an agent to be able to schedule a callback from the Personal Callback widget, they must have an Authority, where the Domain should be “type”, the Entity should be “callback” and Values should be “delete” and “update”.
Supervisor Widgets
These are widgets that supervisors specifically can also add to their Homepage.
- Queue KPI shows statistics for filtered workitems in a queue. A supervisor can select from the following to monitor within the widget:
- Abandoned Calls
- Answered Workitems
- Available Agents
- Busy Agents
- In Queue Workitems
- Logged In Agents
- No Answer Agents
- Total Transfers (Workitems)
- Working Agents
- Wrapup Agents
- Queue SLA is the agreed upon level of service that is considered acceptable at the queue level. The SLA is based on one of the three formulas: NOTE: Only one SLA can be selected to be displayed in the widget for all the selected queues.
- SLA 1 (Answered Within Threshold + Dropped Within Threshold) / All – Shows the percentage of calls that met the threshold or were dropped out of the total numbers of the call.
- SLA 2 (Answered Within Threshold + Dropped Within Threshold) / Answered + Dropped After Threshold – The percentage of calls that meet the threshold. This is a slightly more forgiving percentage than SLA1as it doesn’t include the dropped calls.
- SLA 3 Answered Within Threshold / All – The ratio of the calls that met the target to the ones that didn’t.
- Queue time allows the supervisor to choose one of the three possible queue times to display in the widget for the queues that they select:
- AQT (Average Queue Time)
- CMQT (Current Maximum Queue Time)
- MQT (Max Queue Time)
- NOTE: A supervisor can create more than one Queue time widget if they wish to see more than one queue time.
NOTE: If a supervisor is monitoring two queues and there is an agent in both that is available, the supervisor will see two available agents.
Creating Tabs
A Tab is a way to organize a group of widgets. To create Tabs for the home page:
- In the Options Menu, search for the Home Tab Icon.
![]()
- Click the + icon next to the search bar in the center of the screen.
- You will be directed to a new screen with one tab: Information.
- In the Information Tab you will determine the:
- Name
- Description
- Position – Position is where the tab will appear on the homepage. 1 = The first tab, 2 = the second tab etc…
- You will need to enter a Name and Save. After you press the Save button you will see a second tab: Widgets appear.
- Widgets is where you actually add widgets to the tab. To add a widget click on the + icon. A list of widgets will appear.
- Select the widgets to appear in the tab. Click OK.
Assigning Tabs to Users
To assign Tabs to a User:
- Navigate to that User’s profile.
- Navigate to the Home Tabs tab.
- Click the + icon. A list of configured tabs will appear.
- Select the Tabs to be assigned to the user.
- Click OK.
Assigning Tabs to Users from Profiles
- In the Options Menu, search for the User Profile Icon.
- Select the Profile you want.
- Navigate to the Home Tabs tab.
- Click the + icon.
- Select the Tabs to be assigned to the profile.
- Click OK.
NOTE: Tabs assigned at the user level will take precedence over tabs assigned at the Profile level.