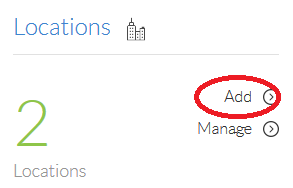
Locations are the physical sites where your phones are based. Your first location was automatically created for you based on your billing address information you filled out before accepting your sales quote. If your business has more than one physical site, you can add additional locations by following the steps below.
- Visit www.nextiva.com, and click Client Login to log in to NextOS.
- From the NextOS home page, select Voice.
- From the Nextiva Voice Admin Dashboard, click the Add link in the Locations tile.
 Add Location
 - Enter the required information as indicated below:
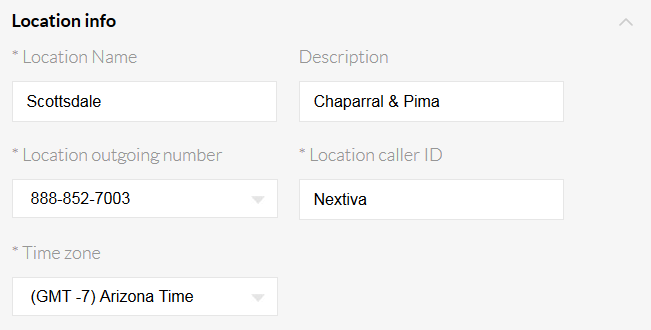 Location Details
- Location name: Name of the location.
- Description: Description of the location.
- Location outgoing number: This will be the default outgoing caller ID number for the users in this location. This can be changed on a per-user basis later.
- Location caller ID: The caller ID name you want displayed for calls made from this location.
- Time zone: Time zone for this location.
- Enter the address information for this location in the fields shown. The address entered here is where emergency services will arrive if 911 is dialed from a number at this location, so please review for accuracy.
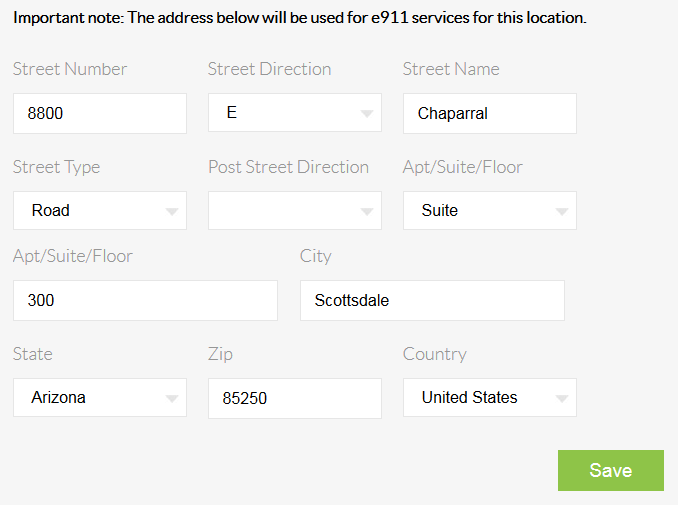 Location Address
- Click the green Save button below the address information. A pop-up message will appear confirming the location has been created.
 Location Added