Managing users for Nextiva Social Media and Reviews

Invite teammates and staff to help manage and create custom social media content, including the ability to instantly reply to posts on social media and review sites – all from one place. If you signed up before July 23, 2024, click here

Adding users

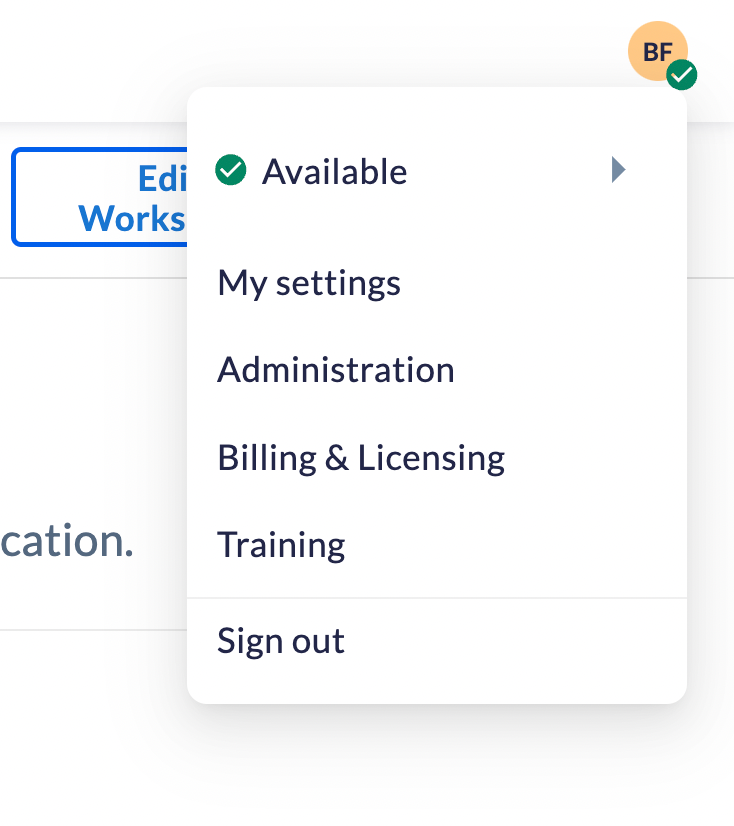
  1. Click your initials in the top right corner and select Billing and Licensing.
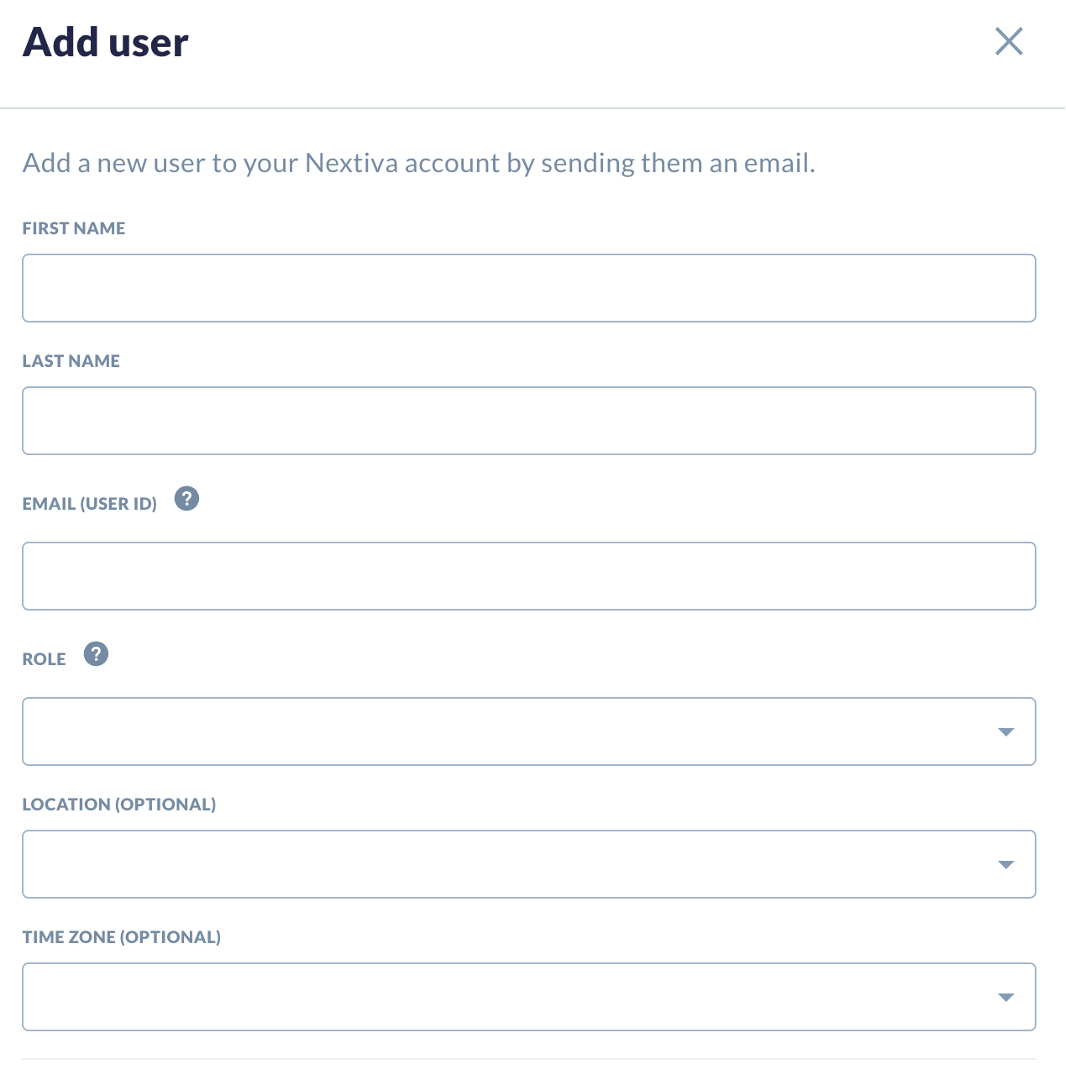
  2. Select Users from the left side of the screen and click Add User. Enter the required information, including first and last name, email, role, location (optional), and time zone (optional).
  3. Click Add License and select the available license from the drop-down. Only available licenses will be displayed in the drop-down.
  4. Select the Workspace(s) the user should access (required). A workspace provides a space to organize content and channels by team, function, role, and more. For more information, click here
  5. Click Create. If the new user has a license that includes voice options, you will be prompted to set up the user’s voice settings. For more information, click here.

Adding users (if signed up before July 23, 2024) 

If you signed up before July 23, 2024, follow these steps to add users. Select the Home icon from the left toolbar. Under the Onboarding tab, select Invite your team. Enter the user’s email address and role, and click Send Invite

Roles: 

  • Admin: Allowed to change settings and respond to interactions in the Unibox. Only the Admin has access to the Onboarding tab. 
  • Member: Can view and respond to interactions in the Unibox.
  • Viewer: Can only view interactions in the Unibox.

The user will receive an email with a link and username to log in. When logging in for the first time, the User will need to select Forgot Password to reset their password. An email will be sent to the email address entered with instructions to reset the password.  

Need additional help? Click here.

Was this article helpful?