Automate actions, such as updating case fields (Priority, Status, Department, Owner, Topic) or manually typing emails, for example, by using Macros and Predefine Text.
A Macro is a single command template used to automatically complete form fields in Nextiva CRM. Instead of repeatedly typing or selecting the same field values while completing forms, you can create and apply macros to automate that task. For example, customers may report the same common issue. Rather than manually completing the form for the same issue each time, you can create a Macro. Agents can then quickly apply the macro to auto-populate the fields in the form.
Predefined Text is saved text that you can insert while writing in a text editor on a form (e.g. Description, Note, Email). Predefined text is most useful when you need to write the same message multiple times. For example, rather than creating a new welcome email for each new customer, you can create predefined text to insert and send when onboarding new customers quickly.
Creating Macros
Users can create Macros from the Create Case Form via a Note, Email, or Log Interaction.
- Click the Plus (+)icon and select
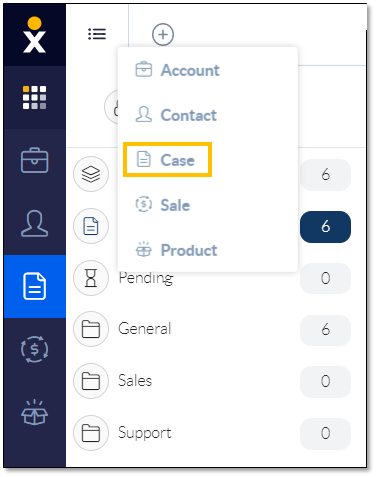
Case Option
- At the top of the form, enter a Case Subject (required).
- Choose the following parameters from the drop-down lists:
- Priority: The urgency of the Case. The priority defaults to Urgent.
- Status: The status of the Case. The status defaults to Open.
- Department: The department to which the Case is assigned.
- Owner: The User to which the Case is assigned.
- Topic: The category that best summarizes the Case.
- In the Description section, enter a summary of the Case. You can format the text, insert links, and add Predefined Text.
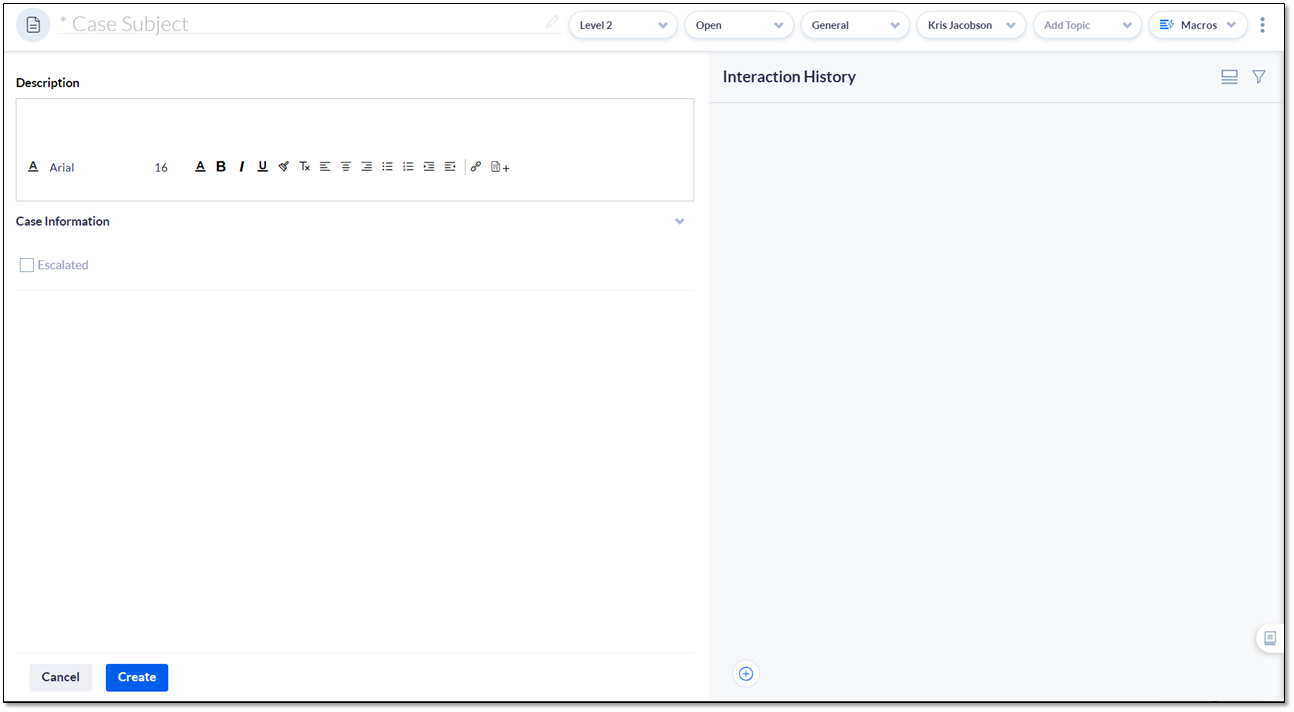
New Case Form
- Create a Note, Email, and Log Interactions by clicking the Plus (+) icon on the bottom-left corner of the Case Interaction feed.
- Click Macros in the top-right corner and select Create Macro.
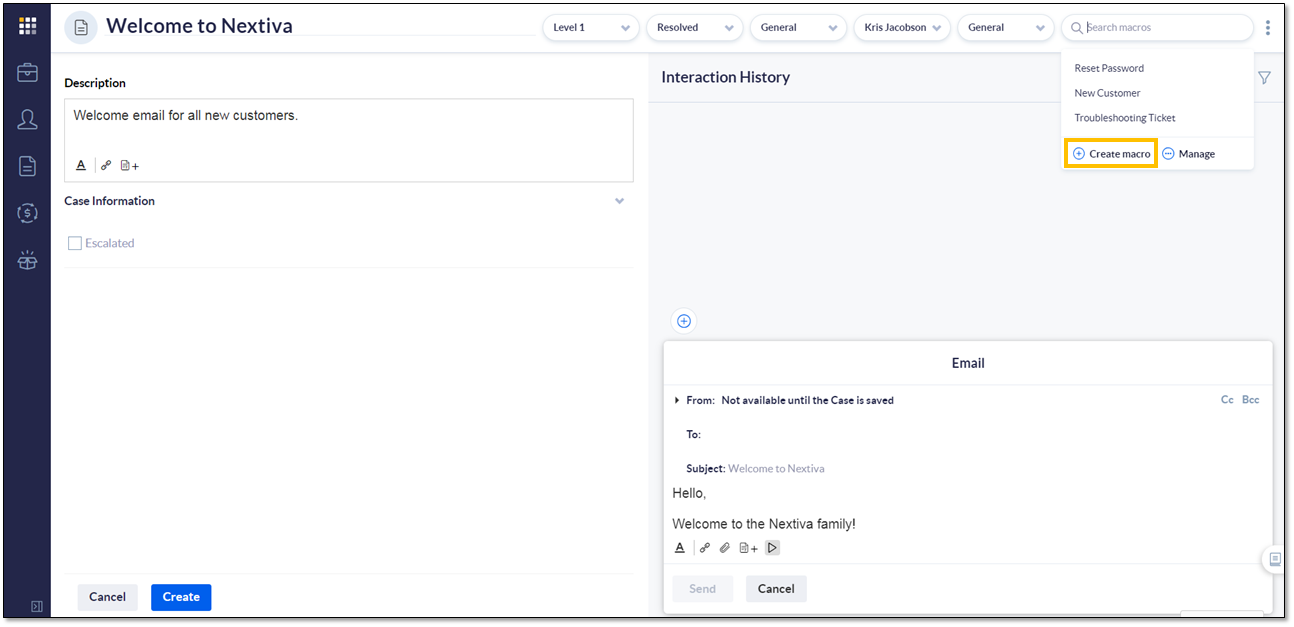
Create Macro
Applying a Macro
From the form, such as a Case, click Macros in the top-right corner, and search for the Macro. Click the Macro to apply to form.
Editing and Deleting a Macro
- Click Macros in the top-right corner and click Manage.
- Click the Ellipsis (…) icon next to the Macro and select Edit or Delete.
Creating Predefined Text
You can create Predefined Text from any Nextiva CRM Workspace under the Interaction History panel.
- Click the Ellipsis icon, and select Create Predefined Text.
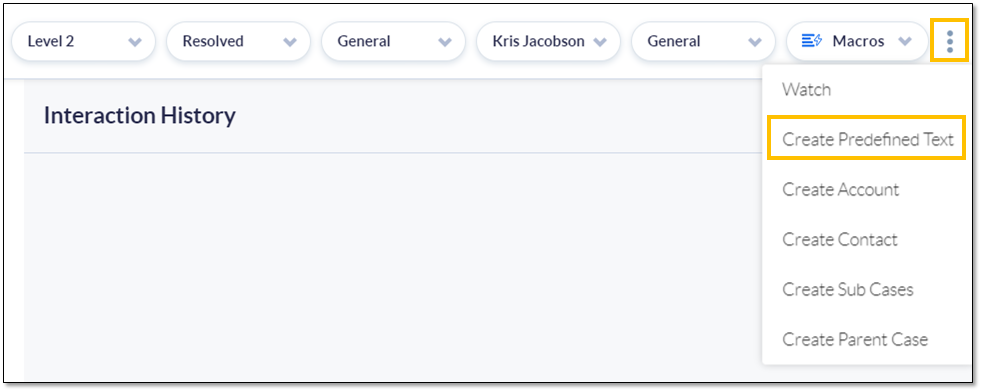
Create Predefined Text
- In the Create Predefined Text window, enter a Name and the predefined message.
- Select the availability (All Agents or Only Me). Click Create.
-
NOTE: The Available To drop-down list is only available to Users with permissions.
-
Inserting Predefined Text
From the form, such as a Case, click the Add Predefined Text icon in the text editor toolbar, and search for the Predefined Text. Click the Predefined Text to apply to the form.
Editing and Deleting Predefined Text
- Click the Add Predefined Text icon in the text editor toolbar.
- Click the Ellipses (…) icon next to the Macro and select Edit or Delete.