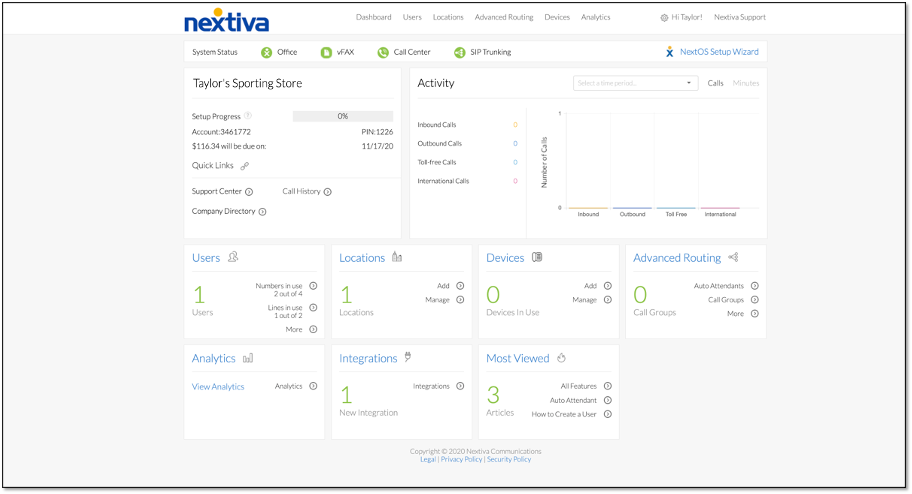
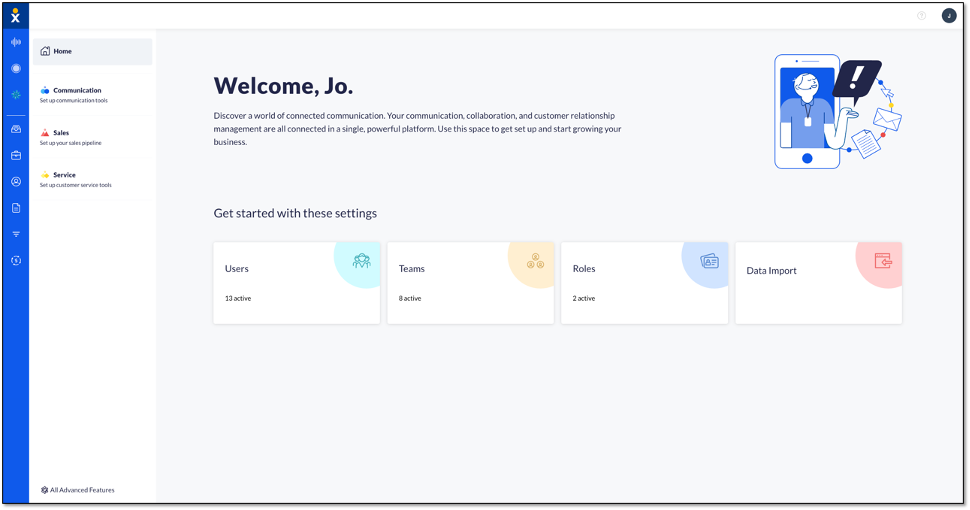
Choose the image that looks most like your screen once logged in.
 |
 |
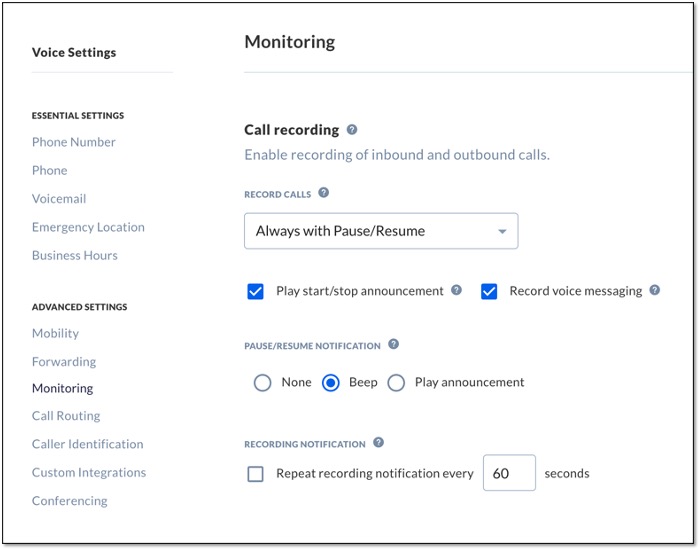
When using feature codes, you must first place the active call on hold and place a new call using the codes below on the same line. Wait for the confirmation message, the call will automatically disconnect so you can rejoin the active call.
*44 (Call Recording Start): Starts recording if On Demand With User Initiated Start is enabled.
*45 (Call Recording Stop): Stops recording if On Demand With User Initiated Start is enabled.
*48 (Call Recording Pause): Pauses an active recording if Always with Pause/Resume, On Demand with User Initiated Start, or On Demand is enabled.
*49 (Call Recording Resume): Resumes a paused recording if Always with Pause/Resume, On Demand with User Initiated Start, or On Demand is enabled.
Call recording feature codes
When using feature codes, you must first place the active call on hold and place a new call using the codes below on the same line. Wait for the confirmation message, the call will automatically disconnect so you can rejoin the active call.
*44 (Call Recording Start): Starts recording if On Demand With User Initiated Start is enabled.
*45 (Call Recording Stop): Stops recording if On Demand With User Initiated Start is enabled.
*48 (Call Recording Pause): Pauses an active recording if Always with Pause/Resume, On Demand with User Initiated Start, or On Demand is enabled.
*49 (Call Recording Resume): Resumes a paused recording if Always with Pause/Resume, On Demand with User Initiated Start, or On Demand is enabled.
Download PDF: