How to set up your Nextiva Clarity device
When you receive your Nextiva Clarity package, you should have several items in the box:
- Nextiva Clarity device (NA250B or NA320E)
- Ethernet cable
- Power supply
- Getting Started guide (*included with you Nextiva Clarity device shipment)
Establishing a Physical Connection
Follow the steps below to physically connect your Nextiva Clarity device to your network:
- Move a single computer or laptop to where the Nextiva Clarity device will be set up.
- Turn off the laptop/PC (Personal Computer) so you can generate a clean ARP (Address Resolution Protocol) record.
- Connect the provided Ethernet cord to the WAN port on the Nextiva Clarity device (Figure 1-1).
- Next, connect the other end of the Ethernet cord to your modem, and power on the Nextiva Clarity device. It will take anywhere from 2 to 10 minutes to fully boot depending on your internet speeds.
Once the device has booted up entirely, run an Ethernet cord from your laptop/PC into the LAN port and turn on the laptop/PC.
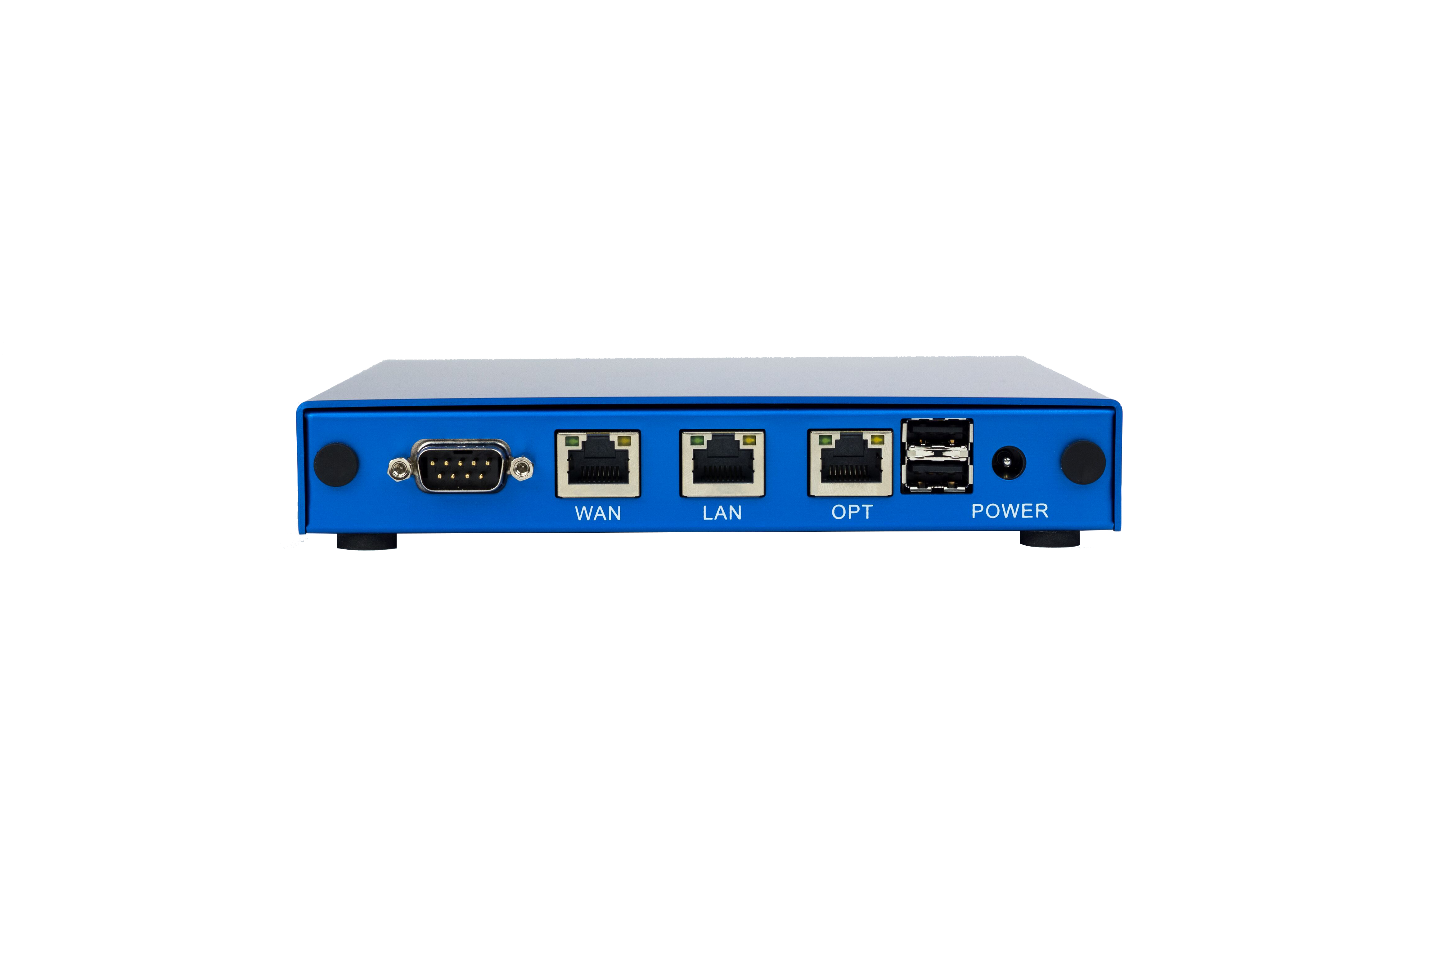 Figure 1-1: Nextiva Clarity Hardware
NOTE: For this product to work properly, please verify with your ISP (Internet Service Provider) that your modem is in "Transparent Bridge Mode". This is a common requirement for any network using a modem/router combination device or gateway.
Testing your Internet connection
Once you have confirmed an Internet connection, follow the steps below:
- On the laptop/PC that is connected to your Nextiva Clarity device, open an Internet browser and navigate to any website. If the 'calibration' screen is displayed, wait 1-2 minutes. Then you will be connected to the website you chose (Figure 1-2).
- If the 'failed to detect' screen is displayed, you may need some basic information from your ISP, such as:
- Public, Static IP Address, Subnet Mask, Default Gateway
- PPPOE/PPTP Username and Password
- Enter this information into the defined text boxes on the screen and click Save. The information will be saved to the dashboard for completion. You should not have to re-enter this information again.
- Open your Internet browser and type in www.nextiva.com. The 'calibration' page will display; wait 2-3 minutes for the page to complete the process. You should now be online.
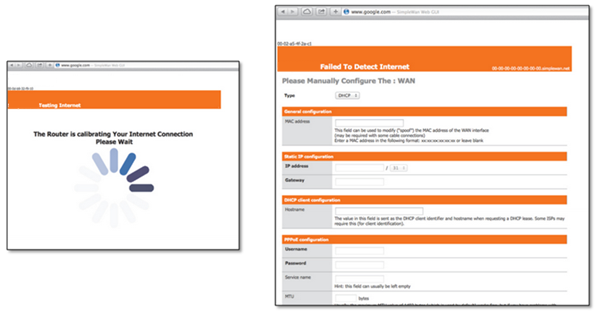 Figure 1-2: Calibration Screen (left); Failed to Detect Screen (right)
 - Plug in all applicable switches to the Nextiva Clarity device.
- Connect all phones and/or computers to the switch.
- Restart all computers and phones.
Hardware lights
- 1 Solid light — Unit Has Power
- 1 Solid light, 1 Flashing light — Calibrating, internet connection is in progress
- 2 Solid lights — Internet connection has been detected
- 3 Solid lights — System is ready and operational
Need additional help? Click here.