X-Lite is a free application for computers. The free version of this application does not include the ability to transfer or conference calls. If you want to connect X-Lite to your Nextiva service, follow the steps below:
Once you have installed X-Lite, run the application. Follow the below steps to complete the X-Lite setup process.
Setting Up X-Lite:
- Visit nextiva.com, and click Client Login to log in to NextOS.
- From the NextOS Home Page, select Voice.
- From the Nextiva Voice Admin Dashboard, hover your cursor over Users and select Manage Users.
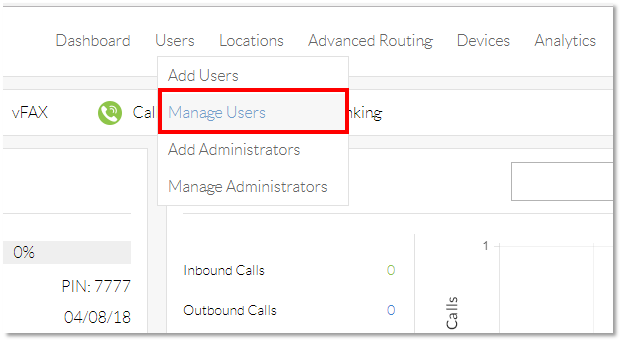
Manage Users
- Hover your cursor over the user you are assigning X-Lite to, and click the pencil icon that appears to the right of their name.
 Edit User
 - Scroll down, and click the Device section.
- Select the Own Device radio button.
- Select Generic SIP Phone from the drop-down menu of the Own Device list.
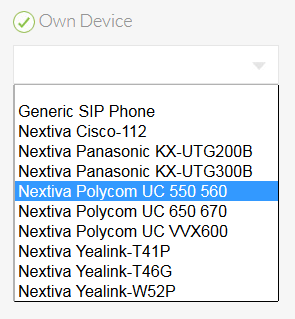 Device Drop-down
 - Click the green Generate button under the Authentication Name text box.
- Select the Change Password checkbox under the Domain.
- Click the green Generate button under the Change Password checkbox. Copy the SIP Username, Domain, Authentication Name, and Password onto a notepad, or document them in some way, as they will be important in setting up the X-LITE.
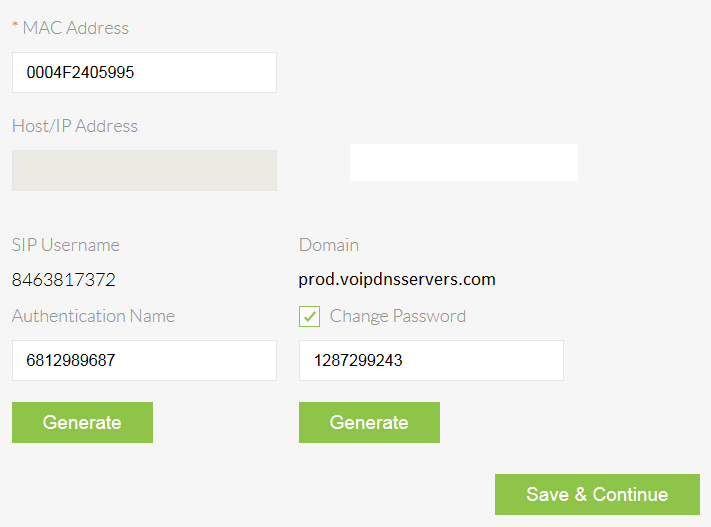 Device Details
 - Click Save & Continue. A pop-up message appears indicating the transaction has been processed.
 Confirmation Popup
 - Install X-Lite on your computer. Once X-Lite is successfully installed, you will need to complete the setup process in the X-Lite application.
- Select Softphone from the drop-down list on the left, and click Account Settings.
- Enter the required information under the Account tab.
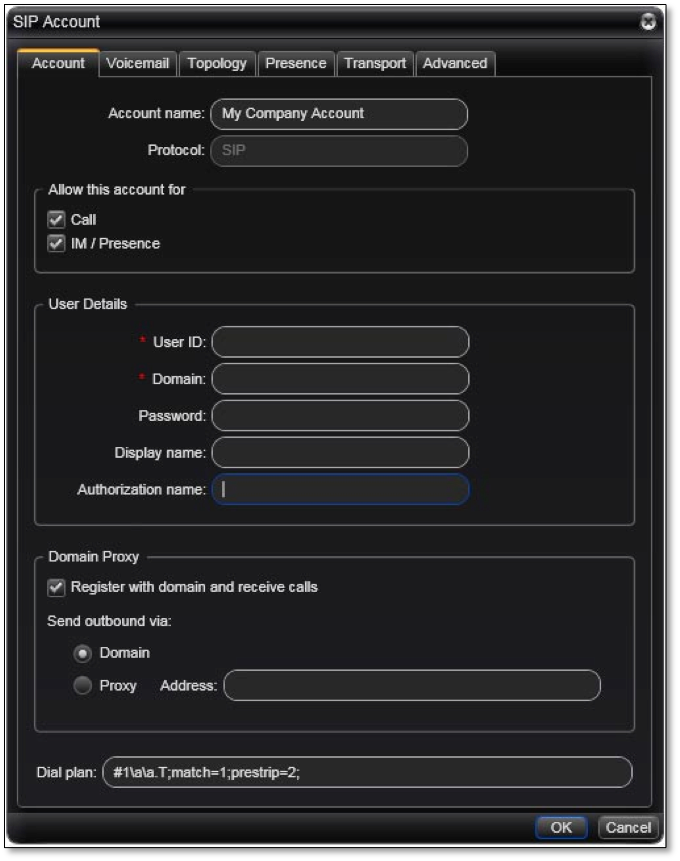 X-Lite® Account Tab
- Account name: Use a name that will help you identify this account name in the future.
- User Details:
- User ID: Input the SIP Username from the user that will be using this X-Lite.
- Domain: Input prod.voipdnsservers.com
- Password: Input the Authentication Password from the user that will be using X-Lite.
- Display name: This can be anything. This name will display when calling between Nextiva devices.
- Authorization name: Input the Authentication Name for the user that will be using X-Lite.
- Leave the Domain Proxy at default.
- User Details:
- Click the Topology tab towards the top of the window.
- For the Firewall traversal method, choose the None (use local IP address) radio button.
- Click the OK button.