All devices purchased from Nextiva will automatically be added to NextOS. Devices that are not purchased from Nextiva can be added manually.
Follow the steps below:
- Visit www.nextiva.com, and click Client Login to log in to NextOS.
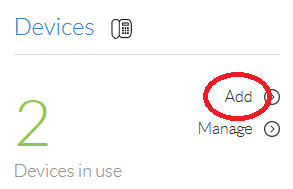
- From the NextOS home page, select Voice.
- From the main dashboard, click the Add link in the Devices tile.
 Adding Devices
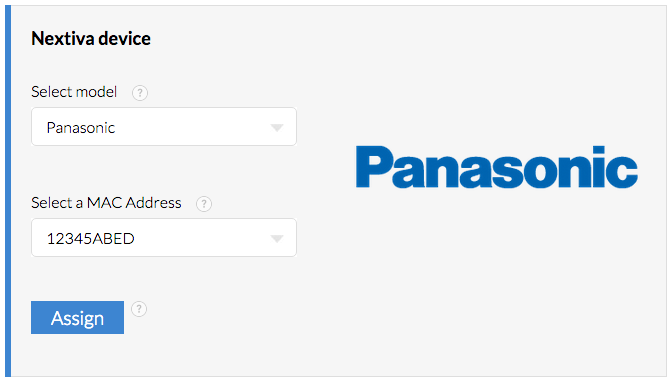
- Select the Own device radio button at the top of the screen.
 Own Device
 - Select the Panasonic KX-UT123 from the drop-down list and enter the MAC address.
 Model and MAC Add
 - Click the blue Assign button toward the bottom of the screen. A pop-up message will confirm the device was successfully provisioned. Once you see the confirmation message, the device has been added to your account. You can assign it to a user at a later time, or go on to step 7 to assign it now.
 Device Added
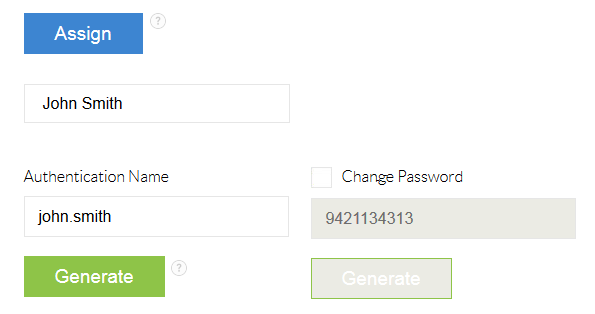
 - To assign the device to a user, select the user to whom the device will be assigned from the drop-down list below the blue Assign button.
 Adding a User
 - Click the green Finish button at the bottom of the screen. A pop-up message will appear confirming the device was successfully assigned to the user.
 User Assignment Confirmation
 - Click the green Done button at the bottom to exit the screen.