Businesses can provide front-line receptionists with the tools needed to control calls, monitor Users, and streamline daily tasks, all in one web-based platform with the Nextiva Receptionist Dashboard.
The Nextiva Receptionist Dashboard supports the full set of call control options, large-scale line monitoring, queuing, multiple directory options and views, and other features required in large or distributed organizations, all without the need to install software on a local computer.
NOTE: A NextOS Receptionist 1-8 license is required to gain access to the Nextiva Receptionist Dashboard. If login fails, reach out to the enterprise Administrator to assign a license.
This article focuses on the following areas:
- Nextiva Receptionist Dashboard Interface
- Logging In to the Nextiva Receptionist Dashboard
- Manually Placing Calls
- Placing Calls to a Contact
- Answering Calls
Nextiva Receptionist Dashboard Interface
Nextiva Receptionist Dashboard Interface
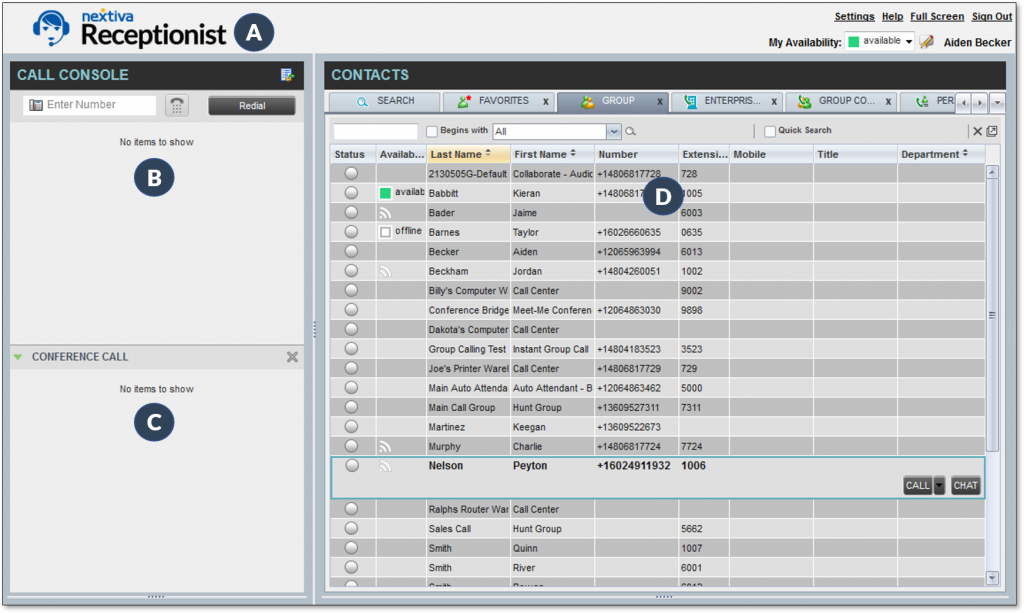
The Nextiva Receptionist Dashboard interface displays the following work areas:
- Logo Pane: Displays links to other pages or functions of the Dashboard and provides information about the logged-in User. It also displays errors, warnings, and information messages.
- Call Console: View and manage current calls.
- Conference Call: View and manage Conference Calls.
- Contacts Pane: Access Contact directories to make calls to Contacts and monitor Team Presence.
Logging In to the Nextiva Receptionist Dashboard
- Navigate to https://cp.nextiva.com/receptionist/ and enter the User credentials.
- Click Sign In to launch the Nextiva Receptionist Dashboard.
Logging In to the Nextiva Receptionist Dashboard
Manually Placing Calls
- In the Call Console pane, enter the phone number of the receiving party in the Enter Number field and click the Dial button to place the call. The Dashboard will ring the associated device or the Nextiva App.
- Pick up the handset or answer the Nextiva App to activate the outgoing call. Clicking ANS will automatically answer the call on speakerphone, if available.
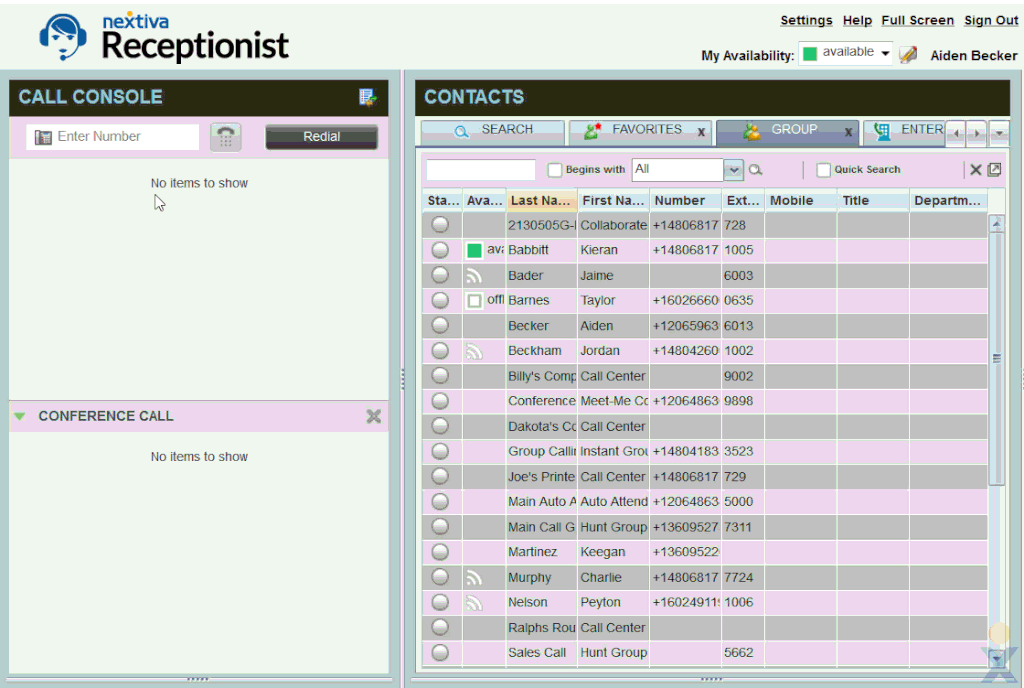
Manually Placing a Call
Placing Calls to a Contact
- In the Contacts pane, click the desired Contact and click Call.
- Pick up the handset or answer the Nextiva App to activate the outgoing call. Alternatively, clicking ANS will automatically dial the call on the associated desk phone’s speakerphone, if available.
Placing a Call to a Contact
Answering Calls
Users can answer incoming calls in the following ways:
- Pick up the desk phone associated with the Nextiva Receptionist User.
- Click Audio if logged into the Nextiva App.
- Click ANS in the Call Console The associated desk phone will answer the call on speakerphone.