Device management in NextOS

Nextiva makes it easy to manage and keep track of all the devices on your account by putting it all in one simple view. Instantly add new devices and configure line keys on your phones with features like duplicated lines (line mirroring), monitored users (busy lamp field), and speed dial directly from your Nextiva voice portal.

Basics

Learn how to view and manage all your device details from one place, including how to add and assign devices.


Click here for more information.

Advanced

Learn how to set up custom line keys, such as duplicated lines, monitored users, and speed dial directly from NextOS.


Click here for more information.

Device management basics

View and manage all devices on the account, including the status (online/offline), device name, MAC address, phone number(s), and the user(s) it’s assigned to from one place. 
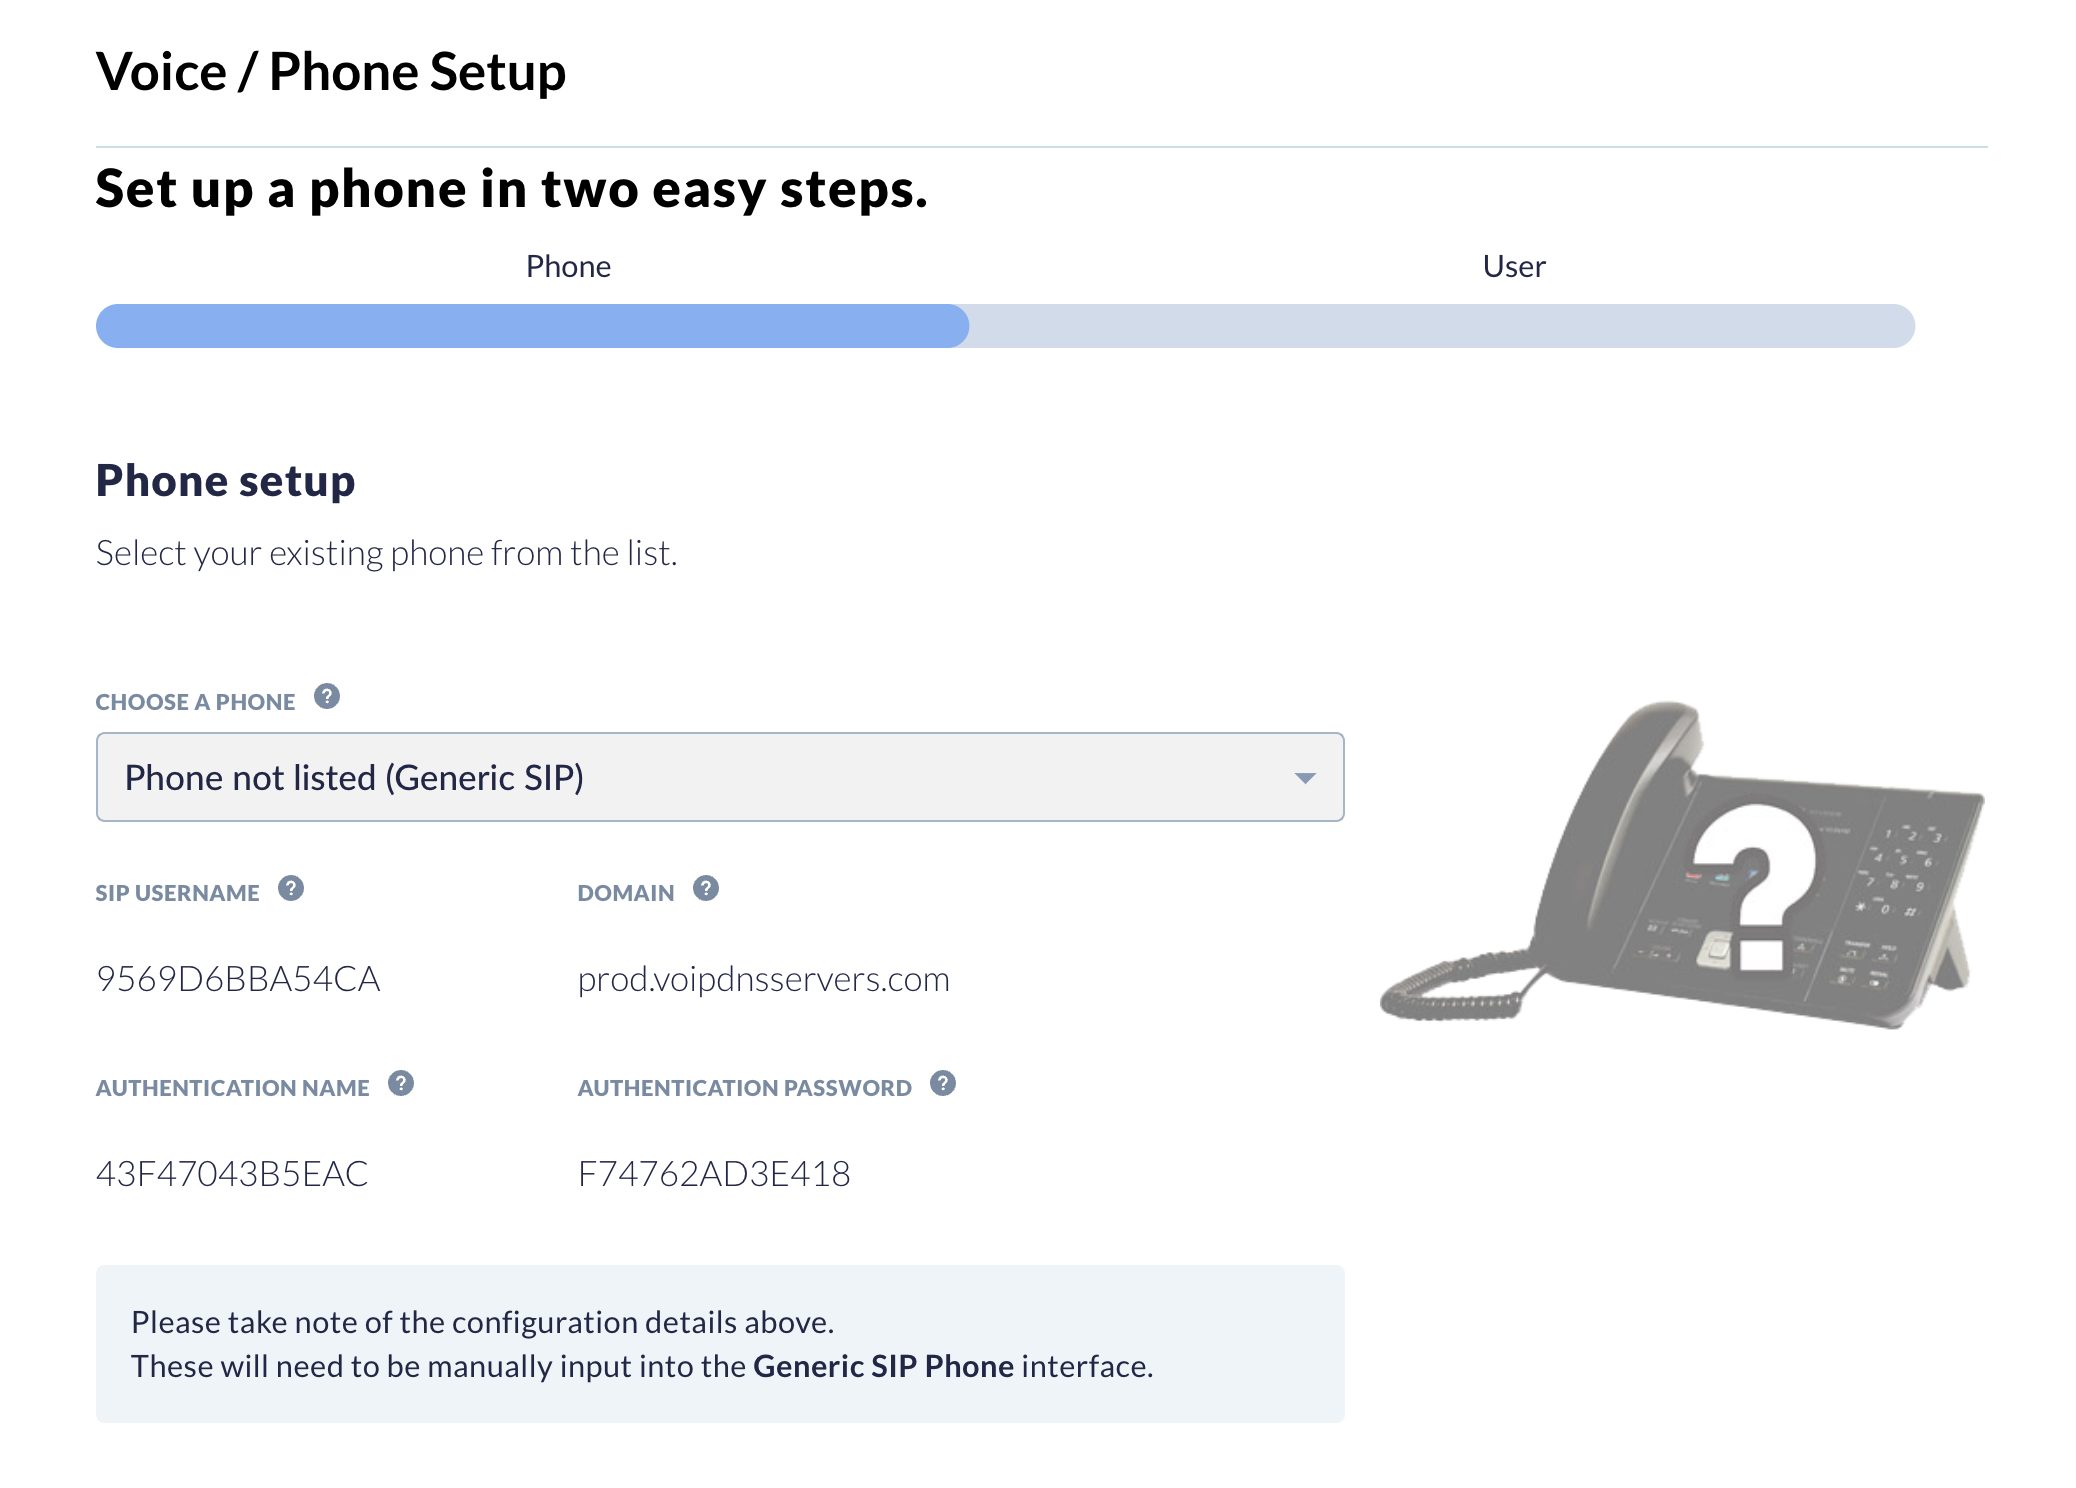
Adding a new device

From the NextOS admin home page, click Communication > Phone System > Manage Phones.

Click Add device, choose the phone model, and enter the MAC address. If you’re using a softphone or your device is not listed, select Phone not listed (Generic SIP) and copy the configuration details to input the device manually. 

NOTE: If the exact model is not listed, contact Nextiva to confirm the device is supported. 

Click Save and Continue, and select the primary user. You can also skip this step if needed and assign a user at a later time. Click Finish

NOTE: You can also add and assign devices to users directly under the user voice settings. For more information, click here

Editing a device

To edit a device, hover over the device and select Edit from the Actions menu. From here, you can assign users to lines, including the option to remove users by clicking the “x” next to the user. Click Save

Updating a device

To update a device, select Update device from the Actions menu. The device will then automatically restart and update. 

TIP: You can also select Edit from the Actions menu to check for updates, including the current firmware. 
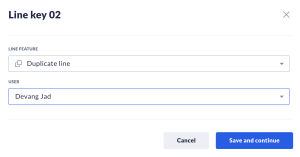
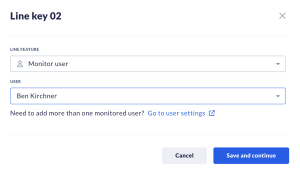
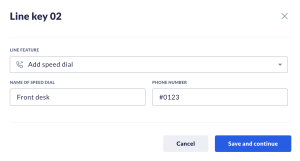
 

Custom line keys

Instantly configure line keys on your phones with features such as duplicated lines (line mirroring), monitored users (busy lamp field), and speed dial directly from your Nextiva voice portal. Below is a list of the currently supported devices for the below features. All other devices will require you to contact Nextiva support. 

Support devices

*Currently, we only support line monitoring (BLF) for Cisco devices.  

Cisco

Poly

Nextiva

Yealink

  • Cisco IP Phone 6851*
  • Poly VVX 311
  • Nextiva X-815
  • Yealink T33G IP
  • Cisco IP Phone 8841*
  • Poly VVX 411
  • Nextiva X-835
  • Yealink T46U IP
  • Cisco IP Phone 8845*
  • Poly VVX 150
  • Nextiva X-885
  • Yealink T54W
  • Cisco IP Phone 8861*
  • Poly VVX 250
   
  • Cisco IP Phone 8865*
  • Poly VVX 350
 
  • Poly VVX 450
 
  • Poly Edge E220
   
 
  • Poly Edge E300
   
 
  • Poly Edge E350
   
 
  • Poly Edge E550
   

Duplicating a line

Duplicating lines (mirroring) allows you to show on more than one line so you can easily manage multiple calls simultaneously. 

To duplicate a line, click the Edit icon and select Duplicate line. Select the user to duplicate and click Save and continue

Adding monitored users

Quickly identify the call status of other users by assigning a line to a user. 

Click the Edit icon and select Monitor user. Select the user and click Save and Continue

Setting up speed dial

Quickly dial your frequently used phone numbers by setting up speed dial on your device. 
Click the Edit icon and select Add speed dial user. Enter a name and the number or extension and click Save and Continue

Need additional help? Click here.

Was this article helpful?