Use the Organizer to create personalized rules used for automation, such as instantly routing customer interactions to the appropriate workbaskets (aka teams) and generate a ticket id for the relevant messages. Below are a few examples of how you could take advantage of this tool.
-
Auto-route tickets to the most qualified team members
-
Auto-response based on keywords found in the message
-
Auto-response to acknowledge the post was seen
-
Auto-tag messages to easily search and identify messages by topic
-
Business/after-hour routing (send tickets to the California team 5AM-9PM and to the New York team 9PM-5AM)
Creating rules
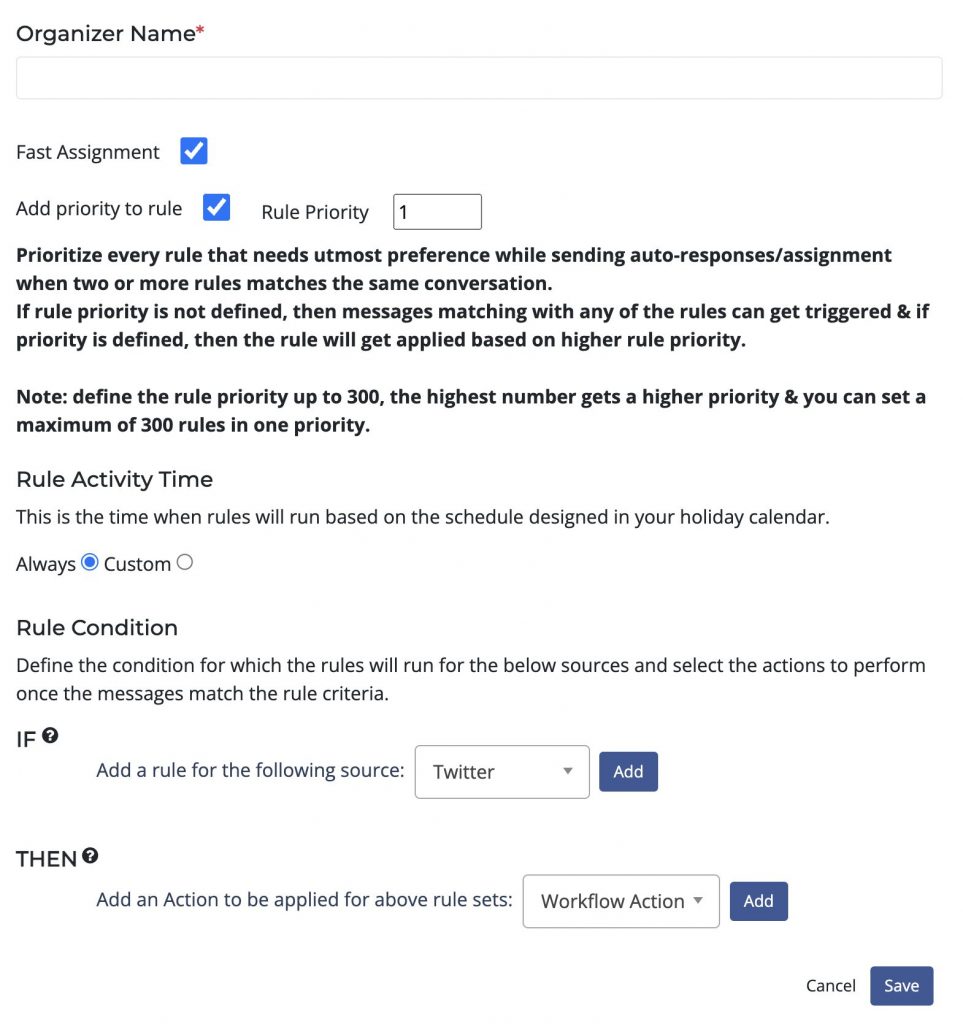
Here are common actions:
-
Auto respond
-
-
-
Auto-replies will be sent to the user.
-
-
-
Tag a message
-
-
-
The message will get tagged.
-
-
-
Create a ticket
-
-
-
A ticket will be created and routed to the correct team or person.
-
-
-
Alert a user/team
-
-
An alert will be sent to a specific team or person.
-