Create rooms to collaborate and share ideas with multiple teammates. Quickly send messages or start a group call using audio or video with just a click of a button.
|
To create a new room, click the Plus (+) icon next to Rooms under Team collaboration. Enter a name and description for the new room. You can also choose to make the room private so only users you invite can join. NOTE: If you make a room private, it cannot be made public. Click Create room. Next, choose the teammates you would like to invite and click Add members. |
 |
| Start collaborating via chat or click the Video button to instantly call all participants in the room. | |
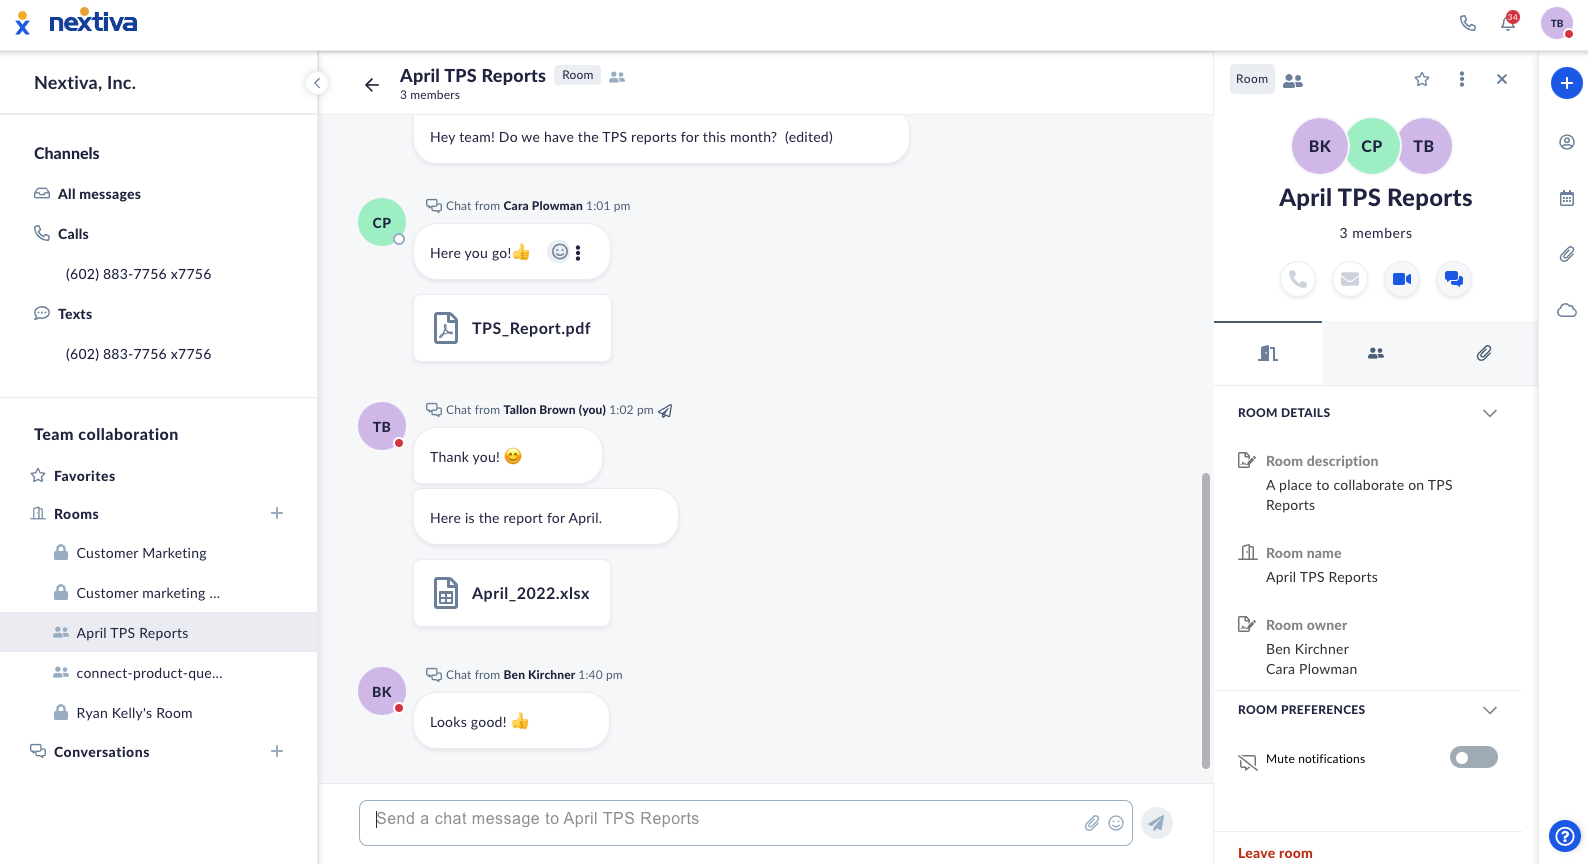
| You can view all room details on the right menu, including the option to edit room details.You can also add room owners from here and set preferences, such as setting the room to private or muting notifications. | |
| Click the Participants icon to view all members in the room. To add more members, click Add members and search for the teammates to add. To remove a member, click the ellipses to the right of the teammate > Remove from room. | |
| Click the Paper clip to view the files shared in the room. |
|
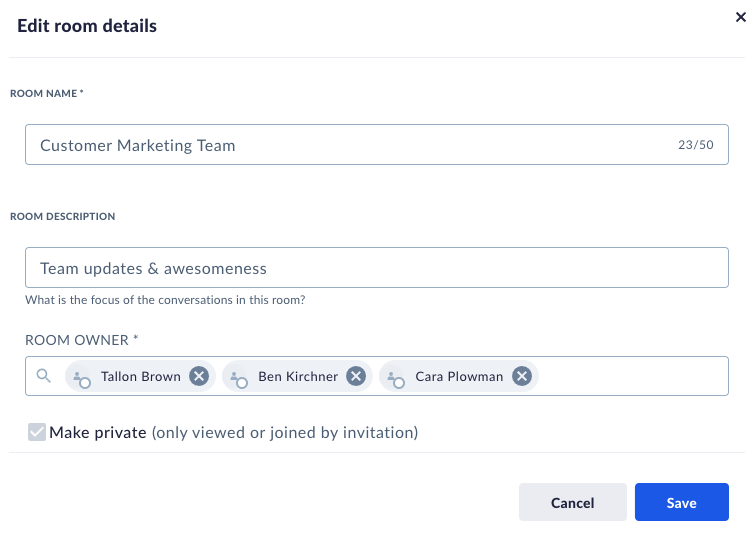
By default you are the owner when creating a new room, however you can also add additional room owners to help manage the room preferences and members. To add additional room owners, click Edit under the room details and enter the new room owners. To remove a room owner, click Edit under Room owner and click the X next to the members name to remove. |
 |