Nextiva Link is a virtual business phone service that allows you to answer phone calls anywhere you are. The service includes an Auto Attendant greeting that can transfer incoming calls to your mobile phone. With a Forwarding Number Profile, you can have calls route to voicemail, play a recorded message, or transfer to any other phone of your choice. An Internet connection is not required for Nextiva Link since the service does not utilize traditional VoIP phones, like in an office setting.
Click here to jump to Creating a New Employee
Click here to jump to Setting Up a Forwarding Number Profile
To Create a New Employee:
- As an Office Manager, you can access your Administrator portal by clicking HERE.
- Log in to the portal with your admin credentials.
- From the main dashboard, click Sites at the top of the page, then click Employees.
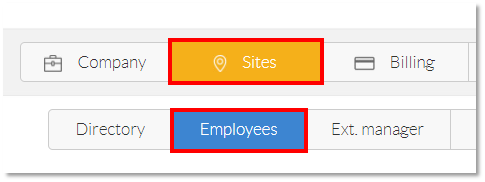
Sites and Employees Selections
- Click the Create New Employee button.
- Fill out the required information in the Name and Address field.
NOTE: You can name Employees anything you want. You can even create an Employee called Customer Service if it makes sense for your business. You can create and customize the Employees to your needs.
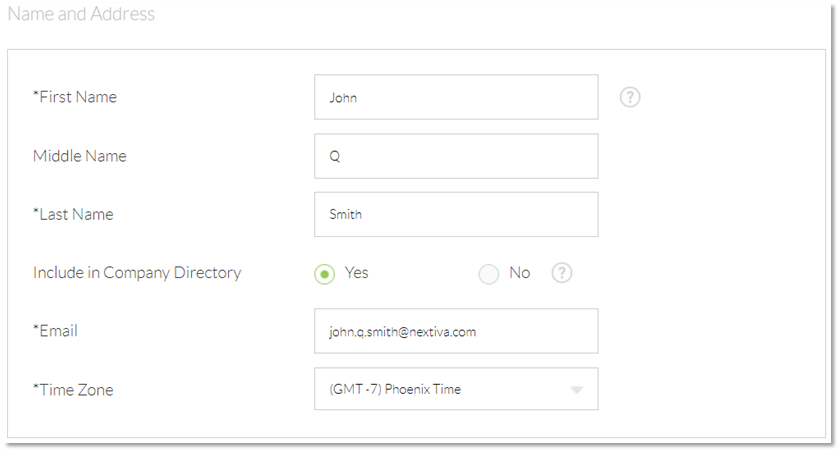
Name and Address Fields
- In the Phone System field, you can choose a number if the Employee needs one, and assign an Extension. Enter a default Voicemail PIN to allow for Voicemail access.

Phone Number, Extension, and PIN Configuration
- Finally, select a unique username for the new Employee. Usernames must be unique across the Nextiva system, and if the desired Username is not available, try altering the Username to ensure it is unique.
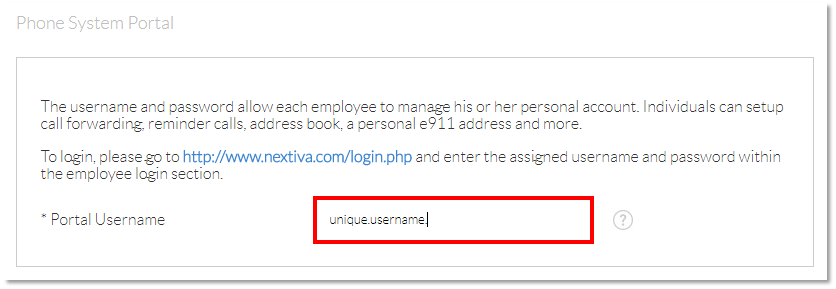
Username Configuration
To Set Up a Forwarding Number Profile:
Once the new Employee has been created, you will need to setup a Forwarding Number Profile, which tells the Nextiva system where to route an incoming call.
- Click Login to the right of the Employee you just created.

Employee Login Selection
- Click on Forwarding Number Profiles on the left.
- In the Call Handling Profiles section, enter the following required information:
- Location Name: A friendly name to describe the number to be reached.
- Phone Number: The phone number or extension that Nextiva will forward the incoming call to.
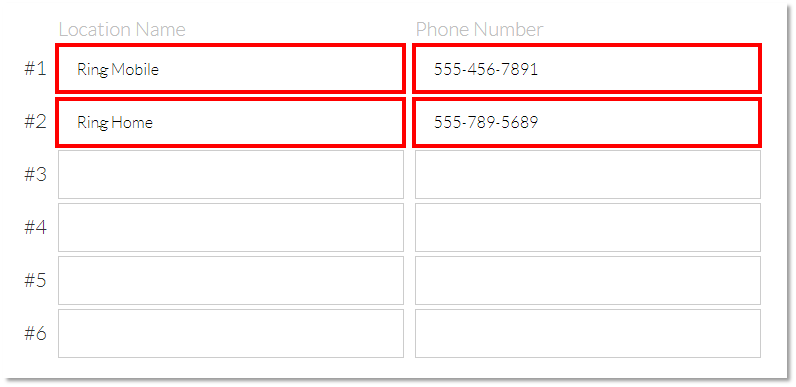
Entering Location Name and Phone Number
- In the Ring Type section below, select one of the following options for each selection:
- Ring all phones at once: Will ring all of the phone numbers entered simultaneously.
- Ring one at a time and ring each phone number: Will ring one phone number for a specified time, then move on to the next phone number.
- In the Filters section, you can filter out blocked/unavailable caller ID, as well as set the default handling for the following:
- Accept the call: Accepts inbound calls.
- Forward to voicemail: Forwards to the voicemail box for the Employee.
- Reject with no message: Rejects the call and hangs up immediately.
- Reject with “Caller Unavailable”: Rejects the call and plays a default message stating the caller is unavailable.
- Reject with no anonymous calls: Rejects the call and plays a message stating that anonymous calls are not accepted.
- Screen Calls: Requests the incoming caller to record their name. The Nextiva system will then call the number and play the recorded name.
NOTE: Choosing Set a filter on a specific phone number will have the same options, and will only apply to specified phone numbers.
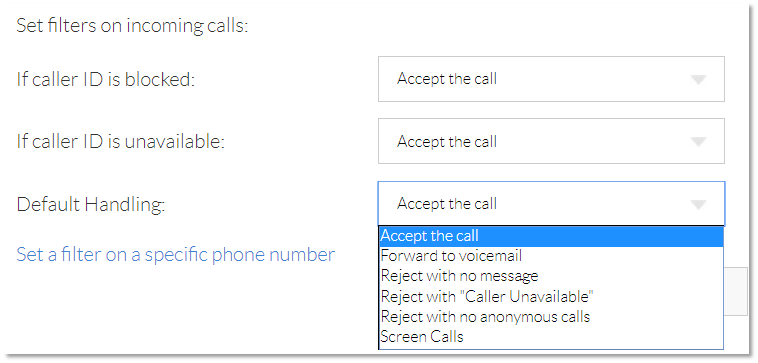
Incoming Call Filters