When the Nextiva Clarity Dual WAN Failover feature is enabled on your account, you will be able to route traffic through a backup internet connect in the event that your primary internet connection is unavailable. You must have a static IP address assigned to the primary WAN interface in order to use the WAN failover feature of Nextiva Clarity. Follow the steps below:
- Log in to nextiva.mycloudconnection.com with your login credentials.
- Click the Site Name on the left.
- Click Interfaces –> WAN2 on the left.
NOTE: The WAN2 interface corresponds to the OPT physical interface on the Clarity router.
-
Enter the required information as indicated below:
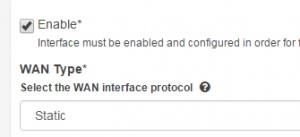
- Enable: Select this check box.
- WAN Type: The connection type: Static (Figure 1-1).
 Figure 1-1: Enable Failover.
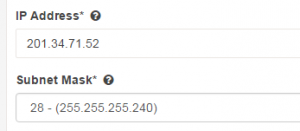
- IP Address: Enter the static IP address assigned to you by your Internet Service Provider (ISP).
- Subnet Mask: Enter the subnet mask assigned to you by your ISP (Figure 1-2).
 Figure 1-2: IP Address Setup.
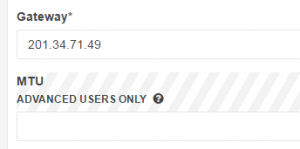
- Gateway: The gateway IP address assigned to you by your ISP (Figure 1-3).
- MTU: Leave blank.
 Figure 1-3: Gateway IP Address.
- Click Save.
If the WAN connection ever fails, traffic will automatically route through the OPT interface on the router, and Nextiva Clarity will begin to ping the WAN interface. If the WAN interface responds to the ping requests for 20 continuous minutes or more, traffic will once again route through the WAN interface instead of the failover connection.