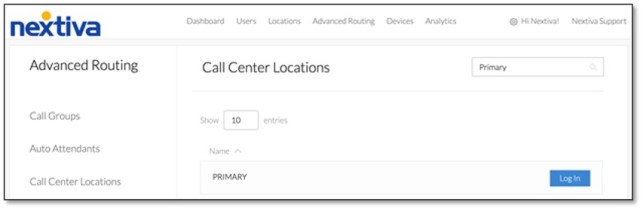
Navigating to Call Center from NextOS (If purchased after Dec. 2020)
Navigating to Call Center from Nextiva Voice (If purchased before Dec. 2020)
The Configuration Portal will open in a new tab or window, select Call Center > Call Centers > Edit.

Select Routing Policies on the left-hand menu > Forced Forwarding > turn ON Forced Forwarding and add a number or extension in the Calls Forward to phone number/SIP-URI field.
If you want to be able to cancel Forced Forwarding using feature access codes, make sure the Allow feature access codes to configure forced forwarding checkbox is checked.
If you want an announcement to play before Forced Forwarding, select the Play announcement before forwarding checkbox and choose an announcement mode. Select OK.