Actions defines the task the business wants to automate. For example, a company may want to automate the task of sending a survey to the customer after a case is resolved to collect feedback on their satisfaction with the service. Companies may also want to automate internal tasks such as changing the priority of a case that has been left open for a specific number of days.
For instructions on how to create rules, click here.
- Under Workflow Builder, click the Plus (+) icon and select Action.
- Configure one of the following actions:
- Click the AND button to include another Action, and then repeat step 2.
- Click Save & Close.
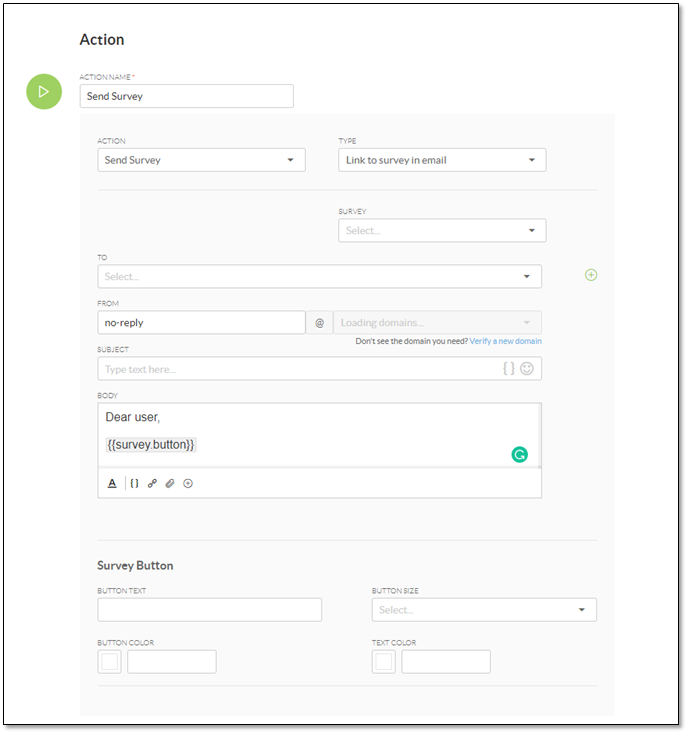
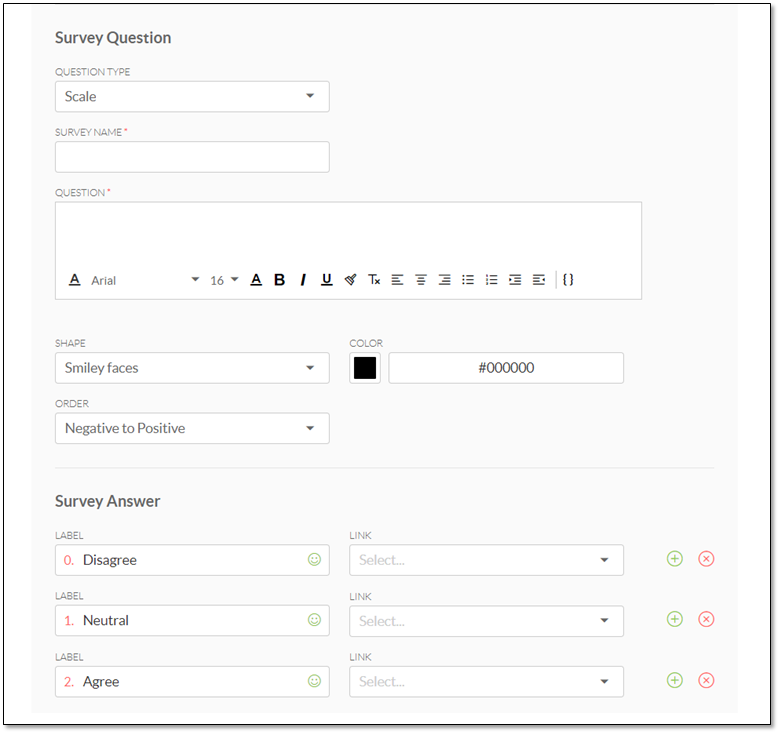
Send surveyUnderstand the customer journey by collecting customer feedback. NextOS can automatically send surveys after a particular action has been performed or after a specified time-frame. For example, when a case is marked as resolved, NextOS can instantly send a survey to the customer via email or after a specified time-frame.
|
  |
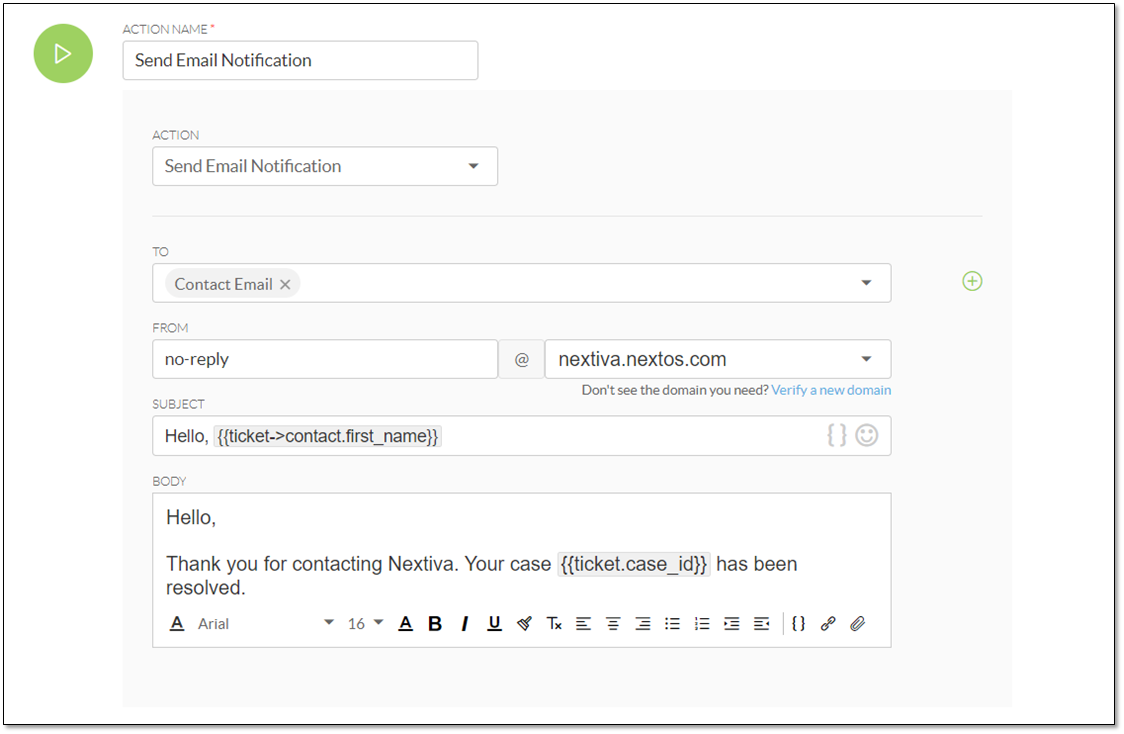
Send email notificationAutomate outgoing emails so employees won’t need to keep track of when and to whom they need to be sent. For example, a company can send email reminders to customers each month automatically.
|
 |
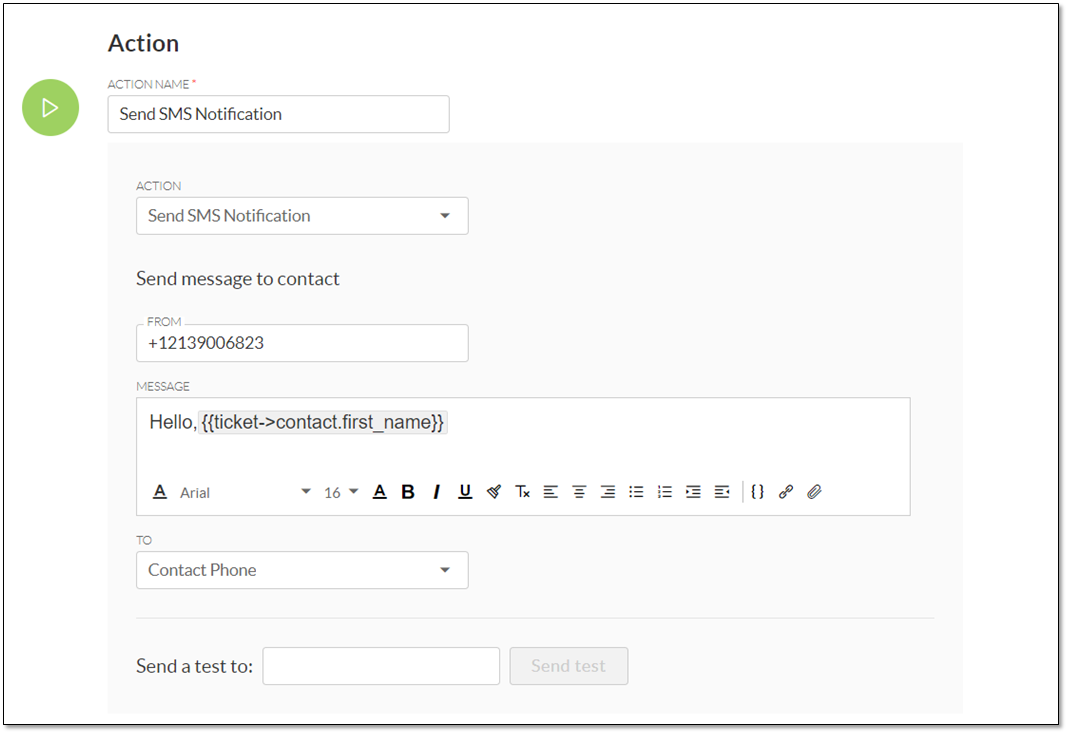
Send text notificationsSend automatic text messages to customers who prefer to receive notifications directly on their phone. For example, companies can send text reminders to customers whose contract is about to expire.
TIP: Send a test before saving by entering a cell phone number in the send a test to field and click Send test. |
 |
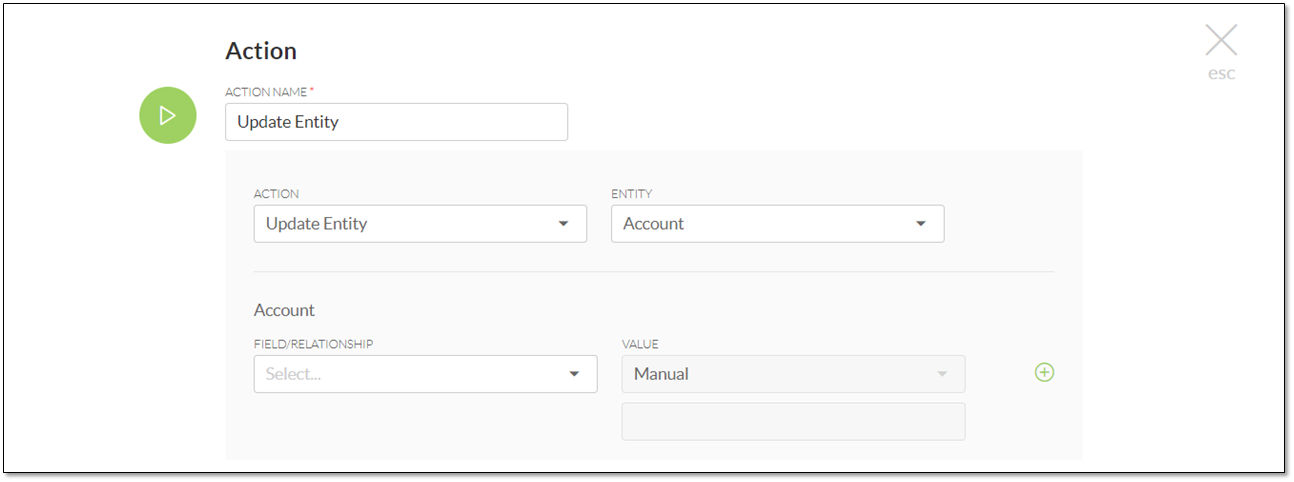
Update NextOS recordAutomatically update NextOS records when specific criteria is met so employees won’t need to make the changes manually. For example, to make sure Cases are timely addressed, companies can implement an automation rule that increases the priority level of Cases that remain open for a specified amount of time.
NOTE: NextOS will only display fields/relationships with compatible data types.
|
 |
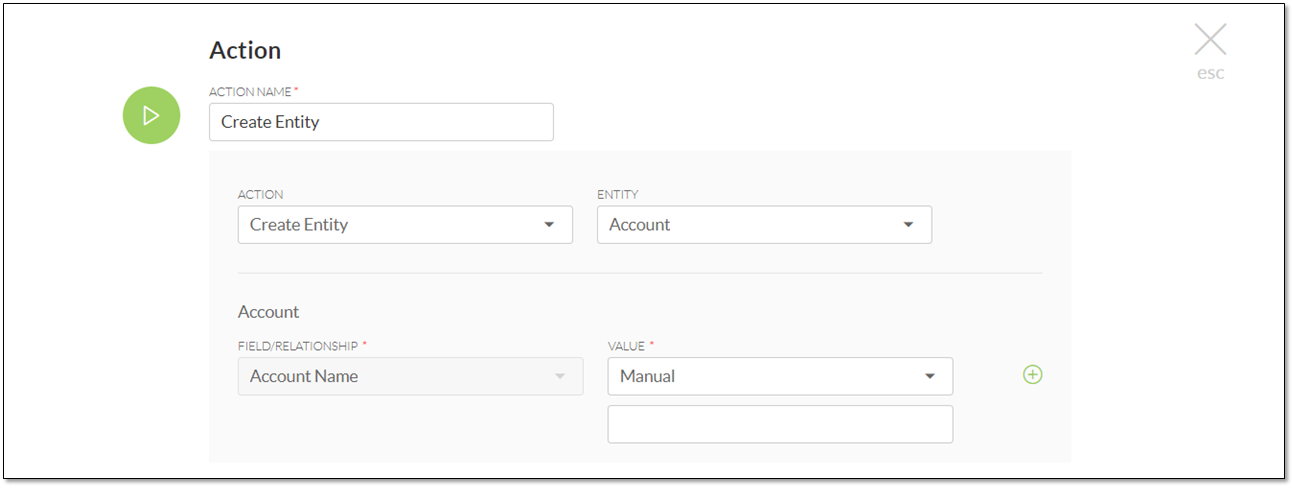
Create NextOS recordsAutomatically create NextOS records when specific criteria is met so employees won’t need to do it manually. For example, businesses can automate the task of creating a new Case to notify a user every time a unique opportunity is added to NextOS.
NOTE: NextOS will only display fields/relationships with compatible data types.
|
 |
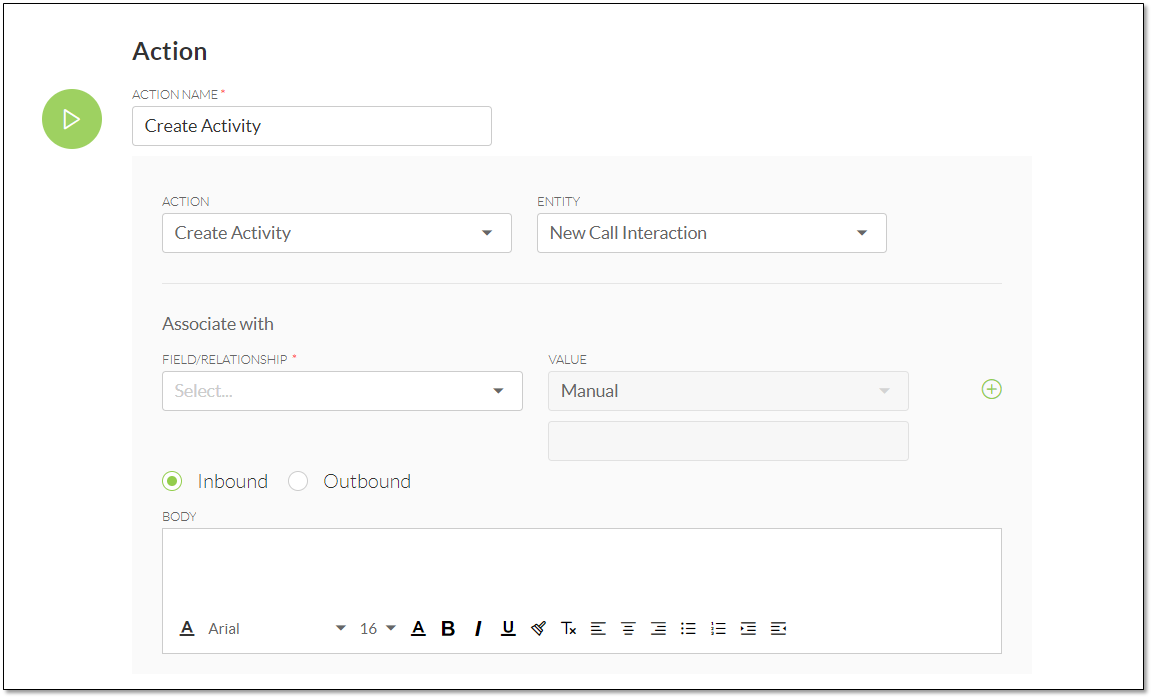
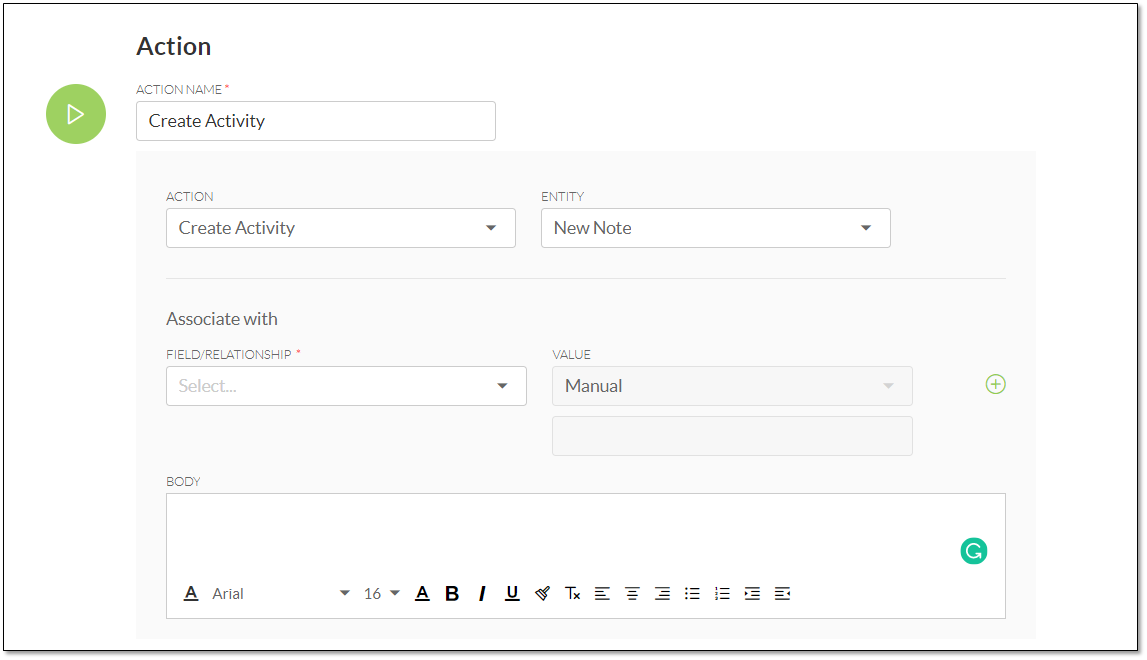
Create activity
|
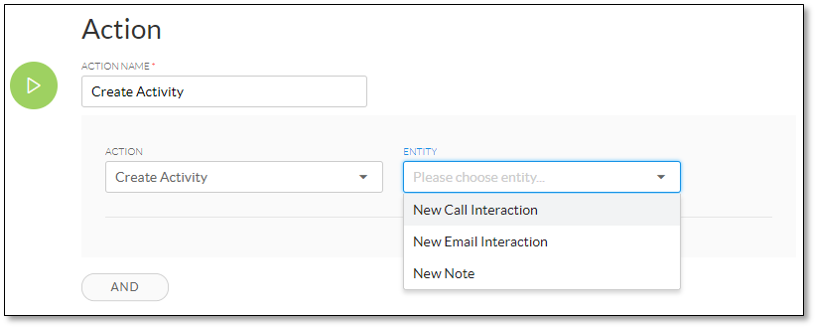 |
New Call Interaction
|
 |
New Email InteractionNOTE: Emails sent via New Email Interaction will be recorded in the Interactions feed, whereas emails sent via Send an Email Notification will not be recorded in the Interactions feed.
|
 |
New Note
|
 |