If inbound calls do not reach your selected Call Forward When Busy number, there are a few things you will want to check in the Voice Portal.
- If there is no power or Internet connection to your Nextiva phone, the star (*) codes to activate and deactivate Call Forwarding will not work.
- Phones that were manually provisioned may not be able to access the star (*) codes and will have to be forwarded from the Voice Portal.
- Lastly, double-check that the destination phone number is valid and that Call Forwarding When Busy is toggled on.
Troubleshooting Call Forward When Busy from the Nextiva Voice Admin Portal:
-
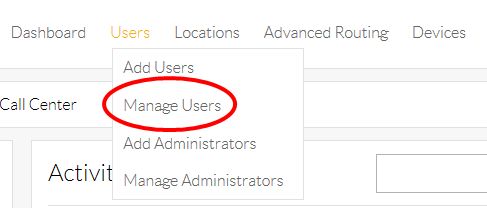
- From the Nextiva Voice Admin Dashboard, hover over Users at the top of the screen and select Manage Users.
-
- Hover your cursor over the name of the user, and select the pencil icon to the right.

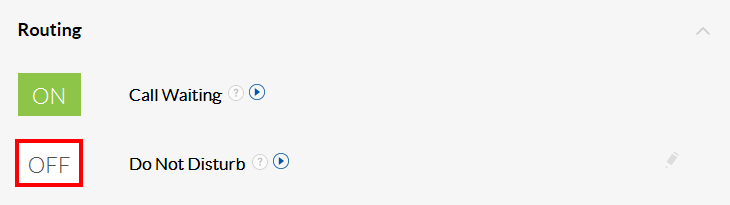
- To check Do Not Disturb status, select Routing and confirm Do Not Disturb is turned OFF.
- Hover your cursor over the name of the user, and select the pencil icon to the right.
-
- Select the Forwarding section and make sure the Call Forward When Busy is turned ON.

- Select the pencil icon to the right of Call Forward Busy and confirm the forwarding number is correct and that there are no spaces, dashes, or digits missing.
- Select Save to apply all changes.