Nextiva encourages customers to purchase a router with Tomato firmware. Nextiva recommends 1 Mbps of bandwidth for each phone on the account in order to ensure Quality of Service (QoS). Prior to setting up a Tomato router, collect the following information:
- Internet Service Provider
- Type of Modem
- Perform a Speed Test
- Total Amount of Bandwidth Throughput
Configuring a Tomato Router:
- Unplug and turn off the modem. Connect one end of the Ethernet cable to the modem and the other to the Internet port of the router.
- Once plugged in, turn on the modem and connect the power adapter to the router. Plug it into a power outlet and wait for the wireless LED to turn a solid blue.
- Connect the router to a local computer, then type 168.1.1 into the address bar of a web browser to access the admin section. The username and password are both admin for Tomato routers.
- Enter the following firewall access rules to allow traffic to all of Nextiva’s servers:
- CIDR:73.144.0/21
- Range:73.144.0 to 208.73.151.255
- CIDR:89.108.0/22
- Range:89.108.0 to 208.89.111.255
NOTE: Ensure any blocks are below the above firewall access rules.
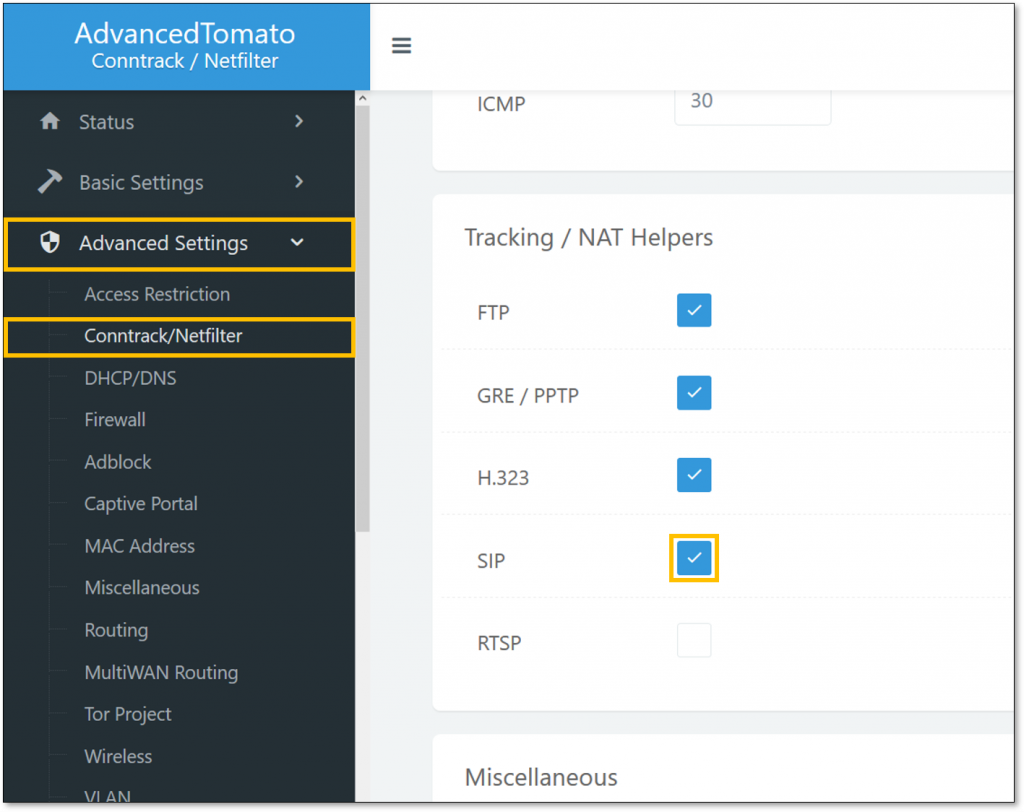
- Navigate to Advanced > Conntrack/Netfilter and uncheck the SIP checkbox.
 Disabling SIP ALG
- For additional assistance, please contact a member of our Amazing Service team by emailing routersetup@nextiva.com. Be sure to include the Nextiva account number and contact information in the subject line.
Need additional help? Click here.