All devices purchased from Nextiva will automatically be added to NextOS. Devices that are not purchased will have to be manually added.
Adding a Poly SoundPoint IP 6000:
- Visit www.nextiva.com, and click Client Login to log in to NextOS.
- From the NextOS home page, select Voice.
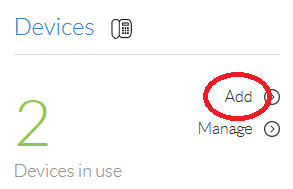
- From the Nextiva Voice Admin Dashboard, click the Add link under the Devices heading at the bottom of the main dashboard screen.
 Adding Devices
- Select the Own device radio button at the top of the screen.
 Own Device
 - Select the Poly Soundpoint IP 6000 from the drop-down and enter the MAC address.
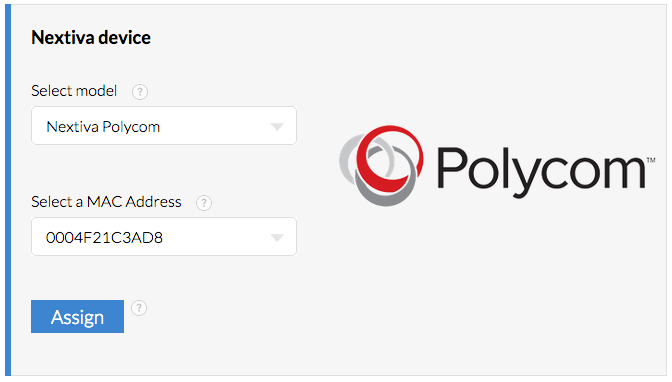 Model and MAC Add
 - Click the blue Assign button toward the bottom of the screen. A pop-up window indicating the device was successfully provisioned.
 Device Added
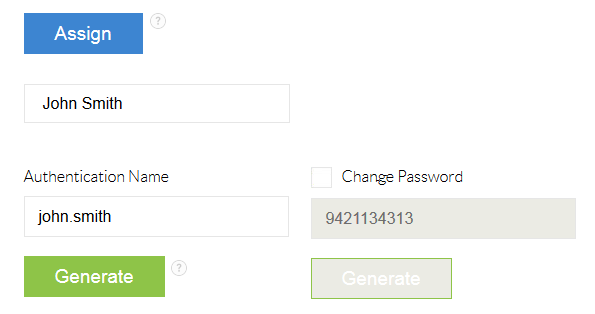
 - Select the user which will be assigned to the device from the drop-down box below the blue Assign button.
 Adding a User
 - Click the green Finish button toward the bottom of the screen. A pop-up window will appear indicating the device was successfully assigned to the user.
 User Assignment Confirmation
 - Click the green Done button toward the bottom of the screen.
NOTE: When provisioning your phone, ensure that you enable Tag SN to UA in the phone’s provisioning menu.
Need additional help? Click here.